
在后台管理项目中,excel的导入导出是一个常见的功能需求,参考 RuoYi-Vue 和 ruoyi-vue-pro 来实现。
后端开发语言使用的是 java ,导入导出功能使用 EasyExcel 来完成,没有和 RuoYi-Vue 自定义 @Excel 注解,用来放在被导入导出的实体类属性上。
导出功能
后端实现
EasyExcel excel的导出使用分为以下两步:
- 在需要导入或者导出的属性上添加注解
ExcelProperty,不需要导出的属性添加注解ExcelIgnore - 调用
EasyExcel.write方法,将查表获得需要导出的数据作为参数传递,得到的excel写入到输出流中
代码部分如下:
@Data
@Builder
@AllArgsConstructor
@NoArgsConstructor
public class RoleVo {
    private static final long serialVersionUID = 1L;
    /**
     * 角色ID
     */
    @ExcelProperty("角色ID")
    private Long roleId;

    /**
     * 角色名称
     */
    @ExcelProperty("角色名称")
    private String roleName;

    /**
     * 角色权限
     */
    @ExcelProperty("角色权限")
    private String roleKey;

    /**
     * 角色排序
     */
    @ExcelProperty("角色排序")
    private Integer roleSort;

    /**
     * 角色状态(0正常 1停用)
     */
    @ExcelProperty("角色状态(0正常 1停用")
    private String status;

    /**
     * 创建时间
     */
    @ExcelProperty("创建时间")
    private Date createTime;

    /**
     * 当前页
     */
    @ExcelIgnore
    private Integer pageNum;

    /**
     * 每页显示数量
     */
    @ExcelIgnore
    private Integer pageSize;
}

public void export(HttpServletResponse response, RoleVo roleVo) throws IOException {
    // 入参校验
    RoleValidation.rolesSearchParamsValid(roleVo);
    PageHelper.startPage(roleVo.getPageNum(), roleVo.getPageSize());
    List<SysRole> roles = roleService.getRoles();
    // 转 VO
    PageInfo<SysRole> pageList = new PageInfo<>(roles);
    List<RoleVo> roleVos = new ArrayList<>();
    if (pageList.getList().size() > 0) {
        pageList.getList().forEach(sysRole -> {
            RoleVo role = new RoleVo();
            BeanUtils.copyProperties(sysRole, role);
            roleVos.add(role);
        });
    }
    // excel导出
    ExcelUtils.export(response, "角色列表", "角色", RoleVo.class, roleVos);
}

public class ExcelUtils {
    /**
     * 导出
     *
     * @param response  响应
     * @param filename  文件名
     * @param sheetName 表名字
     * @param head      Excel head 头
     * @param data      数据
     */
    public static <T> void export(HttpServletResponse response, String filename,
                                  String sheetName, Class<T> head, List<T> data) throws IOException {
        EasyExcel.write(response.getOutputStream(), head)
                // 不要自动关闭,交给 Servlet 自己处理
                .autoCloseStream(false)
                // 基于 column 长度,自动适配。最大 255 宽度
                .registerWriteHandler(new LongestMatchColumnWidthStyleStrategy())
                .sheet(sheetName)
                .doWrite(data);
        response.addHeader("Content-Disposition", "attachment;filename=" + URLEncoder.encode(filename, "UTF-8"));
        response.setContentType("application/vnd.ms-excel;charset=UTF-8");
        response.setCharacterEncoding("UTF-8");
    }
}
注意:如果需要将文件下载保存在本地,则需要将 HTTP 响应头 Content-Disposition 进行设置,其属性值为 attachment; filename='',其中 attchment 表示以附件的形式下载并保存到本地;filename 为下载后的文件名。
前端实现
前端的难点在于怎么将文件流转化为可下载的 excel 文件,这句话可以拆解出以下两个问题:
- 文件流转化
- 可下载
对于文件流转化,在 js 中对文件处理有 File 和 Blob。 File 接口是用来提供有关文件的信息,其继承于 Blob。Blob 对象表示一个不可变、原始数据的类文件对象,它的数据可以按文本或二进制的格式进行读取,也可以转换成 ReadableStream 来用于数据操作。
// 其构造函数可以通过其他对象创建 blob。例如,用一个 JSON 字符串构造一个 blob
const blob = new Blob([JSON.stringify(obj, null, 2)], {type : 'application/json'});
对于文件下载,在 HTML 元素上添加的 download属性 ,表明链接的资源将被下载,而不是显示在浏览器中。该值表示下载文件的建议名称。如果该名称不是基础操作系统的有效文件名,浏览器将对其进行调整。
有了以上两点的解决思路,通过 URL.createObjectURL(其会创建一个新的 url 对象,新的 URL 对象表示指定的 File 对象或 Blob 对象) 和 a 标签可以将这两者进行结合得到。
const blob = new Blob([data], { type: mineType });
const downloadUrl = URL.createObjectURL(blob);
// a 标签:<a href=downloadUrl download=fileName>下载</a>
参考代码如下:
type fileType = 'application/vnd.ms-excel'
const download = (data: any, fileName: string, mineType: fileType) => {
    // 创建 blob
    const blob = new Blob([data], { type: mineType });
    const downloadUrl = URL.createObjectURL(blob);
    // 为了构建如下元素:<a href=downloadUrl download=fileName>下载</a>
    const a = document.createElement('a');
    a.download = fileName;
    a.href = downloadUrl;

    document.body.appendChild(a)
    a.click()
    a.remove()
    URL.revokeObjectURL(downloadUrl);
}
// 下载 Excel 方法
export function excel(data: any, fileName: string) {
    download(data, fileName, 'application/vnd.ms-excel');
}

const handleExport = async (type?: string) => {
    if (type === "template") {
        const result = await importTemplateApi();
        excel(result, "角色列表导入模板");
    } else {
        const result = await exportRoleListApi({ pageNum: pagination.currentPage, pageSize: pagination.pageSize });
        excel(result, "角色列表");
    }
}
注意:为了防止乱码产生需要设置 XMLHttpRequest.responseType = 'blob' 更改响应类型
完整的代码:传送门
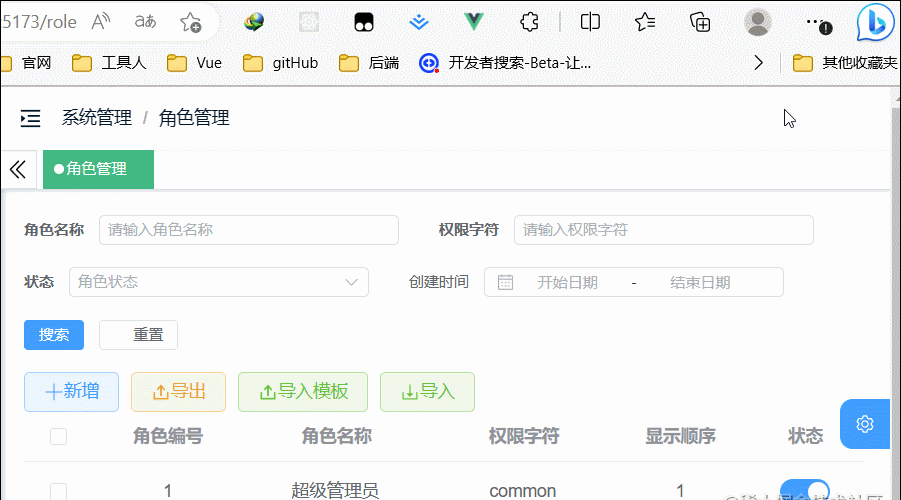
最终完成的效果如下:

导出功能
后端实现
EasyExcel excel 的导入主要做的事就是将 excel 数据转化为 list ,得到的 list 再插入到数据库中。代码如下:
/**
 * 导入excel
 *
 * @param file 文件
 * @return {@link ResultVO}<{@link ?}>
 * @throws IOException ioexception
 */
@PostMapping("/import")
@PreAuthorize("@ss.hasPermission('system:role:import')")
public ResultVO<?> importExcel(@RequestBody MultipartFile file)throws IOException{
    List<RoleVo> list = ExcelUtils.excel2List(file, RoleVo.class);
    roleService.insertRole(list);
    return ResultVO.success("上传成功");
}
前端实现
前端部分直接使用 element plus upload组件,之前写过文件上传就不再说了,代码如下:
<el-upload v-model:file-list="fileList" class="upload-demo" method="post"
    :on-success="handleUploadSuccess"
    :on-error="handleUploadError" :show-file-list="false" :action="uploadRequestConfig.uploadUrl"
    :headers="uploadRequestConfig.headers" >
    <el-button type="success" plain>
        <icon icon="svg-icon:import" />
        导入
    </el-button>
</el-upload>
const handleUploadSuccess = (response: any) => {
    console.log(response)
    if (response.code === 200) {
        ElMessage({
            type: 'success',
            message: response.msg
        })
    } else {
        ElMessage({
            type: 'error',
            message: response.msg
        })
    }
}
const handleUploadError = (error: Error) => {
    ElMessage({
        type: 'error',
        message: "上传失败"
    })
}
原文链接:https://juejin.cn/post/7212925983967625273 作者:单线程_01