
前端插件之喂投
分类:javascript
在此之前,我们先来认识一下,生成的插件包的格式类型有哪些
amd– Asynchronous Module Definition, used with module loaders like RequireJS
cjs– CommonJS, suitable for Node and other bundlers (alias: commonjs)es– Keep the bundle as an ES module file, suitable for other bundlers and inclusion as a<script type=module>tag in modern browsers (alias: esm, module)iife– A self-executing function, suitable for inclusion as a<script>tag. (If you want to create a bundle for your application, you probably want to use this.)umd– Universal Module Definition, works as amd, cjs and iife all in onesystem– Native format of the SystemJS loader (alias: systemjs)
翻译一下这些格式的定义
amd- 异步模块定义,使用模块加载器,比如RequireJS
说到加载器,支持这个格式的有两种
SeaJS与RequireJS,RequireJS在推广过程中对模块定义的规范化产出的是AMD,SeaJS在推广过程中对模块定义的规范化产出的是CMD,CMD推崇依赖就近,AMD推崇依赖前置;
cjs– CommonJS规范, 适用于Node模块与其他的打包器, 标准的用法是module.exportses- ES模块文件,适用于其他捆绑软件,并作为现代浏览器中的<script type = module>标签包含(别名:esm,module)iife- 自执行函数,适合用于<script>引入.(如果要为应用程序创建捆绑包,则可能要使用它。)umd- 通用模块定义,可同时用作amd,cjs和iife
system– SystemJS加载程序的本机格式(别名:systemjs)
如果不使用构建工具如何构建(列举三种常见的格式类型)
iife格式
var pluginName = (function(){
    // Just return a value to define the module export.
    // This example returns an object, but the module
    // can return a function as the exported value.
    return {}
})();
umd格式
// if the module has no dependencies, the above pattern can be simplified to
;(function (root, factory) {
    if (typeof define === 'function' && define.amd) {
        // AMD. Register as an anonymous module.
        define([], factory);
    } else if (typeof exports === 'object') {
        // Node. Does not work with strict CommonJS, but
        // only CommonJS-like environments that support module.exports,
        // like Node.
        module.exports = factory();
    } else {
        // Browser globals (root is window)
        root.pluginName = factory();
  }
}(this, function () {

    // Just return a value to define the module export.
    // This example returns an object, but the module
    // can return a function as the exported value.
    return {};
}));
es格式
function pluginName() {
    // logical code
}

export default pluginName
如果不用构建工具,是不是也很简单?但是一旦使用最新的api,是需要自己手动兼容的,一旦使用构建工具那就不需要考虑那么多了
对比webpack与rollup这两种构建工具
-
Webpack- 通过loader处理各种各样的资源依赖
- HMR模块热替换(hot module replacement)
- 按需加载
- 提取公共模块
-
Rollup- 编译出来的代码可读性好
- rollup打包后生成的bundle内容十分干净,没有什么多余的代码,只是将各个模块按照依赖顺序拼接起来,所有模块构建在一个函数内(Scope Hoisting), 执行效率更高。相比webpack(webpack打包后会生成__webpack_require__等runtime代码),rollup拥有无可比拟的性能优势,这是由依赖处理方式决定的,编译时依赖处理(rollup)自然比运行时依赖处理(webpack)性能更好
- 对于ES模块依赖库,rollup会静态分析代码中的 import,并将排除任何未实际使用的代码(tree-shaking)
- 支持程序流分析,能更加正确的判断项目本身的代码是否有副作用(配合tree-shaking)
为什么选择rollup
- Webpack 致力于复杂的SPA、MPA、SSR等模块化构建的业务框架
- Rollup 致力于打造性能出众的类库
手动实现一个简单的构建流程
- 建立目录并初始化
mkdir codeDemo && cd codeDemo && npm init -y
- 安装rollup
npm i rollup --save-dev #如果安装成功可手动在目录执行`npx rollup -h`,查看帮助
- 建立配置文件
rollup
touch rollup.config.js
- 安装所需插件(举例
@rollup/plugin-babel,其余插件参考官方文档)
npm install --save-dev @rollup/plugin-babel
- 安装babel核心库和预设工具
npm install --save-dev @babel/core @babel/preset-env
- 安装
@babel/plugin-transform-runtime,可重新使用Babel注入的帮助程序代码以节省代码大小。
npm install --save-dev @babel/plugin-transform-runtime
@babel/plugin-transform-runtime依赖@babel/runtime,所以还要安装它。
npm install --save @babel/runtime
注意:实例方法"foobar".includes("foo")仅适用于core-js@3。如果您需要填充它们,则可以直接导入"core-js"或使用@babel/preset-env的useBuiltIns选项。
npm install --save @babel/runtime-corejs3
示例项目的babel所需的依赖项暂时安装完了,如果你还想做其他的一些功能可自行查看文档
- 安装
@rollup/plugin-commonjs,转换内置模块格式commonjs=>es6
npm install @rollup/plugin-commonjs --save-dev
- 安装
@rollup/plugin-node-resolve,在node_modules中定位模块位置
npm install @rollup/plugin-node-resolve --save-dev
rollup配置文件写入代码配置
const path = require('path')
const { babel } = require("@rollup/plugin-babel");
const commonjs = require("@rollup/plugin-commonjs");
const { nodeResolve } = require("@rollup/plugin-node-resolve");

const pluginName = "xxx_plugin";
const outputDir = "./dist";

function fileFormat(type) {
    return path.join(__dirname, outputDir, `xxx_plugin.${type}.js`)
}

export default {
	input: path.resolve(__dirname, "./src/main.js"),
	output: [
		{
			name: pluginName,
			format: "es",
			file: fileFormat('es')
		},
		{
			name: pluginName,
			format: "umd",
			file: fileFormat('umd')
		},
		{
			name: pluginName,
			format: "iife",
			file: fileFormat('iife')
		},
		{
			name: pluginName,
			format: "amd",
			file: fileFormat('amd')
		},
		{
			name: pluginName,
			format: "cjs",
			file: fileFormat('cjs'),
			exports: "auto"
		}
	],
	plugins: [
		commonjs(),
        /* @babel/preset-env和@babel/plugin-transform-runtime有两种配置方式,下面只演示一种 */
		babel({
			exclude: /\/node_modules\//,
			presets: [
				[
					"@babel/preset-env",
					{
						targets: "> 0.25%, not dead" /* 配置兼容的程度 */
					}
				]
			],
			plugins: [
                [
                    "@babel/plugin-transform-runtime",
                    {
                        "corejs": 3,
                        "regenerator": true
                    }
                ]
            ],
			babelHelpers: "runtime"
		}),
		nodeResolve()
	]
};
建立项目目录
src目录:放置源代码,需要一个入口文件,配置文件中input设置的入口文件是main.jsdist目录: 编译之后输出位置


配置package.json文件
找到scripts字段
"scripts": {
    "watch": "rollup -c --watch",
    "build": "rollup -c"
}
打包的时候应该先删除之前残留的包,我们用一个简单暴力的方式去解决一下,安装一个
rimraf,打包之前删除dist输出目录
npm install rimraf --save-dev
然后再配置一下scripts
"scripts": {
    "watch": "rollup -c --watch --environment NODE_ENV:development",
    "build": "rimraf dist && rollup -c --environment NODE_ENV:production"
}
- "-c, --config": 选择运行的配置文件,默认
rollup.config.js - "--environment": 配置运行环境变量,区分环境,多个环境变量用
,分开并用:赋值,不赋值默认boolean类型true,例如--environment NODE_ENV:production,test
更多rollup命令参数请点击这里参考
开发编译与打包
配置package.json文件这步完成之后,就可以愉快编译打包了
- 编译
npm run watch
- 打包
npm run build
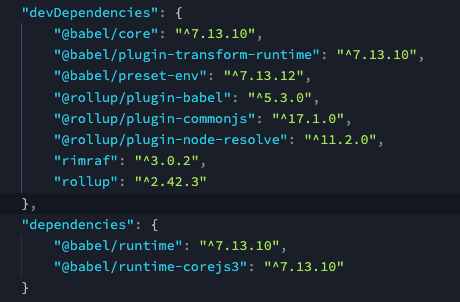
最后附上我当时所用依赖版本
- 示例demo地址点这里
- 如需转载请注明出处,谢谢