
实现一个你脑子中认识的vue-router
前言
vue中使用到的路由插件是vue-router。它是vue官方路由插件,依赖于Vue。近期学习了下vue-router源码,并自己写了一个小例子,包含动态路由addRoutes,router-view,router-link。

现在让我们看一看vue-router到底是怎样实现的!让我们静下心来好好看看
实现文件目录: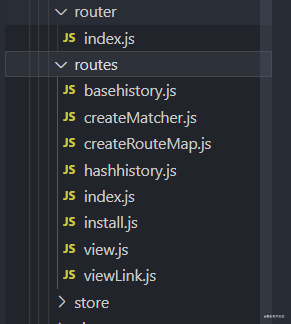
首先我们第一步引入:
router/index.js文件中:
import VueRoutes from './routes/VueRoutes.js'
Vue.use(VueRoutes);
..........
let routers = new VueRoutes({
  mode: 'hash',
  routes
})
我们知道Vue.use(plugin),会执行install方法。
install.js文件中
import routerView from "./view.js"
import routerLink from "./viewLink.js"
export default function install(Vue) {
  // 每个组件混入该生命周期
  Vue.mixin({
    beforeCreate() {
      //  判断是否是根组件options中才有router,根组件才执行,在你new Vue时会传入
      //  一个let router=new VueRoutes();
      if (this.$options.router) {
        this._rootRouter = this;
        this._router = this.$options.router;
        // 重点:路由初始化
        this._router.init(this)
        // 进行设置_route的响应式,当_route发生变化时会进行页面更新
        Vue.util.defineReactive(this, "_route", this._router.history.current);
      } else {
        this._rootRouter = this.$parent && this.$parent._rootRouter;
      }
    },
  });

  Object.defineProperty(Vue.prototype, "$route", {
    get() {
      return this._rootRouter._route;
    }
  })
  Object.defineProperty(Vue.prototype, "$router", {
    get() {
      return this._rootRouter._router;
    }
  })
  //全局组件router-view router-link。具体后面会说
  Vue.component('RouterView', routerView);
  Vue.component('RouterLink',
    routerLink
  );
}
我们可以知道install主要做了
- 利用mixin之后在每个组件中混入该
beforeCreate生命周期 - 生命周期中对根组件进行设置私有属性
_rootRouter,_router - 每个子组件中获取
this.$route,this.$router就会在向上寻找根组件上的_rootRouter._router和_rootRouter._route - 注册全局组件
router-view,router-link
下面看下路由的构造函数做了什么?
routes目录下
index.js文件中
export default function VueRoutes(options) {
  // 返回一个pathlist表示路由数组,与路由映射表 pathMap
  this.matcher = createMatcher(options || []);
  //路由模式有hash,history等,我们主要以hash来讲
  this.history = new HASHHistory(this);
  //下面会讲,路由初始化
  this.init=function(){
     ...
  }
  //通过跳转url,获取到路由映射表
  this.match=function(location) {
    return this.matcher["match"](location)
  }
  //this.$router.push跳转
  this.push=function(path){
      this.history.push(path);
  }
  //添加动态路由
  this.addRoutes=function(routes){
    this.matcher.addRoutes(routes);
  }

  })

VueRouters.install = install;
构造函数中做了:
this.matcher返回match,addRoutes,匹配路由对象与添加路由,之后通过路由实例就能够添加动态路由,和获取路由的映射关系。- 实例化一个
history中,对url监听变化,重新获取跳转新的路由映射,更新_route页面重新渲染 - 路由的初始化,其中的关键
transitionTo,监听路由的变化后对页面的更新
以上三点我们一一看代码详细说吧
createMatcher.js
(1)
export default function createMatcher(options) {
  // 返回路径的列表, 路径和路由对象的映射
  var {
    pathList,
    pathMap
  } = createRouteMap(options.routes);
  console.log(pathList, pathMap);

  // 添加动态路由
  function addRoutes(routes) {
    let obj = createRouteMap(routes, pathList, pathMap);
  }
  // 当路由发生变化的时候,会进行查找该路由 所对应的映射关系,router-view 会用到
  function match(location) {
    let record = pathMap[location];
    let local = {
      path: location
    }
    // 找到当前的记录
    // 需要 到对应的记录,并且根据记录产生一个匹配 的数组
    if (record) {
      return createRoute(record, local)
    }
    // 没有记录则返回为空
    return createRoute(null, local)

  }
  return {
    match,
    addRoutes
  }

}
在createMatcher中,传入routes,之后计算出pathList,pathMap。我们来看下createRouteMap实现
createRouteMap.js
export default function createRouteMap(routes, pathList, pathMap) {
  // 处理routes中的路由映射
  pathList = pathList ? pathList : [];
  pathMap = pathMap ? pathMap : Object.create(null);

  //  遍历路由添加到pathList,pathMap中
  routes.forEach(val => {
    addRoutesRecord(val, pathList, pathMap);
  })
  return {
    pathList,
    pathMap
  }
}
把routes传入之后继续进行遍历之后,添加到pathList,pathMap中
看下addRoutesRecord的实现:
function addRoutesRecord(routes, pathList, pathMap, parent) {
  let path
  //parent是当遍历的是chilren中的路由才有的parent
  if (parent) {
    path = `${parent.path}/${routes.path}`;
  } else {
    path = routes.path;
  }
  let record = {
    path: path,
    component: routes.component,
    parent
  }
  if (!pathMap[path]) {
    pathList.push(path);
    pathMap[path] = record;
  }

  //   如果有children 就继续遍历,生成扁平化放进数组
  if (routes.children) {
    routes.children.forEach(val => {
    //routes传进去,表示当前路由的父路由
      addRoutesRecord(val, pathList, pathMap, routes)
    })
  }

}
routes有children情况下,会继续执行addRoutesRecord,继续添加到pathList,pathaMap中。变成一维数组吧。转化请看下面,还会有parent,之后会在路由变化,router-view重新生成render中用到。
const routes = [{
    path: '/',
    name: 'Home',
    component: Home
  },
  {
    path: '/about',
    name: 'About',
    component: () => import( /* webpackChunkName: "about" */ '../views/About.vue'),
    children: [{
        path: 'aaa',
        component: aaa
      },
      {
        path: 'bbb',
        component: bbb
      }
    ]
  }
变成

HashHistory.js
(2)
接下来我们看下
this.history = new HashHistory(this);
因为小例子所以我们只关心hash路由模式,它会继承于HashHistory,HashHistory会继承于BaseHistory基类。因为之前考虑history,hash,abstract都有共同的属性与方法。
看下HashHistory
export default class HASHHistory extends BaseHistory {
  constructor(app) {
      super(app);

  }
  getCurrentLocation() {
    return getHash();
  }
  setlister() {
    // 设置监听hash的变化
    window.addEventListener("hashchange", () => {
      this.transitionTo(getHash());
      // console.log();
    })
  }
}
监听了路由的变化,会执行this.tansitionTo(url),重要看下基类中的transitionTo实现
BaseHistory类中:
  // 跳转的核心逻辑location
  this.transitionTo=function(location, oncomplete) {
    let routes=this.router.match(location);
     //是否与之前的
     if(this.current.path==location&&this.current.matched.length==routes.matched.length)}    {
      return;
    }
    getCurrent(this,routes)
    // 执行监听路由的变化
    oncomplete && oncomplete();
    // 执行页面的更新
    this.cb&&this.cb(routes);
  }
   this.listen=function(cb){
    this.cb=cb;
  }
 }
判断跳转的url,获取到它的路由映射关系,执行cb更新路由实例的_route,更新页面。
(3)看下init,在vueRoutes构造函数中
this.init=function(app){
    let setlister = function (_that) {
      _that.history.setlister();
    }
    // 默认会执行一次
    this.history.transitionTo(this.history.getCurrentLocation(), setlister(this));
    // 视图更新,已经对实例的_route进行拦截,发生变化会进行对页面的更新
    this.history.listen(route=>{
      app._route=route;
    })
 }
在初始化过程中,默认会执行一次transitionTo,之后transitionTo中匹配到类似像{path:“/”,matched:[...]};之后赋值于app._route,更新页面。我们知道路由的变化会导致router-view重新生成render,渲染到页面。
router-view是一个全局组件,它的实现是一个函数式渲染
export default {
  functional: true,
  render(h, {
    parent,
    data
  }) {
  //获取到当前的路由对象
    let route = parent.$route;
    let match = route.matched;
    data.routerViews = true;
    let depth = 0
    while (parent) {
      if (parent.$vnode && parent.$vnode.data.routerViews) {
        depth++;
      }
      parent = parent.$parent;
    }
    let record = match[depth];
    if (!record) {
      return h()
    }
    let component = record.component;
    return h(component, data)
  }
}
此时matcher比如长这样:
知道当前路由的映射,路径path与组件component。假如嵌套路由时候,这时会有两个router-view,第一个router-view执行后设置一个状态,data.routerViews = true;之后在次只要根据判断(parent.$vnodeparent.$vnode.data.routerViews)为true则证明现在是第二个router-view。
总结,上面只是实现了简单的动态路由,router-view,router-link,还有像导航钩子等都没实现,有兴趣的小伙伴,看看这个哈,也只是草草的写文章 记录了一下,须要查看完整的例子,小伙伴们可以点击gihtub查看,以上只是自己的一点理解,希望有错误的可以一起交流一下哈,力争共同进步。