
前端Js自定义取景框
分类:javascript
参考文章:
- 实现的demo:www.freesion.com/article/676…
- getUserMedia:developer.mozilla.org/zh-CN/docs/…
- 一些问题合集:www.jb51.net/html5/72239…
- 无法使用getUserMedia的原因:stackoverflow.com/questions/5…
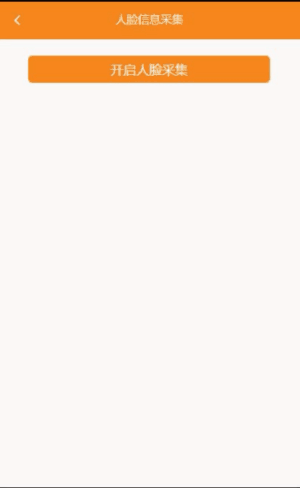
效果展示

html部分
主要分为四部分
- 启动按钮
- 原始相机
- 自定义相机(重点)
- 上传提示
<div class="uploadFacePic">
<!-- 头部 省略-->
<!-- 启动相机按钮-->
<main style="marginTop:20px">
<div class="btn" @click="openCamera">开启人脸采集</div>
</main>
<!-- 1 原始相机 不兼容时的回退方案-->
<input id="file" type="file" accept="image/*" capture="camera" style="display:none">
<!-- 2 自定义相机 -->
<div style="width: 100%; position: fixed; left: 0; bottom: 0; top: 0; right: 0;" v-if="cameraShow">
<!-- 顶部样式 -->
<div style="width: 100%; position: fixed; left: 0; bottom: 90vh; top: 0; right: 0;background:black">
</div>
<video></video>
<!-- 中间部分 -->
<div style="width: 100%; position: fixed; left: 0; bottom: 25vh; top: 10vh; right: 0;">
<!-- a.拍摄时展示取景框。把取景框图片换下就可以了 -->
<img src="../../assets/qujing.png" alt="" v-if="status==1" style="width: 100%;height: 100%;opacity: 0.8">
<!-- b.拍摄完后展示抓拍图片 -->
<img :src="imageUrl" alt="" v-if="status==2">
</div>
<!-- 底下控制部分-->
<div class="control">
<!-- 拍照前 -->
<div class="control_before" v-if="status==1">
<div class="control_before_top">照片</div>
<div class="control_before_bottom">
<div class="smaller" @click="cameraShow=false">取消</div>
<i class="iconfont icon-xiangji bigger" @click="snapPhoto"></i>
<i class="iconfont icon-zhongxin small" @click="front = !front"></i>
</div>
</div>
<!-- 拍照后 -->
<div class="control_after" v-if="status==2">
<div class="smaller" @click="status=1">重拍</div>
<div class="smaller" @click="submitPhoto">使用照片</div>
</div>
</div>
<!-- 抓拍 -->
<canvas id="mycanvas"></canvas>
</div>
<!-- 提示部分 -->
<div class="tipinfo" v-if="tipVisible">
<div class="successContent" v-if="tipInfo.result=='ok'">
<van-icon name="passed"/>
<div class="title">采集成功</div>
<div class="info">恭喜您,完成人脸照片采集</div>
<div class="btn" @click="tipVisible=false">{{'返回'+btntext}}</div>
</div>
<div class="failContent" v-else>
<van-icon name="warning-o" />
<div class="title">采集失败</div>
<div class="info">{{tipInfo.msg+',请重拍'}}</div>
<div class="btn" @click="tipVisible=false">{{'返回'+btntext}}</div>
</div>
</div>
</div>
js部分
变量部分:
data() {
return {
cameraShow:false,//启动自定义相机
status:0,//自定义相机-拍摄进度:0|未开启 1|开启但未拍摄 2|开启且已拍摄
imageUrl:'',//自定义相机-抓拍url
front:true,// 自定义相机-前置与后置转换(未验证)
imageFile:'',//图片对象
//提示部分
tipVisible:false,
tipInfo:{
result:'fail',
msg:'采集人脸失败'
},//上传结果
btntext:'',//倒计时文本
time:null,//计时器
};
},
启动相机
openCamera:主要做了一些兼容与回退。
openCamera() {
// 1. 先展示,因为要从这里获取video标签
this.cameraShow=true
// 2. constraints:指定请求的媒体类型和相对应的参数
var constraints={
audio: false,
video: {
width: 720,
height: 720,
facingMode: (this.front? "user" : "environment")
}
}
// 3. 兼容部分:
// 老的浏览器可能根本没有实现 mediaDevices,所以我们可以先设置一个空的对象
if (navigator.mediaDevices === undefined) {
navigator.mediaDevices = {};
}
// 一些浏览器部分支持 mediaDevices。我们不能直接给对象设置 getUserMedia
// 因为这样可能会覆盖已有的属性。这里我们只会在没有getUserMedia属性的时候添加它。
if (navigator.mediaDevices.getUserMedia === undefined) {
navigator.mediaDevices.getUserMedia = function(constraints) {
// 首先,如果有getUserMedia的话,就获得它
var getUserMedia = navigator.getUserMedia || navigator.webkitGetUserMedia || navigator.mozGetUserMedia || navigator.msGetUserMedia || navigator.oGetUserMedia;
// 一些浏览器根本没实现它 - 那么就返回一个error到promise的reject来保持一个统一的接口
if (!getUserMedia) {
return Promise.reject(new Error('getUserMedia is not implemented in this browser'));
}
// 否则,为老的navigator.getUserMedia方法包裹一个Promise
return new Promise(function(resolve, reject) {
getUserMedia.call(navigator, constraints, resolve, reject);
});
}
}
// 4. 获取视频流
let that=this
navigator.mediaDevices.getUserMedia(constraints)
.then(function(stream) {
// 进来这里表示能够兼容
let video=document.querySelector('video');
video.srcObject = stream;
video.onloadedmetadata = function(e) {
video.play();
};
// 进入自定义拍摄模式
that.status=1
})
.catch(function(err) {
// 进来这里表示不能兼容
console.log('nonono',err)
// 调用原始摄像头
that.originCamera()
});
},
方案一:兼容
snapPhoto:抓拍
snapPhoto(){
var canvas = document.querySelector('#mycanvas');
var video = document.querySelector('video');
canvas.width = video.videoWidth;
canvas.height = video.videoHeight;
canvas.getContext('2d').drawImage(video,0,0);
// 保存为文件,用于后续的上传至服务器(尚未实践)——>后续提交
this.imageFile=this.canvasToFile(canvas)
// blob转url:用于展示
let p=new Promise((resolve,reject)=>{
canvas.toBlob(blob=>{
let url=URL.createObjectURL(blob)
resolve(url)
});
})
let that=this
p.then(value=>{
that.imageUrl=value
that.status=2//表示拍摄完成
})
},
canvasToFile:canvas转为文件格式,用于上传服务器
canvasToFile(canvas){
var dataurl = canvas.toDataURL("image/png");
var arr = dataurl.split(','),
mime = arr[0].match(/:(.*?);/)[1],
bstr = atob(arr[1]),
n = bstr.length,
u8arr = new Uint8Array(n);
while (n--) {
u8arr[n] = bstr.charCodeAt(n);
}
var file = new File([u8arr], "phone.png", {type: mime});
return file
},
方案二:不兼容
originCamera:调用原始摄像机
originCamera(){
let that=this
//关闭自定义相机
that.cameraShow=false
let promise= new Promise(function (resolve, reject) {
let file=document.getElementById('file')
file.click()
file.onchange = function (event) {
if (!event) {
reject('empty')
}
//当选中或者拍摄后确定图片后,保存图片文件——>后续提交
this.imageFile=event.target.files[0]
resolve('ok')
}
})
promise.then((value)=> {
that.submitPhoto()
}
)
},
提交与上传提示
submitPhoto() {
console.log("提交",this.imageFile);
//在这里进行上传操作
//...
//上传服务器,成功时:
this.tipInfo.result='ok'
// this.tipInfo.result='fail'
this.cameraShow=false
//开始提示
this.countdown()
},
//倒计时与提示
countdown(){
clearInterval(this.time);
this.tipVisible=true
let coden = 3;
this.btntext = '('+coden+'s)';
this.time = setInterval(() => {
coden--
this.btntext = '('+coden+'s)';
if (coden == 0) {
clearInterval(this.time);
this.tipVisible = false;
this.btntext = "";
}
}, 1000);
},
css部分
.uploadFacePic{
.img{
width:100%;
height:100%
}
.bigger{
font-weight: 600;
font-size: 3em;
}
.small{
font-size: 2em;
}
.smaller{
font-size: 1.2em;
}
// 控制台
.control{
width: 100%;
position: fixed;
left: 0;
bottom: 0;
top: 75vh;
right: 0;
background:black;
.control_before{
position:relative;
width:100%;
height:100%;
display: flex;
flex-direction: column;
.control_before_top{
z-index: 1;
flex: 1;
color: orange;
display: flex;
justify-content: center;
align-items: center;
}
.control_before_bottom{
flex: 2;
display: flex;
justify-content: space-around;
color: white;
align-items: center;
margin-bottom: 1.5em;
}
}
.control_after{
position:relative;
width:100%;
height:100%;
display: flex;
color: white;
align-items: center;
justify-content: space-around;
}
}
main{
text-align: center;
}
.tipinfo{
z-index: 2;
position: fixed;
top:46px;
left: 0;
right: 0;
bottom: 0;
background: white;
display: flex;
justify-content: center;
align-items: center;
.successContent{
.van-icon{
color: #f68618;
font-size: 5em;
}
.title{
color: #f68618;
font-size: 1.8em;
}
}
.failContent{
.van-icon{
color: red;
font-size: 5em;
}
.title{
color: red;
font-size: 1.8em;
}
}
.info{
margin: 1em 0 3em;
}
}
.btn{
height: 34px;
width: 80vw;
background: #f68618;
color: white;
display: flex;
justify-content: center;
align-items: center;
border-radius: .3em;
margin: 0 auto;
}
}
后记
- 部分icon是从阿里导入的,这里没有写出来。
- 目前在微信开发者工具能够看到自定义相机的效果,在真机上(http)还启动不了,查阅资料说navigator.mediaDevices.getUserMedia服务器需要用https(尚未验证)
- 自定义相机自拍时会出现镜像效果,暂时不知道怎么处理。
- 中间上传时估计要做一个加载ui进行过渡