
vue3 + elemenplus实现导航栏
前言
最近想做一个音乐网站。要分管理端和客户端。这里记录一下开发过程。希望大家的指正。
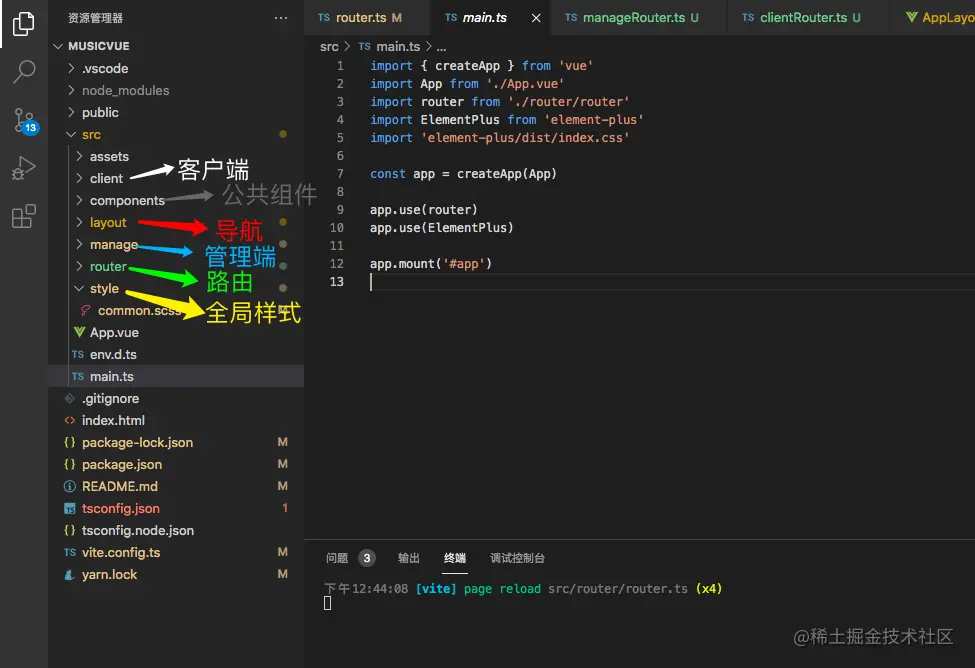
今天实现一下导航栏。文章开始前先新建几个文件夹,用于一会儿存放我们的代码。(使用vite创建)。

vueRouter
这篇文章我只注重如何实现,对于vueRouter的一些分享后续补充。 首先,想要实现导航栏就需要有路由的支持才可以。
安装
# 安装路由
yarn add vue-router@4
复制代码
新建router文件
这里先这么放着,我们一会儿再更改。
// /src/router/router.ts
// 引入 vue-router
import { createRouter, createWebHistory, RouteRecordRaw } from 'vue-router'

const routes: RouteRecordRaw[] = [
  {
    path: '/',
    name: 'Login',
    component: () => import('@/client/login/Login.vue'), // 注意这里要带上 文件后缀.vue
  },
]
// createRouter创建路由
const router = createRouter({
  history: createWebHistory(),
  routes,
})
// 最后导出。es6的模块化方式
export default router
复制代码
在main.js中挂载
把router挂载到app上,全局都可以使用。
import { createApp } from 'vue'
import App from './App.vue'
import router from './router/router'

const app = createApp(App)

app.use(router)

app.mount('#app')

复制代码
改造一下router文件
在router文件夹下再新建clientRouter.ts(js文件也可以)和manageRouter.ts分别存放管理端和客户端的路由配置。然后再引到router.ts中。

因为组件都还没写好,这里先都写成空的,记得导出既可。
manageRouter
const manageRouter =  // 管理端
{

}
export default manageRouter
复制代码
clientRouter
const clientRouter = {

}
export default clientRouter;

复制代码
router
import { createRouter, createWebHistory, RouteRecordRaw } from 'vue-router'
import clientRouter from './clientRouter'
import manageRouter from './manageRouter'
/**
 * 1. 因为我们分了客户端和管理端两部分,只有管理端需要有Layout导航 所以如下router管理分开了。
 * 2. 引用组建时,这里后缀要带上vue 因为ts知道默认找.vue文件
 *
 */

const routes: RouteRecordRaw[] = [
  // 管理端
  manageRouter,
  // 客户端
  clientRouter,

]

const router = createRouter({
  // 路由模式
  history: createWebHistory(),
  routes,
})

export default router


复制代码
elementplus
网址:✈️
安装
// NPM
npm install element-plus --save

// Yarn
yarn add element-plus

// pnpm
pnpm install element-plus
复制代码
main.ts 挂载
app.use(ElementPlus)
import { createApp } from 'vue'
import App from './App.vue'
import router from './router/router'
// ElementPlus 和 其 css文件
import ElementPlus from 'element-plus'
import 'element-plus/dist/index.css'
const app = createApp(App)
app.use(router)
app.use(ElementPlus)
app.mount('#app')
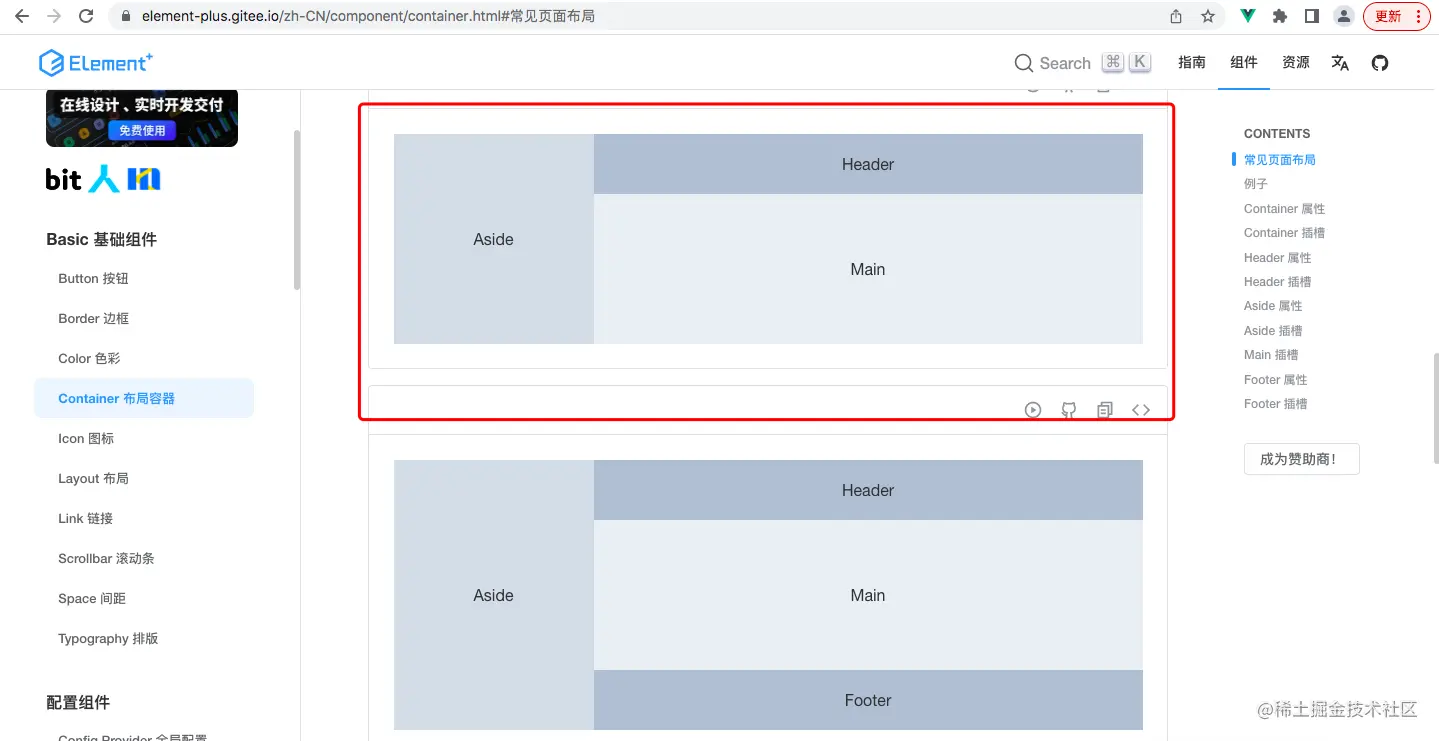
复制代码我们去官方文档看一下,我们想要实现如下的布局。
新建文件
在上面新建好的 layout 文件夹下新建 AppLayout.vue。首先把官网的内容先复制过来。然后添加一些背景色。
- el-aside 就是侧边栏。el-header 就是头部导航的位置 。el-main就是主要的展示区域,根据路由改变别换内容。
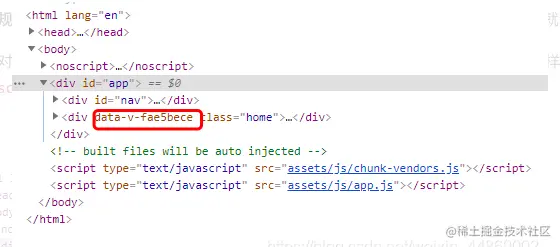
<script lang="ts" setup>这里lang="ts"代表使用使用ts语法。setup是一个新的语法糖。setup选项是在组件创建之前,props被解析之后执行,是组合式 API 的入口。等我后面会发一篇详细的文章。<style scoped lang="scss">对于所有的 Vue 组件,只要设置了<style scoped></style>,Vue就会给该组件生成一个唯一data值。如下图:
<template>
  <div class="common-layout">
    <el-container class="container">
      <el-aside class="aside">
        <AppMenu/>
      </el-aside>
      <el-container>
        <el-header class="header">Header</el-header>
        <el-main class="main"><router-view/></el-main>
      </el-container>
    </el-container>
  </div>
</template>
<script lang="ts" setup >
import AppMenu from '@/components/AppMenu.vue';
</script>
<style scoped lang="scss">
.container{
.aside{
  background: #797979;
  width:230px;
}
.header{
  background: #a1e9d2;
  height:80px;
}
.main{

}
}

</style>

复制代码
添加router
刚才我们manageRouter是没有配置内容的。
- 引入我们的
AppLayout组件,把它作为最外层的导航。 - manage部分的其它页面都放入children中。
- children中组件的引用和
AppLayout组件的引用都记得要 加后缀.vue - 再建一下 Home.vue 和 UserManage.vue 这里为了看效果可以先随便写点东西。
import AppLayout from '@/layout/AppLayout.vue'
const manageRouter =  // 管理端
{
  path:'/manage',
  component : AppLayout,
  children:[
    {
      path:'',
      name:'home',
      component:()=>import('@/manage/Home/Home.vue')
    },
    {
      path:'/user',
      name:'用户管理',
      component:()=>import('@/manage/UserManage/UserManage.vue')
    }
  ]
}
export default manageRouter
复制代码
Home
<template>
 home
</template>
<script lang="ts" setup >

</script>
<style scoped lang="scss">

</style>

复制代码
UserManage
<template>
 用户管理
</template>
<script lang="ts" setup >

</script>
<style scoped lang="scss">

</style>
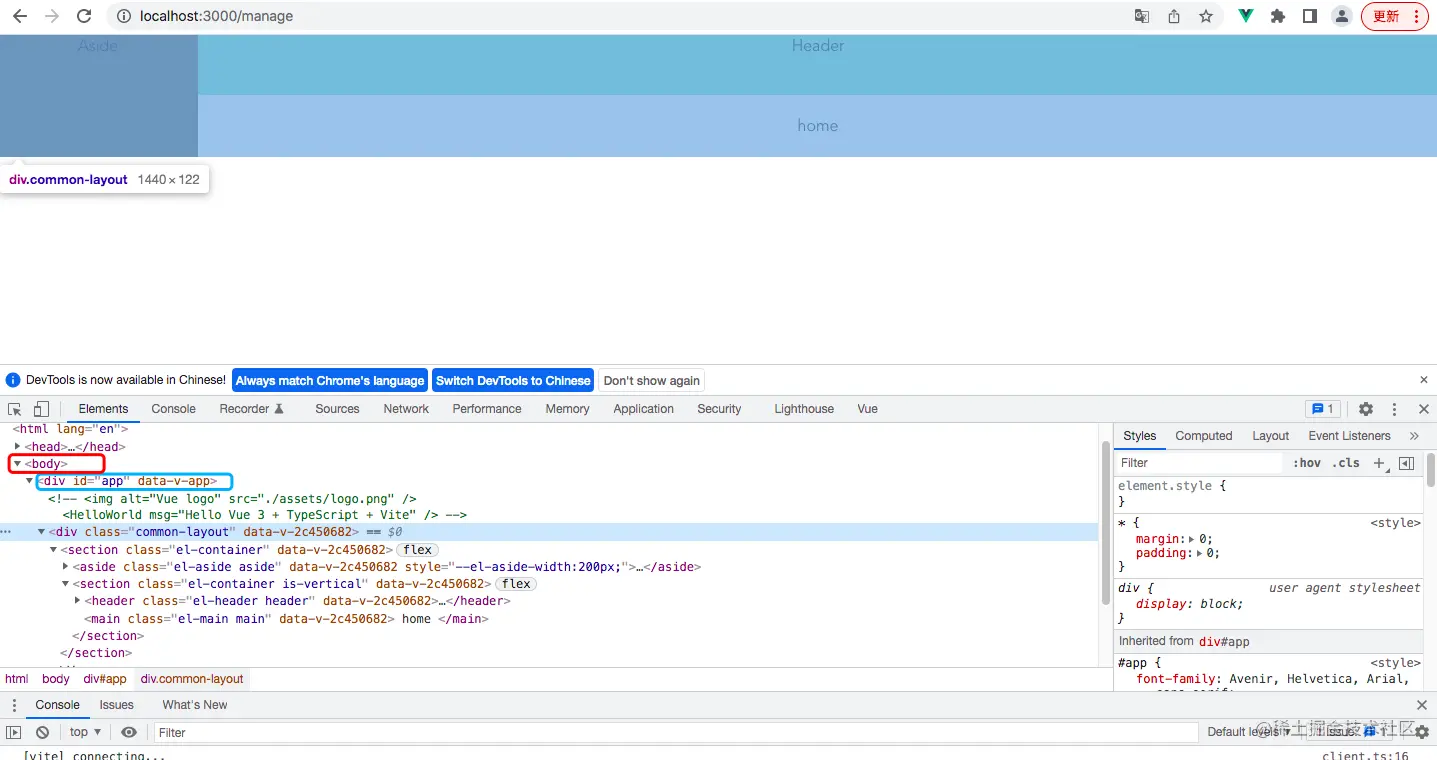
复制代码然后看一下现在的效果,http://localhost:3000/manage (注意你启动的端口)。
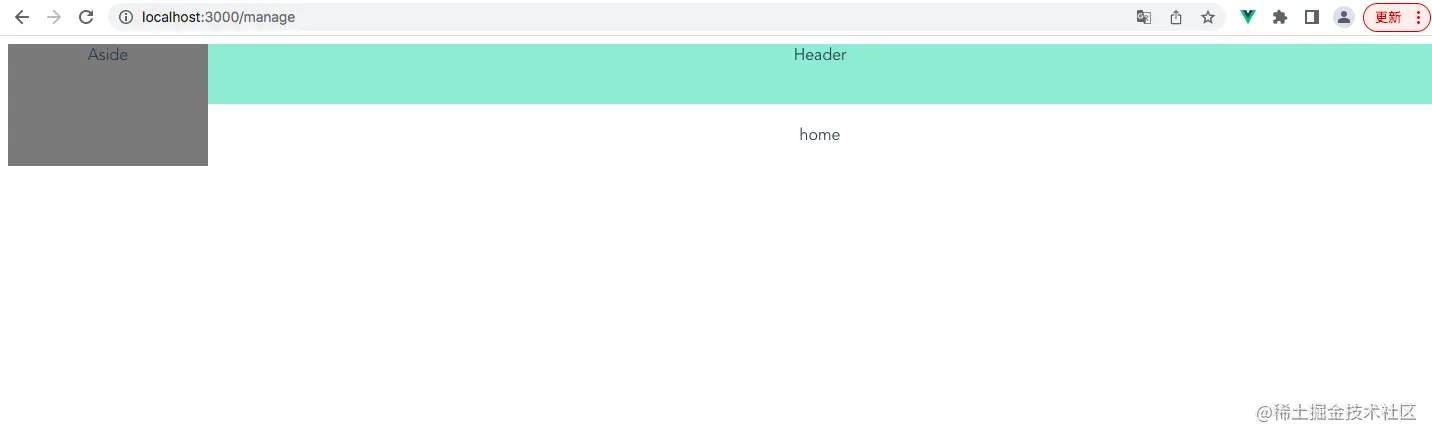
可以发现不但有边距,而且也不是100%的高度。我们下面修改一下样式。
改样式
安装sass
# sass
// 全局安装
yarn global add sass
npm install -g sass
// 安装相应的包
npm install sass sass-loader --save-dev
复制代码
新建全局样式文件
首先在style文件夹下新建common.scss

// 去掉边距
*{
    margin:0;
    padding: 0;
}
复制代码
引入
在App文件中引入这个样式文件
@import './style/common.scss';
复制代码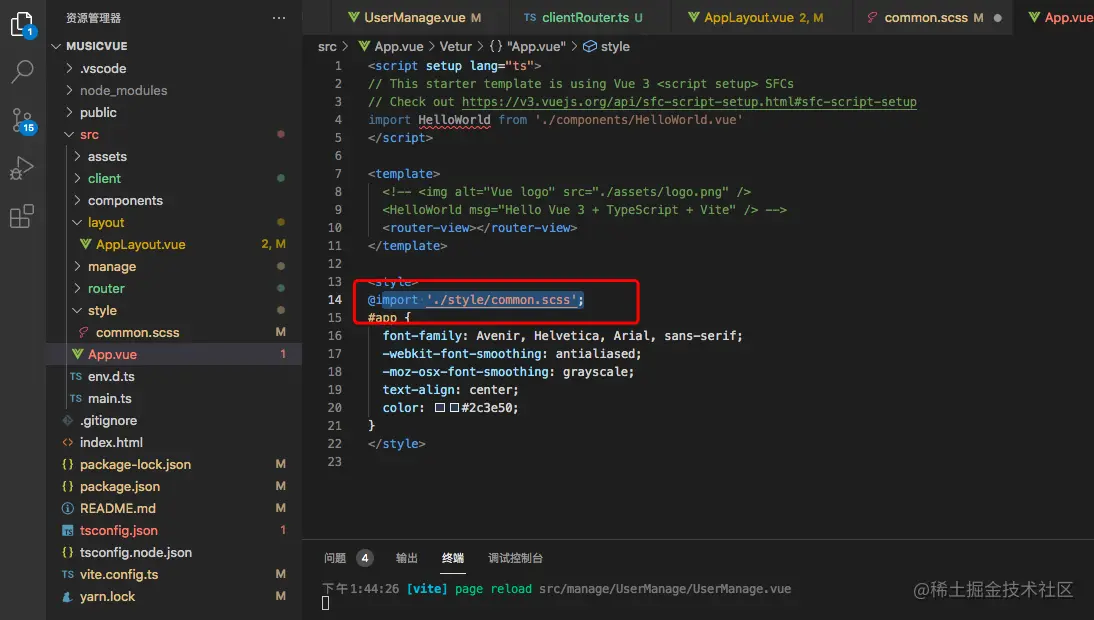
效果
如下去掉了边距,那么说明我们引入的全局样式文件起作用了。

改高度
如果想改aside的高,我们需要把它的父元素、父元素的父元素都设置为100%。 但是vh的出现就不需要这样做了。
给container添加一个 height: 100vh;
.container{
  height: 100vh;
.aside{
  background: #797979;
}
.header{
  background: #a1e9d2;
  height:80px;
}
.main{

}
}
复制代码
添加菜单
先看一下效果

把菜单作为一个组件,我们在compontens下新建 AppMenu.vue
AppMenu.vue组件
- 留一个放logo的位置
- 使用 el-menu
|
属性 |
用途 |
|---|---|
|
:collapse |
菜单的展开收起这里使用父组件传来的值 |
|
:collapse-transition |
展开收起的动画效果 |
|
@open |
展开指定的 sub-menu |
|
@close |
收起指定的 sub-menu |
|
background-color |
菜单的背景色 |
|
text-color |
文本颜色 |
|
active-text-color |
选中状态的文本颜色 |
|
router |
是否启用 vue-router 模式。 启用该模式会在激活导航时以 index 作为 path 进行路由跳转 |
|
|
|
const props = defineProps(['isCollapse'])父组件传的值isCollapsemin-height: calc(100vh - 80px);菜单的最小高度去除了logo的高
<template>
  <div class="logo">

  </div>
  <el-menu
    default-active="2"
    :collapse="props.isCollapse"
    :collapse-transition="false"
    @open="handleOpen"
    @close="handleClose"
    background-color="#ebf1f5"
    text-color="#606266"
    active-text-color="#2F74FF"
    class="menu"
    router
  >
    <el-sub-menu index="1">
      <template #title>
        <el-icon><location /></el-icon>
        <span>Navigator One</span>
      </template>
      <el-menu-item-group>
        <template #title><span>Group One</span></template>
        <el-menu-item index="1-1">item one</el-menu-item>
        <el-menu-item index="1-2">item two</el-menu-item>
      </el-menu-item-group>
      <el-menu-item-group title="Group Two">
        <el-menu-item index="1-3">item three</el-menu-item>
      </el-menu-item-group>
      <el-sub-menu index="1-4">
        <template #title><span>item four</span></template>
        <el-menu-item index="1-4-1">item one</el-menu-item>
      </el-sub-menu>
    </el-sub-menu>
    <el-menu-item index="2">
      <el-icon><icon-menu /></el-icon>
      <template #title>Navigator Two</template>
    </el-menu-item>
    <el-menu-item index="3" disabled>
      <el-icon><document /></el-icon>
      <template #title>Navigator Three</template>
    </el-menu-item>
    <el-menu-item index="4">
      <el-icon><setting /></el-icon>
      <template #title>Navigator Four</template>
    </el-menu-item>
  </el-menu>
</template>

<script lang="ts" setup>
import { ref } from 'vue'
import {
  Document,
  Menu as IconMenu,
  Location,
  Setting,
} from '@element-plus/icons-vue'

const props = defineProps(['isCollapse'])
const handleOpen = (key: string, keyPath: string[]) => {
  console.log(key, keyPath)
}
const handleClose = (key: string, keyPath: string[]) => {
  console.log(key, keyPath)
}
</script>

<style>
.logo{
  height:80px;
  background: #e1eaf4;
}
.menu{
  min-height: calc(100vh - 80px);

}
</style>

复制代码
AppLayout中引用AppMenu组件
- 用到了三目运算符通过isCollapse给
el-aside不同的宽:style="{'width':(isCollapse?'63px':'230px')}" - 使用AppMenu组件,并且将isCollapse传给子组件。
- 需要将isCollapse这个值使用ref方法,才能让这个值是动态渲染的。
- toggle 方法用于改变isCollapse的值。并且被ref处理后,isCollapse需要
.value才真的获取到值 - 在样式中给aside和header添加了阴影效果。 这里推荐一个阴影代码生成网址shadows.brumm.af/
<template>
  <div class="common-layout">
    <el-container class="container">
      <el-aside class="aside" :style="{'width':(isCollapse?'63px':'230px')}">
        <AppMenu :isCollapse="isCollapse"/>
      </el-aside>
      <el-container>
        <el-header class="header">
          <el-row>
            <el-col :span="1">
              <!-- el-icon size:number -->
              <el-button type="text" @click="toggle"><el-icon  :size="25"><fold /></el-icon></el-button>
            </el-col>
          </el-row>
        </el-header>
        <el-main class="main"><router-view/></el-main>
      </el-container>
    </el-container>
  </div>
</template>
<script lang="ts" setup>
import AppMenu from '@/components/AppMenu.vue';
import {ref} from 'vue'
import {Fold} from '@element-plus/icons-vue';
let isCollapse= ref(false)
const toggle = ():void=>{
  isCollapse.value = !isCollapse.value
}

</script>
<style scoped lang="scss">
.container{
  height: 100vh;
.aside{
  overflow: hidden;
  box-shadow:2.8px 2.8px 2.2px rgba(0, 0, 0, 0.02),
  6.7px 6.7px 5.3px rgba(0, 0, 0, 0.028),
  12.5px 12.5px 10px rgba(0, 0, 0, 0.035),
  22.3px 22.3px 17.9px rgba(0, 0, 0, 0.042),
  41.8px 41.8px 33.4px rgba(0, 0, 0, 0.05),
  100px 100px 80px rgba(0, 0, 0, 0.07);
}
.header{
  background:#ebf1f5;
  height:80px;
  box-shadow:
  8.7px 9.2px 2.6px rgba(0, 0, 0, 0.023),
  18.5px 19.6px 6.3px rgba(0, 0, 0, 0.025),
  29.9px 31.7px 11.9px rgba(0, 0, 0, 0.024),
  44.2px 46.8px 21.2px rgba(0, 0, 0, 0.023),
  64.1px 67.9px 39.7px rgba(0, 0, 0, 0.028),
  100px 106px 95px rgba(0, 0, 0, 0.07)
;

}
.main{

}
}

</style>

复制代码
动态渲染导航
路由方式:哈西路由
在router.ts文件中,创建路由时改为哈西路由。
const router = createRouter({
  // 路由模式
  history: createWebHashHistory(),
  routes,
})

复制代码
hash
vue中的使用方式
createWebHashHistory()
复制代码
了解一下
hash路由就是 带 # 号的,和css中的 #一个意思。hash也称为锚点,用于页面定位使用,可以使对应 id 的元素显示在可视区域内(如回到顶部)。
history
history的出现就是为了完善hash的一些不足。
vue中的使用方式
createWebHistory()
复制代码
优点
- hash路由原本用于锚点,但是现在用它来导航,锚点就没法使用了。
- hash基于url传参,会有体积限制,而 history 模式不仅可以在url里放参数,还可以将数据存放在一个特定的对象中。
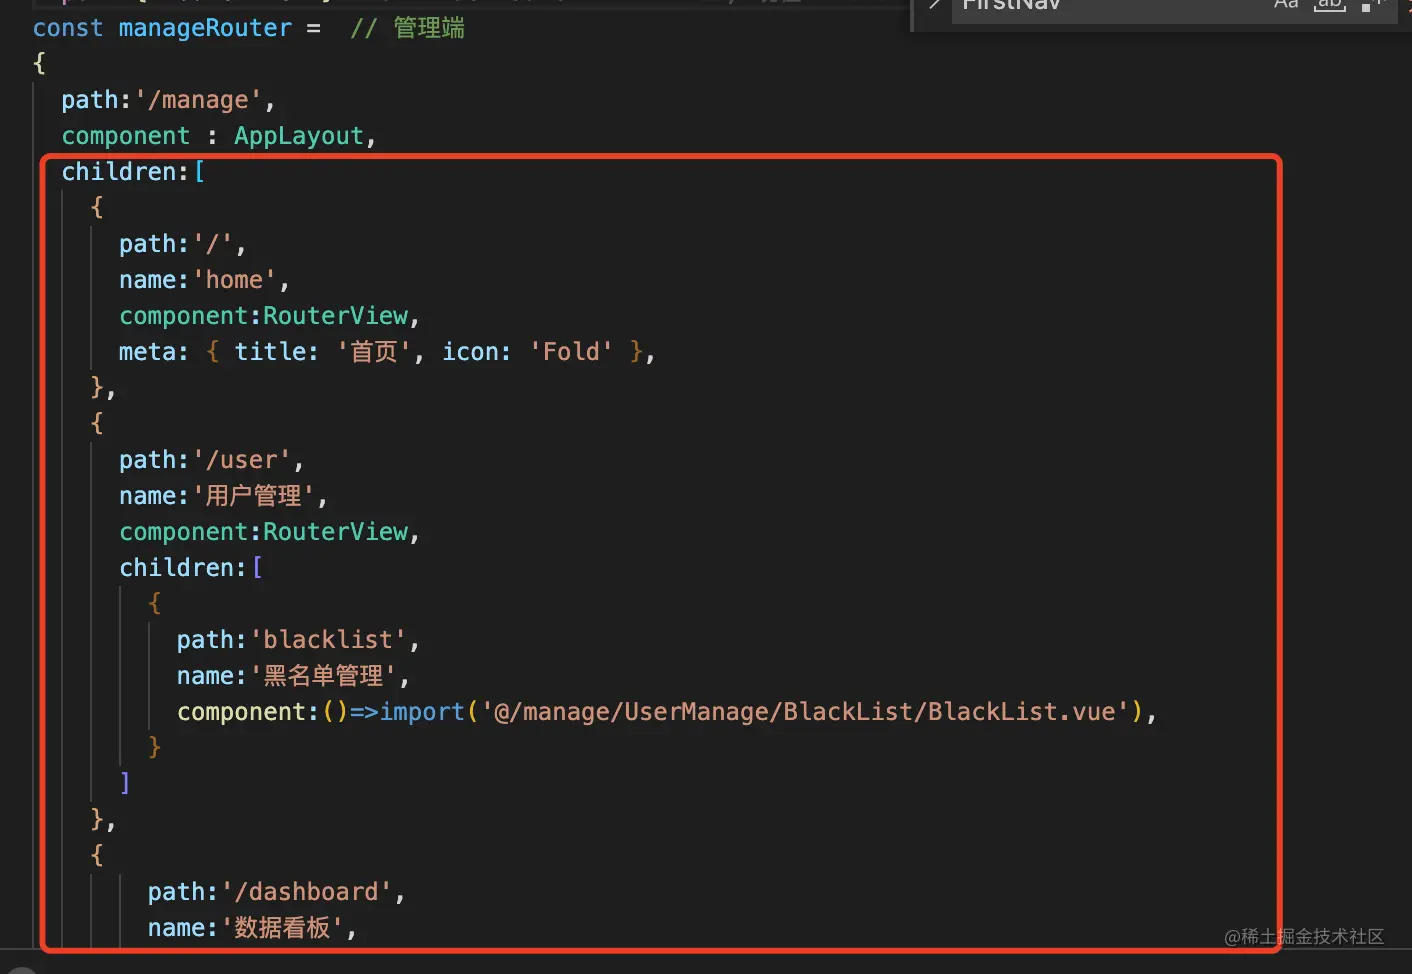
更改router文件
import AppLayout from '@/layout/AppLayout.vue'
import { RouterView } from 'vue-router'
const manageRouter =  // 管理端
{
  path:'/manage',
  component : AppLayout,
  children:[
    {
      path:'/',
      name:'home',
      component:RouterView,
      meta: { title: '首页', icon: 'Fold' },
    },
    {
      path:'/user',
      name:'用户管理',
      component:RouterView,
      children:[
        {
          path:'blacklist',
          name:'黑名单管理',
          component:()=>import('@/manage/UserManage/BlackList/BlackList.vue'),
        }
      ]
    },
    {
        path:'/dashboard',
        name:'数据看板',
        component:RouterView,
        children:[
          {
            path:'pv',
            name:'浏览量',
            component:()=>import('@/manage/DashBoard/PV/PV.vue'),
          }
        ]

    }
  ]
}
export default manageRouter
复制代码
1. RouterView:
如下图,用户管理这种导航没有对应的页面。所以我们可以使用RouterView,作为他的component值。
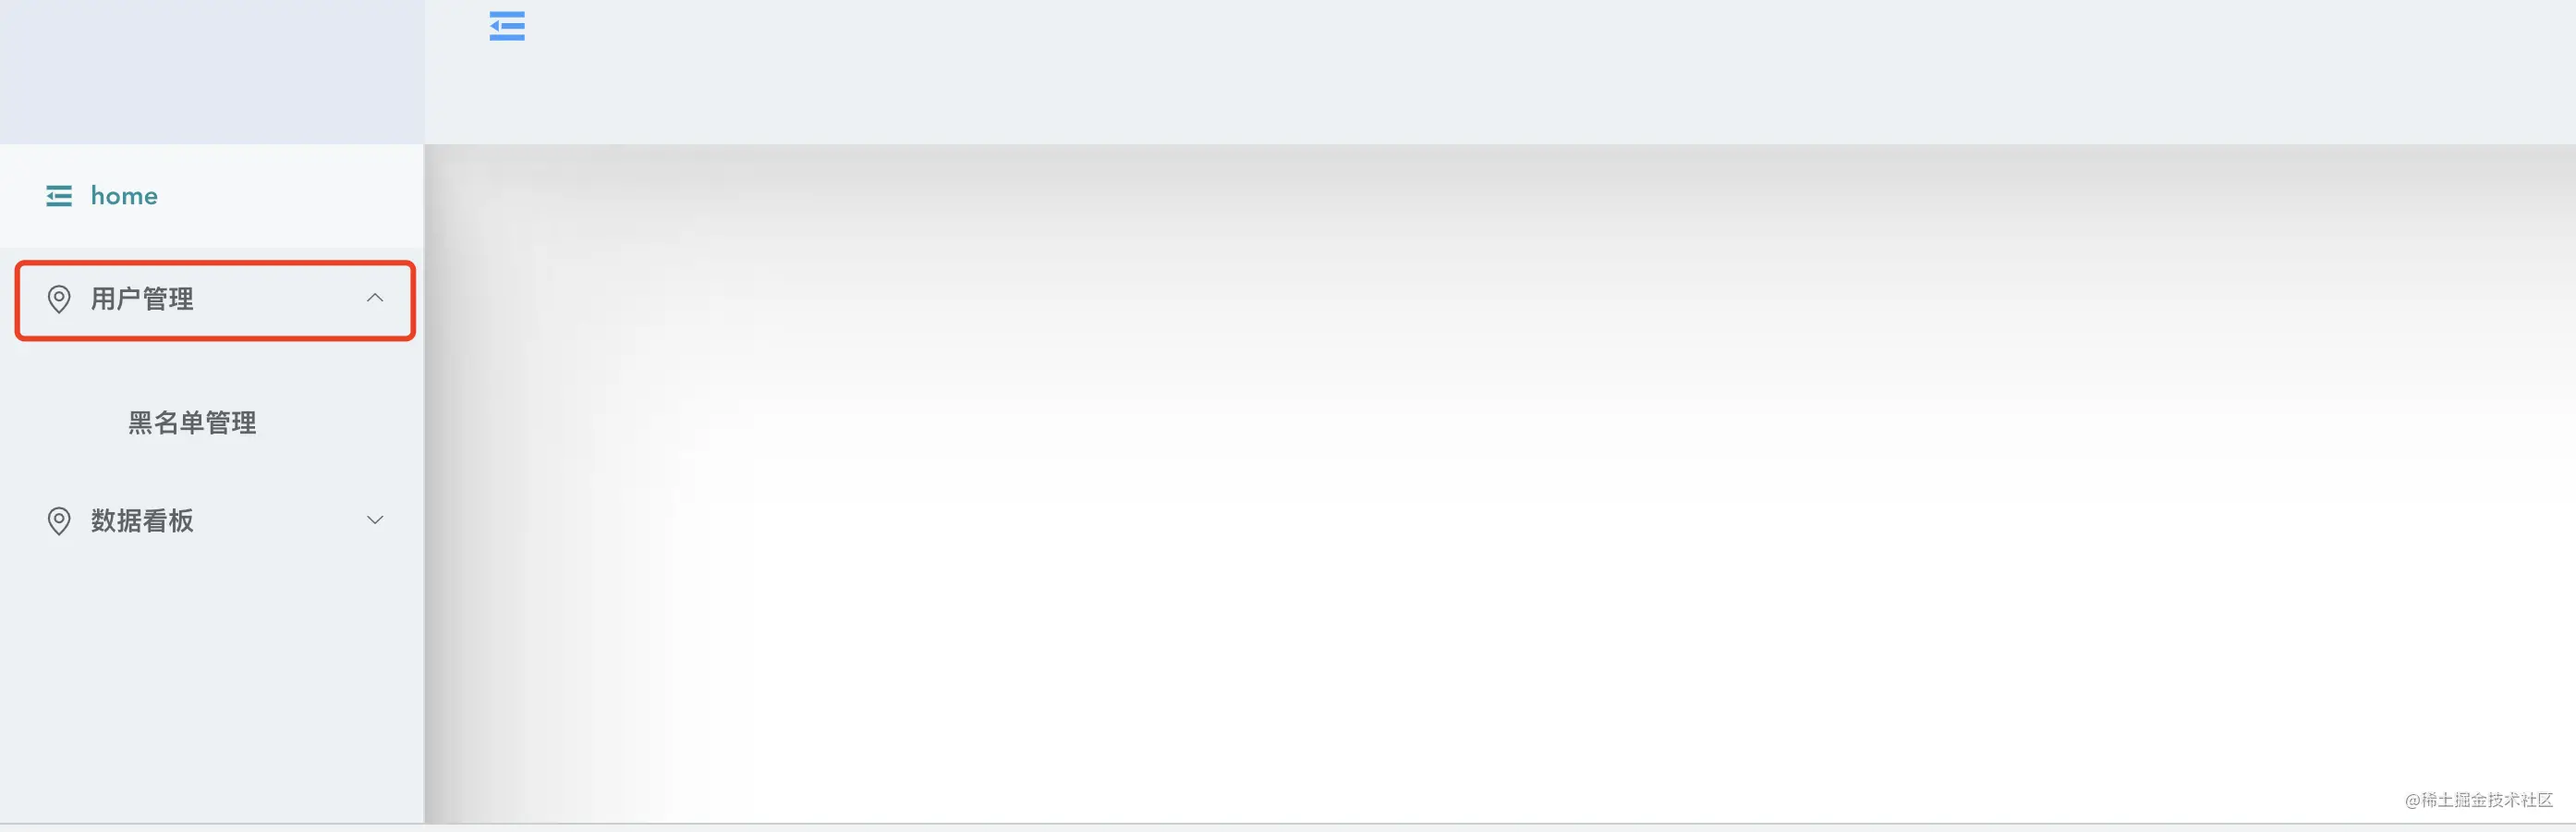
2. 二级菜单:
注意 , 二级菜单的path不使用 /。上面引用的组件没有的话,可以随便新建两个。我们现在只是为了看效果。
<template>
 Pv
</template>
<script lang="ts" setup >

</script>
<style scoped lang="scss">

</style>

复制代码
一级菜单
将manageRouter引入
将我们的manageRouter引入之前写好的,AppMenu组件中,作为遍历需要的数据。
import manageRouter from '@/router/manageRouter'
复制代码
遍历第一次数据
首先在 <template>中遍历,因为我们区分管理端和客户端所以在外面有一层 /manage,而我们,导航栏的内容都是其children中的内容。所以遍历的是 manageRouter.children
<el-menu
    :collapse="props.isCollapse"
    :collapse-transition="false"
    @open="handleOpen"
    @close="handleClose"
    background-color="#ebf1f5"
    text-color="#606266"
    active-text-color="#2F74FF"
    :unique-opened="true"
    class="menu"
    @select="handleSelect"
    :default-active='selectKey'
    router
  >
   <template v-for="(first,index) in manageRouter.children">

     </template>

  </el-menu>
复制代码
不同的一级导航栏
1.
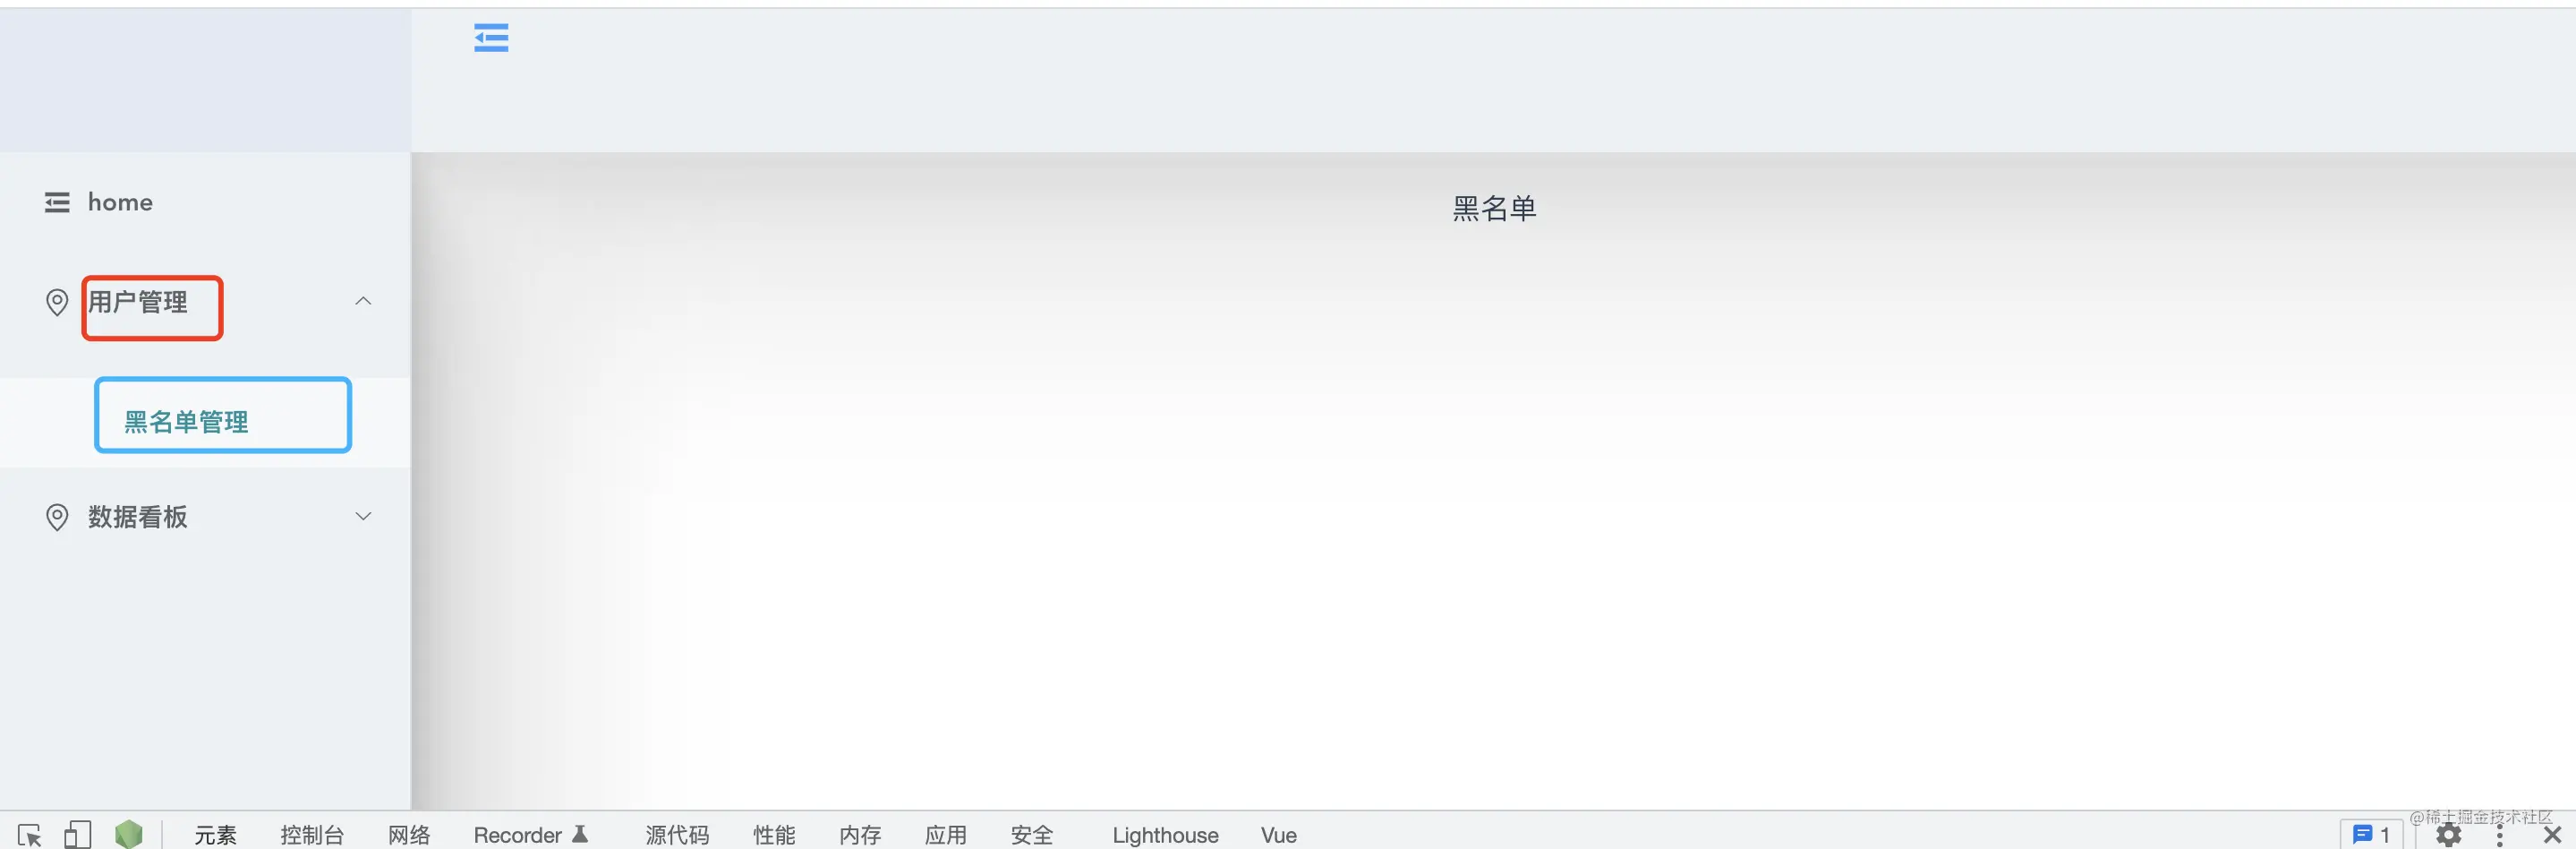
如下图,home和用户管理虽然都是一级导航栏,但是二者并不相同。home对应页面,用户管理则只用于展开子菜单。

   <template v-for="(first,index) in manageRouter.children">
      <el-sub-menu :index="first.path" v-if="first.children" :key="index" >

      </el-sub-menu>
      <el-menu-item v-else :index="first.path" :key="'item'+index">
              <span>{{first.name}}</span>
      </el-menu-item>
     </template>

复制代码
2.
这里用v-if 和 v-else 通过判断 first.children是否为空来区分导航。
el-menu-item用于home这种没有子菜单的,el-sub-menu 用于有子菜单的。
3. 注意 :index 对应的是跳转的路径。
二级菜单
     <el-sub-menu :index="first.path" v-if="first.children" :key="index" >
        <template  v-if="first.children">
            <el-menu-item-group v-for="(second,sec_index) in first.children"  :key="sec_index">
            <!--这个:index需要将上级菜单的路由组合一起-->
                <el-menu-item :index="first.path+'/'+second.path"><i class="el-icon-odometer" />
                    {{second.name}}
                  </el-menu-item>
          </el-menu-item-group>
          </template>
            <template #title>
              <span>{{first.name}}</span>
            </template>
      </el-sub-menu>
复制代码
区分
用户管理和黑名单管理都在 el-sub-menu中,也是需要判断区分一下的。用户管理就直接展示标题名称。而黑名单管理,就需要再遍历。
选中背景色
添加样式
.menu .el-menu-item:hover {
    background-color:#FFFFFF80;
}
.menu .el-menu-item.is-active{
  background-color: #FFFFFF80!important;
  color: #2f74ff !important;
}
复制代码
图标的使用
因为图标也是遍历出来的,我试了好几种方式。如下这种方式是可以的。
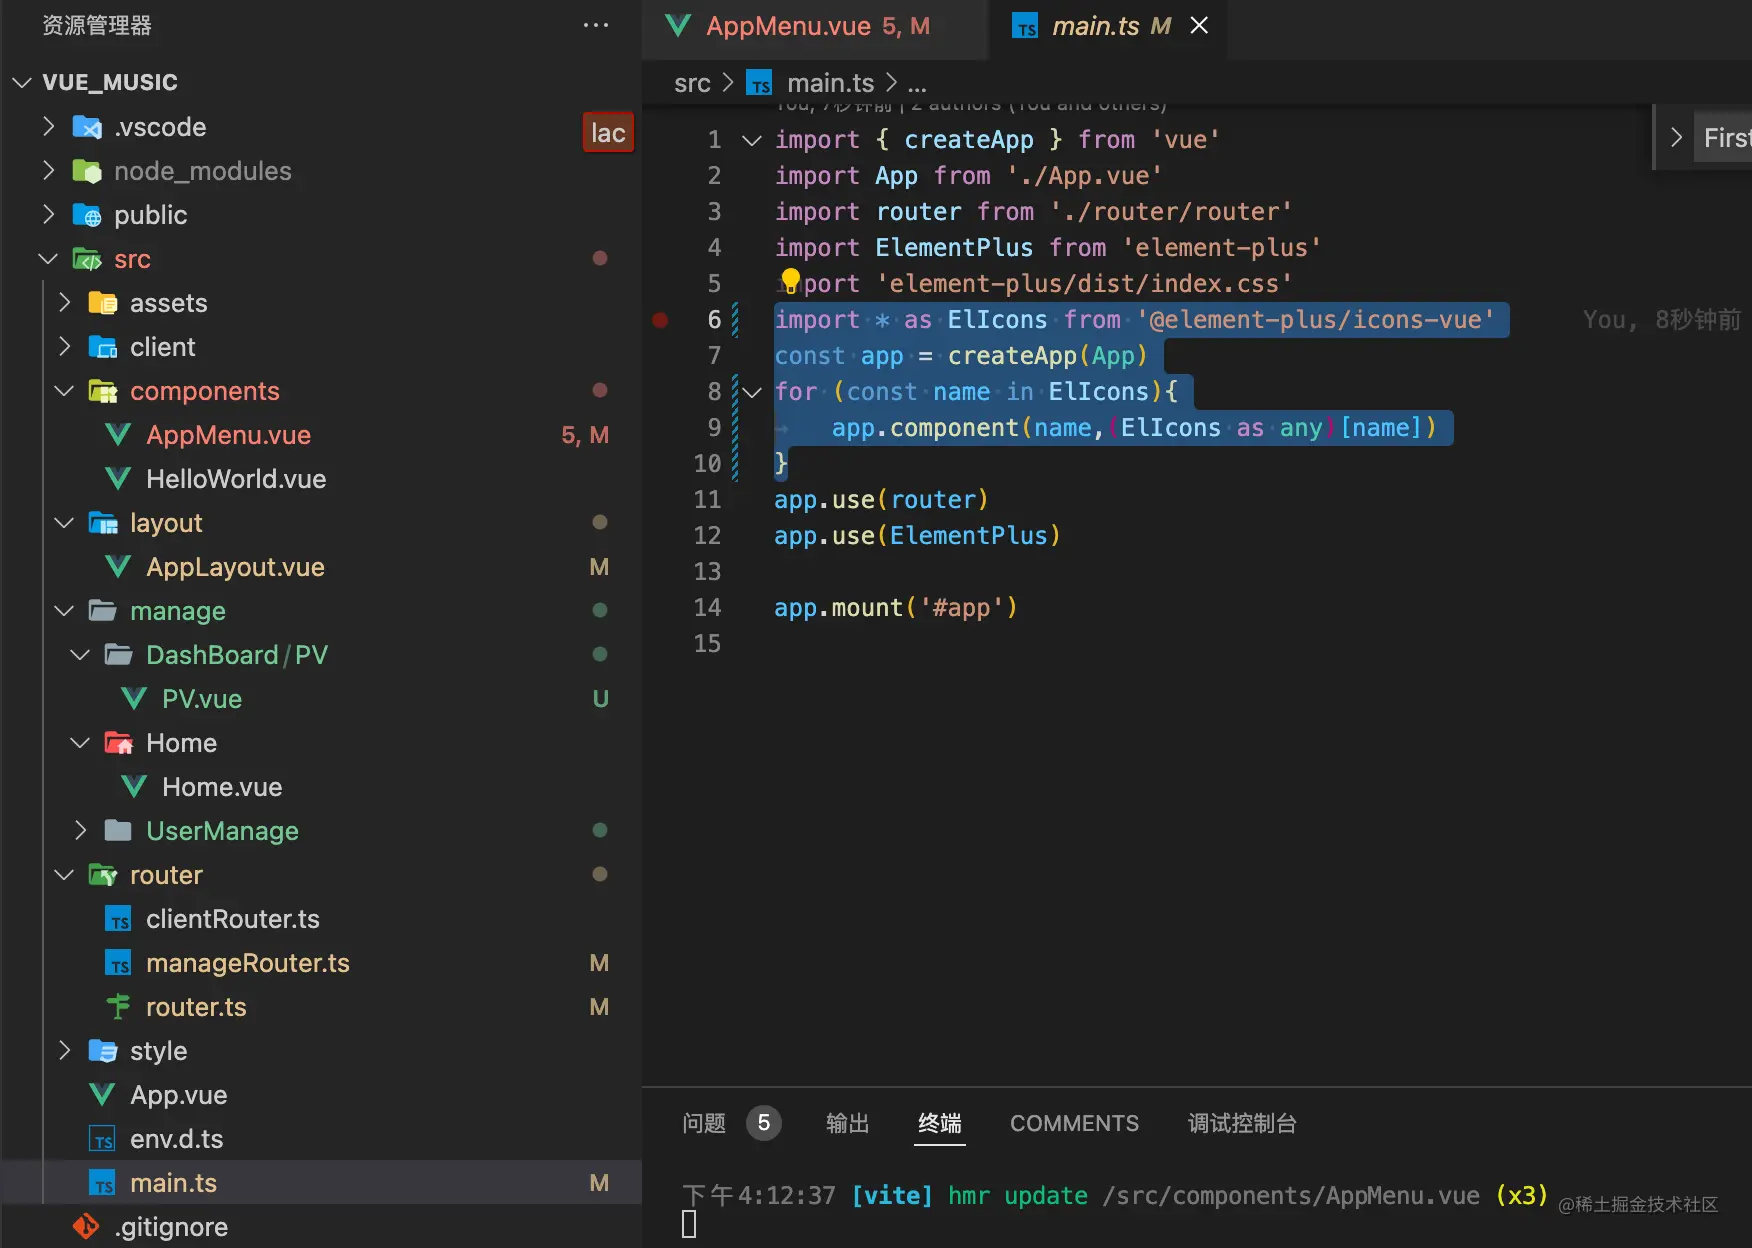
将图标挂载到全局
main.ts
路由文件中添加
在路由文件中添加 meta对象,存放图标。
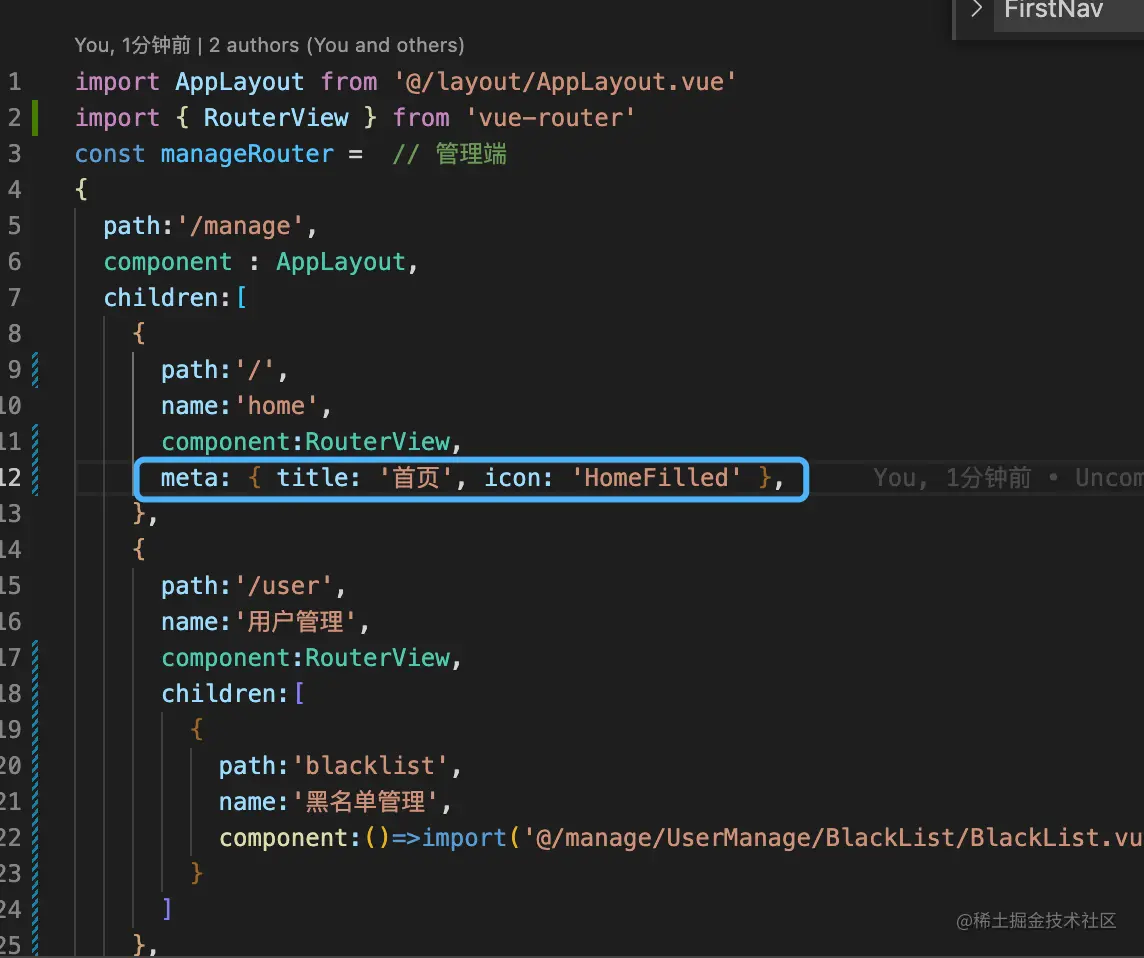
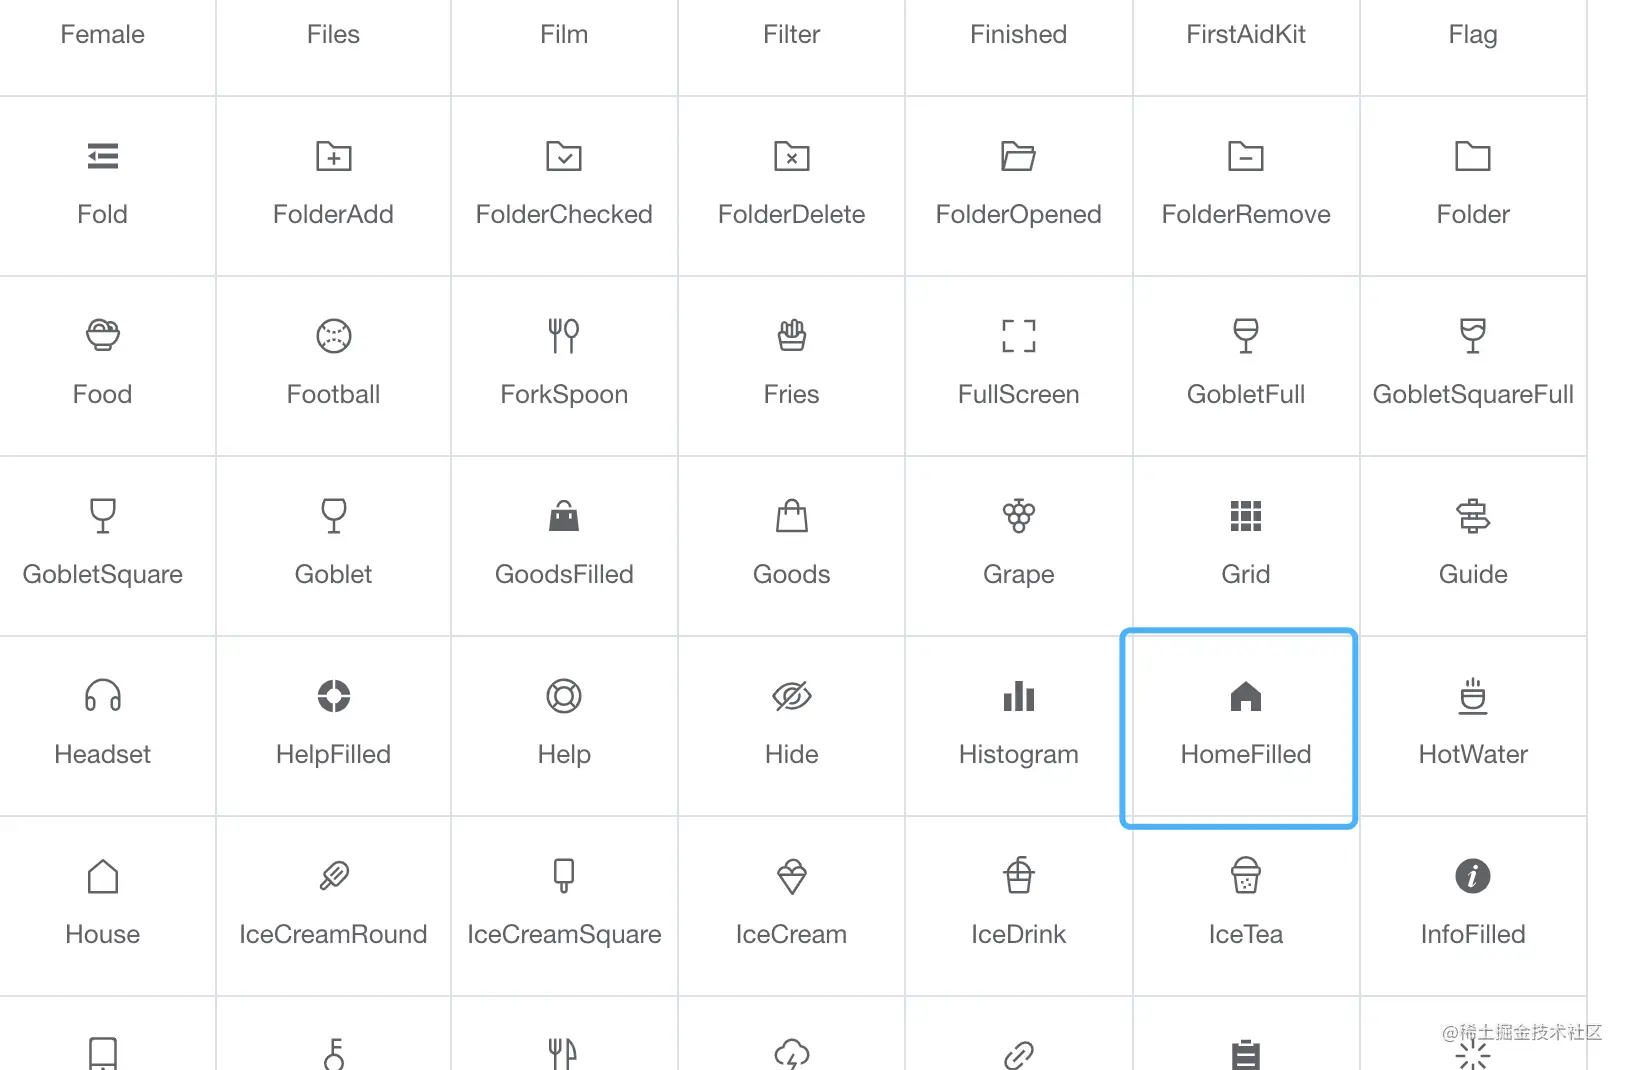
这个HomeFilled对应着 官方文档图标的名称
渲染图标
<el-icon><component :is="first.meta.icon"/></el-icon