
前言
学习目标
- 根据任意图形的变换原理,修改之前变换图案的代码,使其可以变换任意图形
知识点
- 矩阵变换
1-Object2D
整体代码如下:
import { Vector2 } from '../math/Vector2'
import { Group } from './Group'
import { Scene } from '../core/Scene'
import { EventDispatcher } from '../core/EventDispatcher'
import { Matrix3 } from '../math/Matrix3'
import { generateUUID } from '../math/MathUtils.js'
export type Object2DType = {
position?: Vector2
rotate?: number
scale?: Vector2
offset?: Vector2
boundingBox?: BoundingBox
visible?: boolean
index?: number
name?: string
parent?: Scene | Group | undefined
enableCamera?: boolean
uuid?: string
[key: string]: any
}
type BoundingBox = {
min: Vector2
max: Vector2
}
const pi2 = Math.PI * 2
class Object2D extends EventDispatcher {
// 自定义属性
[key: string]: any
// 位置
position = new Vector2()
// 旋转
rotate = 0
// 缩放
scale = new Vector2(1, 1)
// 偏移
offset = new Vector2()
// 边界盒子
boundingBox: BoundingBox = {
min: new Vector2(),
max: new Vector2(),
}
// 可见性
visible = true
// 渲染顺序
index = 0
// 名称
name = ''
// 父级
parent: Scene | Group | undefined
// 是否受相机影响-只适用于Scene的children元素
enableCamera = true
// UUID
uuid = generateUUID()
// 类型
readonly isObject2D = true
/* 本地模型矩阵 */
get matrix(): Matrix3 {
const { position, rotate, scale } = this
return new Matrix3()
.scale(scale.x, scale.y)
.rotate(rotate)
.translate(position.x, position.y)
}
/* 世界模型矩阵 */
get worldMatrix(): Matrix3 {
const { parent, matrix } = this
if (parent) {
return parent.worldMatrix.multiply(matrix)
} else {
return matrix
}
}
/* pvm 投影视图模型矩阵 */
get pvmMatrix(): Matrix3 {
const scene = this.getScene()
if (scene) {
const { camera } = scene
return new Matrix3().multiplyMatrices(camera.pvMatrix, this.worldMatrix)
} else {
return this.worldMatrix
}
}
/* 总缩放量 */
get worldScale(): Vector2 {
const { scale, parent } = this
if (parent) {
return scale.clone().multiply(parent.worldScale)
} else {
return scale
}
}
/* 先变换(缩放+旋转)后位移 */
transform(ctx: CanvasRenderingContext2D) {
const { position, rotate, scale } = this
ctx.translate(position.x, position.y)
ctx.rotate(rotate)
ctx.scale(scale.x, scale.y)
}
/* 将矩阵分解到当期对象的position, rotate, scale中 */
decomposeModelMatrix(m: Matrix3) {
const e = [...m.elements]
// 位移量
this.position.set(e[6], e[7])
// 缩放量
let sx = new Vector2(e[0], e[1]).length()
const sy = new Vector2(e[3], e[4]).length()
const det = m.determinant()
if (det < 0) {
sx = -sx
}
this.scale.set(sx, sy)
// 旋转量
let ang = Math.atan2(e[1] / sx, e[0] / sx)
if (ang < 0) {
ang += pi2
}
this.rotate = ang
}
/* 从父级中删除自身 */
remove() {
const { parent } = this
parent && parent.remove(this)
}
/* 获取场景 */
getScene(): Scene | null {
if ('isScene' in this) {
return this as unknown as Scene
} else if (this.parent) {
return this.parent.getScene()
} else {
return null
}
}
/* 绘图 */
draw(ctx: CanvasRenderingContext2D) {
if (!this.visible) {
return
}
ctx.save()
/*  矩阵变换 */
this.transform(ctx)
/* 绘制图形 */
this.drawShape(ctx)
ctx.restore()
}
/* 绘制图形-接口 */
drawShape(ctx: CanvasRenderingContext2D) {}
/* 创建路径-接口 */
crtPath(ctx: CanvasRenderingContext2D, projectionMatrix: Matrix3) {}
/* 计算边界盒子 */
computeBoundingBox() {}
}
export { Object2D }
在Object2D对象中添加了以下属性:
-
offset 图形偏移量
-
boundingBox 边界盒子
- min 盒子极小值
- max 盒子极大值
在Object2D对象中添加了以下方法:
- computeBoundingBox() 计算边界盒子,此方法会在具体的图形类中实现。
2-Img2D
将之前的Img对象更名为Img2D,避免与Image对象发音冲突。
整体代码如下:
import { Vector2 } from '../math/Vector2'
import { BasicStyle, BasicStyleType } from '../style/BasicStyle'
import { Object2D, Object2DType } from './Object2D'
import { crtPathByMatrix } from './ObjectUtils'
type ImgType = Object2DType & {
image?: CanvasImageSource
size?: Vector2
offset?: Vector2
view?: View | undefined
src?: string
style?: BasicStyleType
}
type View = {
x: number
y: number
width: number
height: number
}
class Img2D extends Object2D {
image: CanvasImageSource = new Image()
size = new Vector2(300, 150)
offset = new Vector2()
view: View | undefined
style: BasicStyle = new BasicStyle()
// 类型
readonly isImg = true
constructor(attr: ImgType = {}) {
super()
this.setOption(attr)
}
/* 属性设置 */
setOption(attr: ImgType) {
for (let [key, val] of Object.entries(attr)) {
switch (key) {
case 'src':
if (this.image instanceof Image) {
this.image.src = val
}
break
case 'style':
this.style.setOption(val)
break
default:
this[key] = val
}
}
}
/* 绘图 */
drawShape(ctx: CanvasRenderingContext2D) {
const { image, size, offset, view, style } = this
//样式
style.apply(ctx)
// 绘制图像
if (view) {
ctx.drawImage(
image,
view.x,
view.y,
view.width,
view.height,
offset.x,
offset.y,
size.x,
size.y
)
} else {
ctx.drawImage(image, offset.x, offset.y, size.x, size.y)
}
}
/* 绘制图像边界 */
crtPath(ctx: CanvasRenderingContext2D, matrix = this.pvmMatrix) {
const {
boundingBox: {
min: { x: x0, y: y0 },
max: { x: x1, y: y1 },
},
} = this
this.computeBoundingBox()
crtPathByMatrix(ctx, [x0, y0, x1, y0, x1, y1, x0, y1], matrix)
}
/* 计算边界盒子 */
computeBoundingBox() {
const {
boundingBox: { min, max },
size,
offset,
} = this
min.copy(offset)
max.addVectors(offset, size)
}
}
export { Img2D }
在上面的代码中删掉了之前与偏移矩阵相关的moMatrix、pvmoMatrix矩阵,在后面我们会把offset偏移相关的数据直接塌陷到路径、边界和控制框的绘制中。
在computeBoundingBox()方法中,基于offset和size计算的边界盒子。
在crtPath()方法中,基于边界盒子boundingBox绘制路径。
3-ControlFrame
将之前的Frame对象更名为ControlFrame,这样更严谨一些。
整体代码如下:
import { Matrix3 } from '../math/Matrix3'
import { Vector2 } from '../math/Vector2'
import { Object2D } from '../objects/Object2D'
import { crtPath, crtPathByMatrix } from '../objects/ObjectUtils'
export type State = 'scale' | 'scaleX' | 'scaleY' | 'rotate' | 'move' | null
type Leve = 'worldMatrix' | 'pvmMatrix'
type ControlFrameType = {
obj?: Object2D
level?: Leve
}
const pi2 = Math.PI * 2
let _bool: Boolean = false
//* 虚拟上下文对象 */
const ctx = document
.createElement('canvas')
.getContext('2d') as CanvasRenderingContext2D
class ControlFrame {
// 目标对象
_obj = new Object2D()
// 图案本地坐标系内的边框的顶点集合
localVertices: number[] = []
// 图案裁剪坐标系的边框的顶点集合
clipVertives: number[] = []
// 当前节点索引
nodeIndex = 0
// 本地坐标系中的中点
localCenter = new Vector2()
// 裁剪坐标系中的中点
clipCenter = new Vector2()
// 路径变换矩阵
matrix = new Matrix3()
// 要把路径变换到哪个坐标系中,默认裁剪坐标系
level: Leve = 'pvmMatrix'
// 描边色
strokeStyle = '#558ef0'
// 填充色
fillStyle = '#fff'
constructor(attr: ControlFrameType = {}) {
for (let [key, val] of Object.entries(attr)) {
this[key] = val
}
}
get obj() {
return this._obj
}
set obj(val) {
this._obj = val
val.computeBoundingBox()
this.updateVertives()
}
/* 获取对面节点 */
get localOpposite(): Vector2 {
return this.getOpposite('localVertices')
}
get clipOpposite(): Vector2 {
return this.getOpposite('clipVertives')
}
getOpposite(type: 'localVertices' | 'clipVertives') {
const { nodeIndex } = this
const vertices = this[type]
const ind = (nodeIndex + 8) % 16
return new Vector2(vertices[ind], vertices[ind + 1])
}
/* 更新localVertices和clipVertives*/
updateVertives() {
const {
clipVertives: cv,
localCenter,
clipCenter,
obj,
level,
obj: {
boundingBox: {
min: { x: x0, y: y0 },
max: { x: x1, y: y1 },
},
},
} = this
const xm = (x0 + x1) / 2
const ym = (y0 + y1) / 2
this.localVertices = [
x0,y0,xm,y0,x1,y0,x1,ym,x1,y1,xm,y1,x0,y1,x0,ym,
]
const lv = this.localVertices
this.matrix = obj[level]
for (let i = 0, len = lv.length; i < len; i += 2) {
const { x, y } = new Vector2(lv[i], lv[i + 1]).applyMatrix3(this.matrix)
cv[i] = x
cv[i + 1] = y
}
localCenter.copy(
new Vector2(lv[0], lv[1]).lerp(new Vector2(lv[8], lv[9]), 0.5)
)
clipCenter.copy(
new Vector2(cv[0], cv[1]).lerp(new Vector2(cv[8], cv[9]), 0.5)
)
}
draw(ctx: CanvasRenderingContext2D) {
this.updateVertives()
const {
obj: {
size,
offset: { x: ox, y: oy },
},
clipVertives: fv,
clipCenter,
matrix,
strokeStyle,
fillStyle,
} = this
/* 图案尺寸的一半 */
const [halfWidth, halfheight] = [size.width / 2, size.height / 2]
/* 绘图 */
ctx.save()
ctx.strokeStyle = strokeStyle
ctx.fillStyle = fillStyle
/* 矩形框 */
ctx.beginPath()
crtPath(ctx, [fv[0], fv[1], fv[4], fv[5], fv[8], fv[9], fv[12], fv[13]])
ctx.closePath()
ctx.stroke()
/* 矩形节点 */
const { elements: e } = matrix
// 矩阵内的缩放量
const sx = new Vector2(e[0], e[1]).length()
const sy = new Vector2(e[3], e[4]).length()
// 节点尺寸,消去缩放量
const pointSize = new Vector2(8 / sx, 8 / sy)
const [w, h] = [pointSize.x / 2, pointSize.y / 2]
// 绘制节点
ctx.beginPath()
for (let y = 0; y < 3; y++) {
for (let x = 0; x < 3; x++) {
if (y === 1 && x === 1) {
continue
}
const [bx, by] = [halfWidth * x, halfheight * y]
crtPathByMatrix(
ctx,
[
ox + bx - w,
oy + by - h,
ox + bx + w,
oy + by - h,
ox + bx + w,
oy + by + h,
ox + bx - w,
oy + by + h,
],
matrix,
true
)
}
}
ctx.fill()
ctx.stroke()
/* 中点 */
ctx.beginPath()
ctx.arc(clipCenter.x, clipCenter.y, 5, 0, pi2)
ctx.fill()
ctx.stroke()
ctx.restore()
}
/* 获取变换状态 */
getMouseState(mp: Vector2): State {
const { clipVertives: fv } = this
/* 对角线距离 */
const diagonal = new Vector2(fv[0] - fv[8], fv[1] - fv[9]).length()
/* 判断缩放的距离 */
const scaleDist = Math.min(24, diagonal / 3)
/* x,y缩放 */
for (let i = 0, len = fv.length; i < len; i += 4) {
if (new Vector2(fv[i], fv[i + 1]).sub(mp).length() < scaleDist) {
this.nodeIndex = i
return 'scale'
}
}
/* y向缩放 */
ctx.save()
ctx.lineWidth = scaleDist
ctx.beginPath()
crtPath(ctx, [fv[0], fv[1], fv[4], fv[5]])
_bool = ctx.isPointInStroke(mp.x, mp.y)
ctx.restore()
if (_bool) {
this.nodeIndex = 2
return 'scaleY'
}
ctx.save()
ctx.lineWidth = scaleDist
ctx.beginPath()
crtPath(ctx, [fv[8], fv[9], fv[12], fv[13]])
_bool = ctx.isPointInStroke(mp.x, mp.y)
ctx.restore()
if (_bool) {
this.nodeIndex = 10
return 'scaleY'
}
/* x向缩放 */
ctx.save()
ctx.lineWidth = scaleDist
ctx.beginPath()
crtPath(ctx, [fv[12], fv[13], fv[0], fv[1]])
_bool = ctx.isPointInStroke(mp.x, mp.y)
ctx.restore()
if (_bool) {
this.nodeIndex = 14
return 'scaleX'
}
ctx.save()
ctx.lineWidth = scaleDist
ctx.beginPath()
crtPath(ctx, [fv[4], fv[5], fv[8], fv[9]])
_bool = ctx.isPointInStroke(mp.x, mp.y)
ctx.restore()
if (_bool) {
this.nodeIndex = 6
return 'scaleX'
}
/* 移动 */
ctx.beginPath()
crtPath(ctx, fv)
if (ctx.isPointInPath(mp.x, mp.y)) {
return 'move'
}
/* 旋转 */
ctx.save()
ctx.lineWidth = 80
ctx.beginPath()
crtPath(ctx, fv, true)
_bool = ctx.isPointInStroke(mp.x, mp.y)
ctx.restore()
if (_bool) {
return 'rotate'
}
/* 无状态 */
return null
}
}
export { ControlFrame }
ControlFrame对象的属性做了以下调整:
- obj:原本的img属性,可以为所有的Object2D图形绘制控制框。
- level:要把路径变换到哪个坐标系中,可以取值’pvmMatrix’或’worldMatrix’,其中已经没有了偏移矩阵,这是因为偏移矩阵已经塌陷到了路径的绘制方法里,因此在把路径变换到某个坐标系中时,已经不需要偏移矩阵。
- localVertices:图案本地坐标系内的边框的顶点集合,便于相应顶点的获取。
- clipVertives:图案裁剪坐标系内的边框的顶点集合,便于相应顶点的获取。
- localCenter:图形在本地坐标系中的中点。
- clipCenter:图形在裁剪坐标系中的中点。
- nodeIndex:当前节点索引
- localOpposite:本地坐标系内的对点
- clipOpposite:裁剪坐标系内的对点
localVertices,clipVertives,localCenter,clipCenter会通过updateVertives() 方法进行更新,updateVertives()方法会在每次绘图时执行。
nodeIndex会在getMouseState()方法中获取获取鼠标状态时同步更新,nodeIndex会作为通过get 取值器获取localOpposite,clipOpposite的依据。
在draw()方法中绘制边界时,便是基于boundingBox绘制的,其offset偏移值已经算入其中。
4-Object2DTransformer
Object2DTransformer是之前的ImgTransformer,表示对任意Object2D对象的变换。
其整体代码如下:
import { Matrix3 } from '../math/Matrix3'
import { Vector2 } from '../math/Vector2'
import { Object2D } from '../objects/Object2D'
class Object2DTransformer {
/* 本地变换数据 */
localMatrix = new Matrix3()
localRotate = 0
localScale = new Vector2(1, 1)
localPosition = new Vector2()
/* 本地坐标系内的变换基点 */
origin = new Vector2()
/* 相对变换量 */
relativePosition = new Vector2()
relativeRotate = 0
relativeScale = new Vector2(1, 1)
/* 等量旋转时的旋转弧度 */
uniformRotateAng = Math.PI / 12
/* 基点变换后的矩阵 */
get matrix() {
const {
relativePosition,
relativeRotate,
relativeScale,
origin,
localPosition,
localScale,
localRotate,
} = this
const m2 = new Matrix3().makeTranslation(-origin.x, -origin.y)
const m3 = new Matrix3()
.scale(localScale.x * relativeScale.x, localScale.y * relativeScale.y)
.rotate(localRotate + relativeRotate)
.translate(
localPosition.x + relativePosition.x,
localPosition.y + relativePosition.y
)
return m3.clone().multiply(m2)
}
/* 设置基点 */
setOrigin(localOrigin: Vector2) {
this.origin.copy(localOrigin)
this.localPosition.copy(localOrigin.clone().applyMatrix3(this.localMatrix))
}
/* 根据Object2D对象获取本地矩阵数据 */
setLocalMatrixDataByObject2D(obj: Object2D) {
this.localMatrix.copy(obj.matrix)
this.localScale.copy(obj.scale)
this.localRotate = obj.rotate
this.localPosition.copy(obj.position)
}
/* 清理相对数据 */
clearRelativeMatrixData() {
this.relativePosition.set(0, 0)
this.relativeRotate = 0
this.relativeScale.set(1, 1)
}
/* 获取相对缩放量 */
getRelativeScale(start2Orign: Vector2, end2Orign: Vector2) {
const a = end2Orign.clone().rotate(-this.localRotate)
const b = start2Orign.clone().rotate(-this.localRotate)
return new Vector2(a.x / b.x, a.y / b.y)
}
/* 双向自由缩放 */
scale0(start2Orign: Vector2, end2Orign: Vector2) {
this.relativeScale.copy(this.getRelativeScale(start2Orign, end2Orign))
}
/* 双向等比缩放 */
scale1(start2Orign: Vector2, end2Orign: Vector2) {
const { x, y } = this.getRelativeScale(start2Orign, end2Orign)
this.relativeScale.set((x + y) / 2)
}
/* 单向自由缩放 */
scaleX0(start2Orign: Vector2, end2Orign: Vector2) {
this.doScaleSigleDir('x', start2Orign, end2Orign)
}
scaleY0(start2Orign: Vector2, end2Orign: Vector2) {
this.doScaleSigleDir('y', start2Orign, end2Orign)
}
doScaleSigleDir(dir: 'x' | 'y', start2Orign: Vector2, end2Orign: Vector2) {
const s = this.getRelativeScale(start2Orign, end2Orign)
this.relativeScale[dir] = s[dir]
}
/* 单向等比缩放 */
scaleX1(start2Orign: Vector2, end2Orign: Vector2) {
this.doUniformScaleSigleDir('x', start2Orign, end2Orign)
}
scaleY1(start2Orign: Vector2, end2Orign: Vector2) {
this.doUniformScaleSigleDir('y', start2Orign, end2Orign)
}
doUniformScaleSigleDir(
dir: 'x' | 'y',
start2Orign: Vector2,
end2Orign: Vector2
) {
const s = this.getRelativeScale(start2Orign, end2Orign)
this.relativeScale.set(s[dir])
}
/* 自由旋转 */
rotate0(start2Orign: Vector2, end2Orign: Vector2) {
this.relativeRotate = end2Orign.angle() - start2Orign.angle()
}
/* 等量旋转 */
rotate1(start2Orign: Vector2, end2Orign: Vector2) {
const { uniformRotateAng } = this
const ang = end2Orign.angle() - start2Orign.angle()
this.relativeRotate =
Math.floor((ang + uniformRotateAng / 2) / uniformRotateAng) *
uniformRotateAng
}
/* 自由移动 */
move0(dragStart: Vector2, dragEnd: Vector2) {
this.relativePosition.subVectors(dragEnd, dragStart)
}
/* 正交移动 */
move1(dragStart: Vector2, dragEnd: Vector2) {
// 作业
}
}
export { Object2DTransformer }
Object2DTransformer对象是基于上一章的任意图形的变换建立的,其中的本地变换数据、本地坐标系内的变换基点和相对变换量都是与上一章相吻合的。
Object2DTransformer对象会通过matrix取值器返回图形最新的本地模型矩阵。
/* 基点变换后的矩阵 */
get matrix() {
const {
relativePosition,
relativeRotate,
relativeScale,
origin,
localPosition,
localScale,
localRotate,
} = this
const m2 = new Matrix3().makeTranslation(-origin.x, -origin.y)
const m3 = new Matrix3()
.scale(localScale.x * relativeScale.x, localScale.y * relativeScale.y)
.rotate(localRotate + relativeRotate)
.translate(
localPosition.x + relativePosition.x,
localPosition.y + relativePosition.y
)
return m3.clone().multiply(m2)
}
在变换之前,setLocalMatrixDataByObject2D(obj: Object2D)方法会从图形中获取本地模型矩阵数据。
setLocalMatrixDataByObject2D(obj: Object2D) {
this.localMatrix.copy(obj.matrix)
this.localScale.copy(obj.scale)
this.localRotate = obj.rotate
this.localPosition.copy(obj.position)
}
setOrigin(localOrigin: Vector2)方法可以设置变换基点,并将当前图形的本地模型矩阵乘以origin,算出最新的本地模型矩阵的位移量localPosition。
setOrigin(localOrigin: Vector2) {
this.origin.copy(localOrigin)
this.localPosition.copy(localOrigin.clone().applyMatrix3(this.localMatrix))
}
在变换图形的时候,scale0(),scale1(),rotate0(),rotate1(),move0()等方法会根据鼠标数据,计算相对变换量。
5-TransformControler
TransformControler对象是之前的ImgControler,表示对任意图形的变换控制。
其整体代码如下:
import { Vector2 } from '../math/Vector2'
import { Object2D } from '../objects/Object2D'
import { Matrix3 } from '../math/Matrix3'
import { MouseShape } from './MouseShape'
import { ControlFrame, State } from './ControlFrame'
import { Object2DTransformer } from './Object2DTransformer'
type TranformData = {
position: Vector2
rotate: number
scale: Vector2
}
// change 事件
const _changeEvent = { type: 'change' }
class TransformControler extends Object2D {
// 要控制的Object2D对象
_obj: Object2D | null = null
// 图案控制框
frame = new ControlFrame()
// 鼠标状态
mouseState: State = null
// 鼠标的裁剪坐标位
clipMousePos = new Vector2()
// 鼠标图案
mouseShape = new MouseShape({
vertives: this.frame.clipVertives,
center: this.frame.clipCenter,
mousePos: this.clipMousePos,
})
// 渲染顺序
index = Infinity
// 不受相机影响
enableCamera = false
// 控制状态
controlState: State = null
// 拖拽起始位与结束位
dragStart = new Vector2()
dragEnd = new Vector2()
//拖拽起始位减基点
start2Orign = new Vector2()
//拖拽结束位减基点
end2Orign = new Vector2()
// alt 键是否按下
_altKey = false
// shift 键是否按下
shiftKey = false
/* 变换器 */
transformer = new Object2DTransformer()
// 父级pvm逆矩阵
parentPvmInvert = new Matrix3()
// 选中图案时的暂存数据,用于取消变换
controlStage: TranformData = {
position: new Vector2(),
scale: new Vector2(1, 1),
rotate: 0,
}
get obj() {
return this._obj
}
set obj(val) {
if (this._obj === val) {
return
}
this._obj = val
if (val) {
this.frame.obj = val
this.saveTransformData()
this.transformer.setLocalMatrixDataByObject2D(val)
this.dispatchEvent({ type: 'selected', obj: val })
} else {
this.mouseState = null
this.controlState = null
}
this.dispatchEvent(_changeEvent)
}
get altKey() {
return this._altKey
}
set altKey(val) {
if (this._altKey === val) {
return
}
this._altKey = val
const { controlState } = this
if (controlState) {
// 清理相对变换
this.transformer.clearRelativeMatrixData()
// 重置基点
this.setOrigin()
// 设置起点到基点向量
this.start2Orign.subVectors(
this.dragStart,
this.transformer.localPosition
)
// 终点到基点的向量
this.end2Orign.subVectors(this.dragEnd, this.transformer.localPosition)
// 重新变换
this.relativeTransform(controlState)
}
this.dispatchEvent(_changeEvent)
}
/* 鼠标按下 */
pointerdown(obj: Object2D | null, mp: Vector2) {
if (!this.mouseState) {
this.obj = obj
if (!obj) {
return
}
}
// 更新鼠标裁剪坐标位
this.clipMousePos.copy(mp)
// 获取鼠标状态
this.mouseState = this.frame.getMouseState(mp)
// 更新parentPvmInvert
const pvmInvert = this.obj?.parent?.pvmMatrix.invert()
pvmInvert && this.parentPvmInvert.copy(pvmInvert)
if (this.mouseState) {
// 拖拽起始位(图案父级坐标系)
this.dragStart.copy(mp.clone().applyMatrix3(this.parentPvmInvert))
// 控制状态等于鼠标状态
this.controlState = this.mouseState
// 设置本地矩阵数据
this.obj && this.transformer.setLocalMatrixDataByObject2D(this.obj)
// 设置基点
this.setOrigin()
// 设置起点到基点向量
this.start2Orign.subVectors(
this.dragStart,
this.transformer.localPosition
)
}
this.dispatchEvent(_changeEvent)
}
/* 鼠标移动 */
pointermove(mp: Vector2) {
if (!this.obj) {
return
}
const {
end2Orign,
dragEnd,
clipMousePos,
controlState,
frame,
transformer: { localPosition },
} = this
// 更新鼠标裁剪坐标位
clipMousePos.copy(mp)
if (controlState) {
dragEnd.copy(mp.clone().applyMatrix3(this.parentPvmInvert))
end2Orign.subVectors(dragEnd, localPosition)
this.relativeTransform(controlState)
} else {
// 获取鼠标状态
this.mouseState = frame.getMouseState(mp)
}
this.dispatchEvent(_changeEvent)
}
/* 鼠标抬起 */
pointerup() {
const { obj, controlState, transformer } = this
if (!obj || !controlState) {
return
}
transformer.setLocalMatrixDataByObject2D(obj)
transformer.clearRelativeMatrixData()
this.controlState = null
this.dispatchEvent(_changeEvent)
}
/* 键盘按下 */
keydown(key: string, altKey: boolean, shiftKey: boolean) {
this.shiftKey = shiftKey
this.altKey = altKey
if (this.obj) {
switch (key) {
case 'Escape':
// 将选中图案时存储的图案变换数据controlStage 拷贝到图案中
this.cancleTransform()
// 图案置空
this.obj = null
break
case 'Enter':
// 图案置空
this.obj = null
break
case 'Delete':
this.obj.remove()
this.obj = null
break
}
}
this.dispatchEvent(_changeEvent)
}
/* 键盘抬起 */
keyup(altKey: boolean, shiftKey: boolean) {
this.shiftKey = shiftKey
this.altKey = altKey
this.dispatchEvent(_changeEvent)
}
/* 相对变换 */
relativeTransform(controlState: string) {
const { transformer, start2Orign, dragStart, dragEnd, end2Orign, obj } =
this
const key = controlState + Number(this.shiftKey)
if (!obj || !transformer[key]) {
return
}
if (controlState === 'move') {
transformer[key](dragStart, dragEnd)
} else {
transformer[key](start2Orign, end2Orign)
}
this.dispatchEvent({ type: 'transformed', obj })
}
/*  设置基点(图案父级坐标系) */
setOrigin() {
const {
altKey,
controlState,
frame: { localCenter, localOpposite },
transformer,
} = this
let curOrigin =
altKey || controlState === 'rotate' ? localCenter : localOpposite
transformer.setOrigin(curOrigin)
}
/* 存储本地模型矩阵的变换数据 */
saveTransformData() {
const { obj, controlStage } = this
obj && this.passTransformData(obj, controlStage)
}
/* 取消变换,恢复图形变换前的状态 */
cancleTransform() {
const { obj, controlStage } = this
obj && this.passTransformData(controlStage, obj)
}
/* 把一个对象的变换数据传递给另一个对象 */
passTransformData(obj0: TranformData, obj1: TranformData) {
const { position, scale, rotate } = obj0
obj1.position.copy(position)
obj1.scale.copy(scale)
obj1.rotate = rotate
}
/* 绘图 */
draw(ctx: CanvasRenderingContext2D) {
const { obj } = this
if (!obj) {
return
}
const { frame, mouseShape, mouseState, controlState, transformer } = this
// 设置本地模型矩阵
controlState && obj.decomposeModelMatrix(transformer.matrix)
/* 绘制外框 */
frame.draw(ctx)
/* 绘制鼠标图案 */
mouseShape.draw(ctx, mouseState)
}
}
export { TransformControler }
其中的变换逻辑我之前都说过,大家可以结合注释自己看一下。
接下来我们先使用图案做一下变换测试。
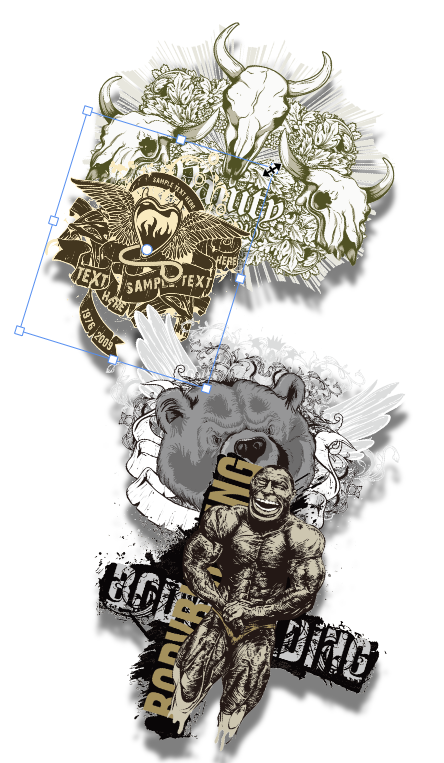
6-变换图案
参照之间的ImgControler.vue,建立一个TransformControler.vue,用于测试刚才建立的变换组件。
整体代码如下:
<script setup lang="ts">
import { ref, onMounted } from 'vue'
import { TransformControler } from '../lmm/controler/TransformControler'
import { OrbitControler } from '../lmm/controler/OrbitControler'
import { Scene } from '../lmm/core/Scene'
import { Vector2 } from '../lmm/math/Vector2'
import { Group } from '../lmm/objects/Group'
import { ImagePromises, SelectObj } from '../lmm/objects/ObjectUtils'
import { Object2D } from '../lmm/objects/Object2D'
import { Img2D } from '../lmm/objects/Img2D'
// 获取父级属性
defineProps({
size: { type: Object, default: { width: 0, height: 0 } },
})
// 鼠标样式
const cursor = ref('default')
// 对应canvas 画布的Ref对象
const canvasRef = ref<HTMLCanvasElement>()
/* 场景 */
const scene = new Scene()
/* 相机轨道控制器 */
const orbitControler = new OrbitControler(scene.camera)
/* 图案控制器 */
const transformControler = new TransformControler()
scene.add(transformControler)
const images: HTMLImageElement[] = []
for (let i = 1; i < 5; i++) {
const image = new Image()
image.src = `https://yxyy-pandora.oss-cn-beijing.aliyuncs.com/stamp-images/${i}.png`
images.push(image)
}
const imagePromises = ImagePromises(images)
/* 鼠标滑上的图案 */
let imgHover: Object2D | null
/* 选择图案的方法 */
const selectObj = SelectObj(scene)
/* 图形集合 */
const group = new Group()
scene.add(group)
/* 所有图片加载完成 */
function onAllImageLoaded() {
/* 添加图像 */
group.add(
...images.map((image, i) => {
const size = new Vector2(image.width, image.height).multiplyScalar(0.3)
return new Img2D({
image,
position: new Vector2(0, i * 150 - 250),
offset: new Vector2(-size.x / 2, -size.y / 2),
rotate: 0.3,
size,
name: 'img-' + i,
style: {
shadowColor: 'rgba(0,0,0,0.5)',
shadowBlur: 5,
shadowOffsetY: 20,
},
})
})
)
/* 渲染 */
scene.render()
}
/* 按需渲染 */
orbitControler.addEventListener('change', () => {
scene.render()
})
transformControler.addEventListener('change', () => {
scene.render()
})
/* 鼠标按下*/
function pointerdown(event: PointerEvent) {
const { button, clientX, clientY } = event
const mp = scene.clientToClip(clientX, clientY)
switch (button) {
case 0:
imgHover = selectObj(group.children, mp)
transformControler.pointerdown(imgHover, mp)
updateMouseCursor()
break
case 1:
orbitControler.pointerdown(clientX, clientY)
break
}
}
/* 鼠标移动 */
function pointermove(event: PointerEvent) {
const { clientX, clientY } = event
const mp = scene.clientToClip(clientX, clientY)
orbitControler.pointermove(clientX, clientY)
transformControler.pointermove(mp)
imgHover = selectObj(group.children, mp)
updateMouseCursor()
}
/* 滑动滚轮缩放 */
function wheel({ deltaY }: WheelEvent) {
orbitControler.doScale(deltaY)
}
/* 鼠标抬起 */
window.addEventListener('pointerup', (event: PointerEvent) => {
switch (event.button) {
case 0:
transformControler.pointerup()
break
case 1:
orbitControler.pointerup()
break
}
})
/* 键盘按下 */
window.addEventListener(
'keydown',
({ key, altKey, shiftKey }: KeyboardEvent) => {
transformControler.keydown(key, altKey, shiftKey)
updateMouseCursor()
}
)
/* 键盘抬起 */
window.addEventListener('keyup', ({ altKey, shiftKey }: KeyboardEvent) => {
transformControler.keyup(altKey, shiftKey)
})
/* 更新鼠标样式 */
function updateMouseCursor() {
if (transformControler.mouseState) {
cursor.value = 'none'
} else if (imgHover) {
cursor.value = 'pointer'
} else {
cursor.value = 'default'
}
}
onMounted(() => {
const canvas = canvasRef.value
if (canvas) {
scene.setOption({ canvas })
Promise.all(imagePromises).then(onAllImageLoaded)
}
})
</script>
<template>
<canvas
ref="canvasRef"
:style="{ cursor }"
:width="size.width"
:height="size.height"
@pointerdown="pointerdown"
@pointermove="pointermove"
@wheel="wheel"
></canvas>
</template>
<style scoped>
#text {
position: absolute;
left: 15px;
top: 15px;
}
</style>
测过其效果,没啥问题:

总结
在当前的变换逻辑里,因为把偏移矩阵塌陷到了图形的路径和边框之中,而基点也是在图形的本地坐标系内定义的,所以整体的变换逻辑会更加的简洁、明了。
下一章我们会建立一个文字对象,然后变换一下试试。
原文链接:https://juejin.cn/post/7246716050942394405 作者:李伟_Li慢慢