
1. 功能背景
在很多管理界面或者数据展示界面中,Antd Tree结构用于展示层次化数据。通常情况下,用户可能需要修改这些数据。为了提升用户体验,允许用户直接在Tree视图上通过双击节点快速编辑,然后自动保存修改内容,是一个非常实用的功能。
2. 功能实现的基本思路
实现上述功能的基本思路包括以下几个步骤:
- 监控双击事件:捕捉用户对Tree节点的双击动作,并识别出被双击的节点。
- 显示输入框以编辑:在节点位置显示一个输入框,让用户可以输入新的内容。
- 处理失焦事件:当用户完成编辑并点击输入框外的任何位置时,自动保存修改,并隐藏输入框。
- 更新Tree数据:根据用户的输入更新Tree的数据源,以反映更改。
3. jQuery和Lodash中方法的使用
虽然在React项目中使用jQuery不是推荐的做法,但在某些情况下,为了快速实现特定的DOM操作,我们可能会用到它。例如,通过jQuery快速修改输入框的样式和位置。而Lodash提供了强大的数据处理能力,如通过get和set方法来方便地获取和更新嵌套对象的属性值。
4. 双击时input框出现和失焦时input框消失的原理
在React组件的useEffect中,我添加了对dblclick事件的监听。当事件触发时,显示并定位输入框。通过设置输入框(<input>)的样式使其出现在双击的节点上,并将节点当前的文本值赋给输入框。当输入框失焦(即用户点击输入框外的地方)时,隐藏输入框,并通过前文提到的changeText函数更新Tree的数据源。
useEffect(() => {
    const dblClickHandle = e => {
        const { target } = e;
        if (!target) {
            return;
        }
        showEditor(target);
    }

    window.addEventListener('dblclick', dblClickHandle);

    return () => void window.removeEventListener('dblclick', dblClickHandle);
}, [renderData]);
在useEffect中监听了全局的dblclick事件,并在事件发生时调用showEditor函数,这个函数负责显示并定位输入框。
const showEditor = target => {
    setShowIpt(true);
    const size = target.getBoundingClientRect();
    const { x, y, height, width } = size;

    if (ref.current) {
        const ipt = ref.current;
        $(ipt).css({
            display: 'block',
            position: 'absolute',
            top: `${y}px`,
            left: `${x}px`,
            minWidth: `${width}px`,
            minHeight: `${height}px`,
        });
        ipt.value = target.innerText;
        ipt.focus();
    }
}
而在input框失去焦点的时候自动隐藏这个input:
<input
    style={{display: 'none'}}
    ref={ref}
    onInput={(e)=>{
        if(e.target) changeText(e.target.value)
    }}
    onBlur={()=>{
       if( ref.current) ref.current.style.display = 'none';
    }}
/>
5. 输入框位置的确定
通过getBoundingClientRect方法获取被双击节点的位置和尺寸,然后使用jQuery的.css()方法动态设置输入框的位置和大小,以确保输入框能够准确覆盖在被编辑的节点上。
6. 被点击元素的确定以及使用key查询此元素内容对应的数据
通过onSelect事件(此事件为Ant Design的Tree组件中暴露的API)获取被选中(或被双击)节点的key值,然后使用这个key值来定位和更新数据源中对应的节点数据。
const onSelect = (selectedKeys, info) => {
    console.log('selected', selectedKeys, info);
    if (!selectedKeys.length) return;
    currentKey.current = selectedKeys[0];
};
在onSelect事件处理函数中获取了被选中节点的key值,并保存到currentKey.current,这个key值后续用于定位和更新数据。
7. 数据传递或者修改原理
利用Lodash的set函数来更新节点的title属性。通过将节点路径转换为Lodash能够理解的路径字符串(例如,0-0-2转换为0.children.2),然后使用这个路径和新的节点值来更新renderData状态,从而触发组件重新渲染并显示更新后的内容。
const changeText = value => {
    const path = currentKey.current;
    const _path = path.split('-').join('.children.');
    const rst = get([...renderData], _path);
    const new_renderData = set([...renderData], _path, merge({}, rst, { title: value }));
    setRenderData(new_renderData);
}
8. 完整代码
// FDSTree.js
import React, { useState, useEffect, useRef } from 'react';
import { DownOutlined } from '@ant-design/icons';
import { Input, Tree } from 'antd';
import { set, get, merge } from 'lodash';
import $ from 'jquery';
const FDSTree = (props) => {
const { data } = props;
const {
title,
introduction,
scope,
frs,
uid,
error,
pr,
tca,
sm,
dhp,
backup,
support,
accessibility,
} = data;
const [renderData, setRenderData] = useState([]);
const [showIpt, setShowIpt] = useState(false);
const ref = useRef(null);
const currentKey = useRef('');
const showEditor = target => {
setShowIpt(true);
const size = target.getBoundingClientRect();
const { x, y, height, width } = size;
if (ref.current) {
const ipt = ref.current;
$(ipt).css({
display: 'block',
position: 'absolute',
top: `${y}px`,
left: `${x}px`,
minWidth: `${width}px`,
minHeight: `${height}px`,
})
ipt.value = target.innerText;
ipt.focus();
}
}
const changeText = value => {
const path = currentKey.current;
const _path = path.split('-').join('.children.');
const rst = get([...renderData], _path);
const new_renderData = set([...renderData], _path, { ...rst, ...{ title: value } })
setRenderData(new_renderData);
}
useEffect(() => {
const dblClickHandle = e => {
const { target } = e;
if (!target) {
return;
}
showEditor(target);
}
window.addEventListener('dblclick', dblClickHandle);
return () => void window.removeEventListener('dblclick', dblClickHandle);
}, [renderData])
useEffect(() => {
const _renderData = {
title: title.placeholder,
key: '0',
children: [
{
title: '1. Introduction',
key: '0-0',
},
{
title: '2. Scope',
key: '0-1',
children: scope.map((v, i) => {
return ({
title: v.placeholder,
key: `0-1-${i}`,
})
})
},
{
title: '3. Functional Requirements',
key: '0-2',
children: frs.map((v, i) => {
return ({
title: v.titlePlaceHolder,
key: `0-2-${i}`,
children: v.items.map((_v, j) => {
return ({
title: _v.placeholder.split('\n')[0],
key: `0-2-${i}-${j}`,
})
})
})
})
},
{
title: '4. User Interface Design',
key: '0-3',
children: uid.map((v, i) => {
return ({
title: v.titlePlaceHolder,
key: `0-3-${i}`,
})
})
},
{
title: '5. Error Handling',
key: '0-4',
},
{
title: '6. Performance Requirements',
key: '0-5',
},
{
title: '7. Accessibility',
key: '0-6',
},
{
title: '8. Testing Criteria',
key: '0-7',
},
{
title: '9. Security Measures',
key: '0-8',
},
{
title: '10. Data Handling and Privacy',
key: '0-9',
},
{
title: '11. Backup and Recovery',
key: '0-10',
},
{
title: '12. Documentation and Support',
key: '0-11',
},
],
};
setRenderData([_renderData]);
}, [
title,
introduction,
scope,
frs,
uid,
error,
pr,
tca,
sm,
dhp,
backup,
support,
accessibility,
]);
const onSelect = (selectedKeys, info) => {
console.log('selected', selectedKeys, info);
if (!selectedKeys.length) return;
currentKey.current = selectedKeys[0];
};
return (
<>
<Tree
showLine
switcherIcon={<DownOutlined />}
defaultExpandedKeys={['0-0-0']}
onSelect={onSelect}
treeData={renderData}
/>
<input
style={{display: 'none'}}
ref={ref}
onInput={(e)=>{
if(e.target) changeText(e.target.value)
}}
onBlur={()=>{
if( ref.current) ref.current.style.display = 'none';
}}
/>
</>
);
};
export default FDSTree;
可优化的点
1. 回车表示输入完毕
增加键入回车表示修改完毕的修改:
            <input
style={{ display: 'none' }}
ref={ref}
onInput={(e) => {
if (e.target) changeText(e.target.value)
}}
onBlur={() => {
if (ref.current) ref.current.style.display = 'none';
}}
onKeyDown={(e) => {
const { key } = e;
if (key === "Enter" && ref.current) ref.current.style.display = 'none';
}}
/>
2. 对响应的tag做筛选
虽然使用了代理,但明显不是所有的tag都需要响应双击事件,所以对响应的元素根据特殊的类名进行筛选:
        const dblClickHandle = e => {
const { target } = e;
if (!target) {
return;
}
if (target.classList.contains('ant-tree-title')) showEditor(target);
}
3. 考虑屏幕滚动
骨架图应该是sticky定位的,因此在考虑input框的定位的时候需要加上纵向window的滚动距离:
    const showEditor = target => {
setShowIpt(true);
const size = target.getBoundingClientRect();
const { x, y, height, width } = size;
if (ref.current) {
const ipt = ref.current;
$(ipt).css({
display: 'block',
position: 'absolute',
top: `${y + window.scrollY}px`,
left: `${x}px`,
minWidth: `${width}px`,
minHeight: `${height}px`,
})
ipt.value = target.innerText;
ipt.focus();
}
}
4. 监听屏幕的滚动事件
如果骨架屏是采用sticky布局样式的,就需要随着window的滚动适配动态输入框的y向位置,为此需要监听window上面的scroll事件,随着事件的触发动态修改input框的位置,以带来更好的体验。
const sllClickHandle = e => {
console.log(1)
if (!ref.current) {
return;
}
const ipt = ref.current;
console.log('ipt.style.display:', ipt.style.display)
console.log('ipt.style.display:', currentY.current)
if (ipt.style.display==='block') {
$(ipt).css({
top: `${currentY.current + window.scrollY}px`,
})
}
}
// 事件监听和取消监听
window.addEventListener('dblclick', dblClickHandle);
window.addEventListener('scroll', sllClickHandle);
return () => {
window.removeEventListener('dblclick', dblClickHandle);
window.removeEventListener('scroll', sllClickHandle);
}
本文展示了如何在React环境中结合antd的Tree组件、jQuery和Lodash来实现一个双击编辑节点并失焦回填的功能。尽管在React项目中直接操作DOM并不是一种推荐的做法,但在某些特定场景下,适当结合传统的jQuery操作可以为用户提供更加流畅和直观的交互体验。
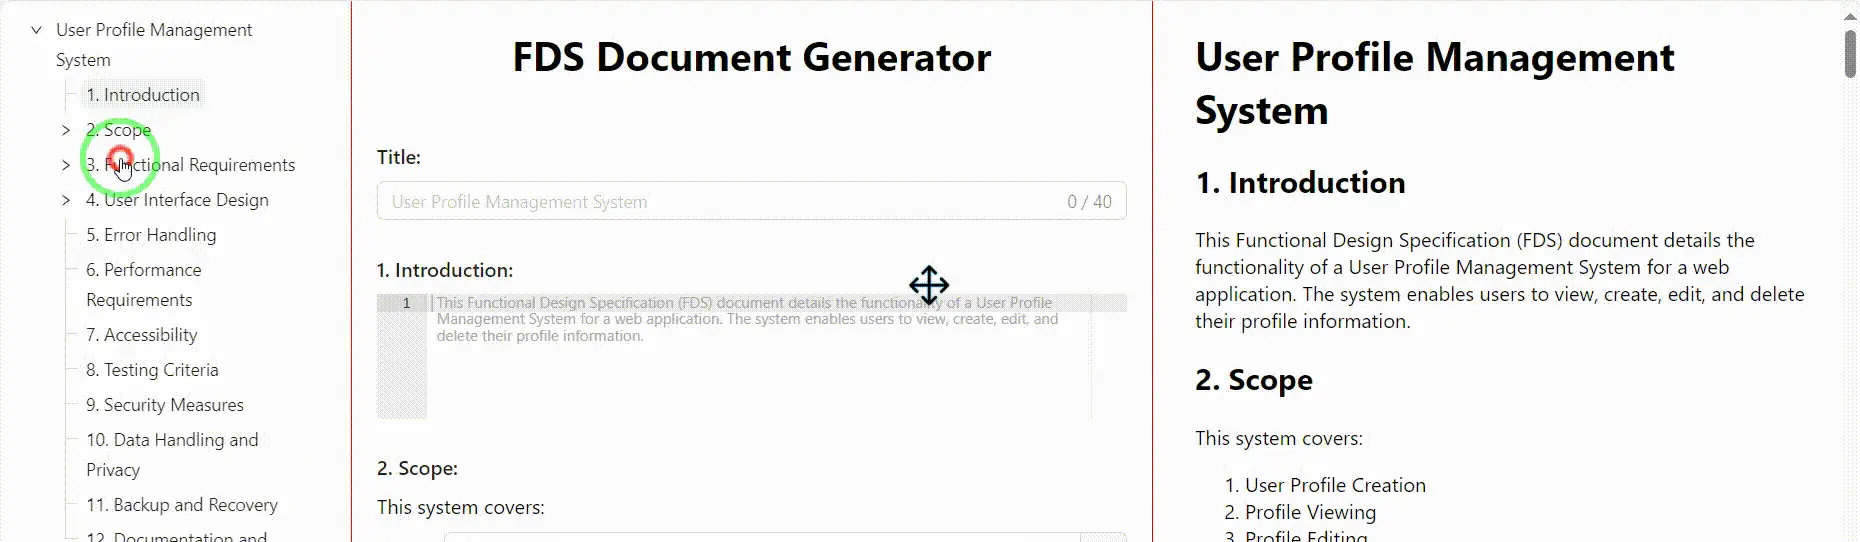
效果展示
最后来看下效果展示:

原文链接:https://juejin.cn/post/7330178014134272010 作者:慕仲卿