
一、Ajax初步
1、服务器端渲染
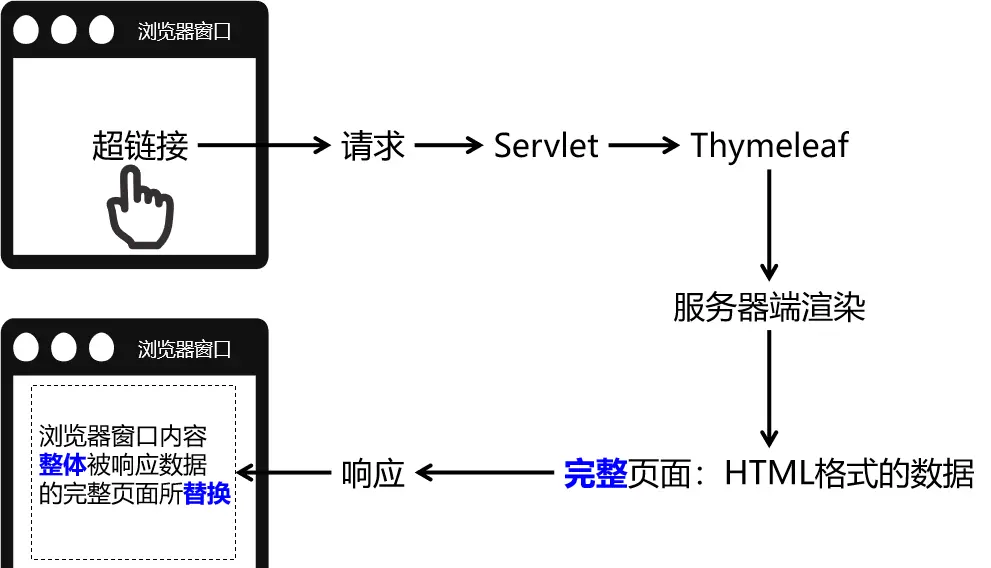

2、Ajax渲染(局部更新)

3、Ajax名词解释
- 名称:Asynchronous JavaScript and XML(异步的 JavaScript 和 XML)
4、对比
| 非Ajax | Ajax | |
|---|---|---|
| 发出请求 | 超链接、表单 | JavaScript代码 |
| 响应格式 | HTML页面 | 数据本身(通常是JSON格式) |
| 页面渲染 | 后端渲染 | 前端渲染 |
| 用户体验 | 中规中矩 | 较好 |
开发方式:
- 服务器端渲染:页面渲染主要由服务器端渲染实现
- 前后端分离:所有请求和响应都基于Ajax技术实现
- 分工明确:前端工程师不必关心数据的来源;后端工程师不必关心数据的显示
- 代码解耦:前端代码和后端代码充分解耦,分别开发,易于维护
二、Axios框架
框架简介
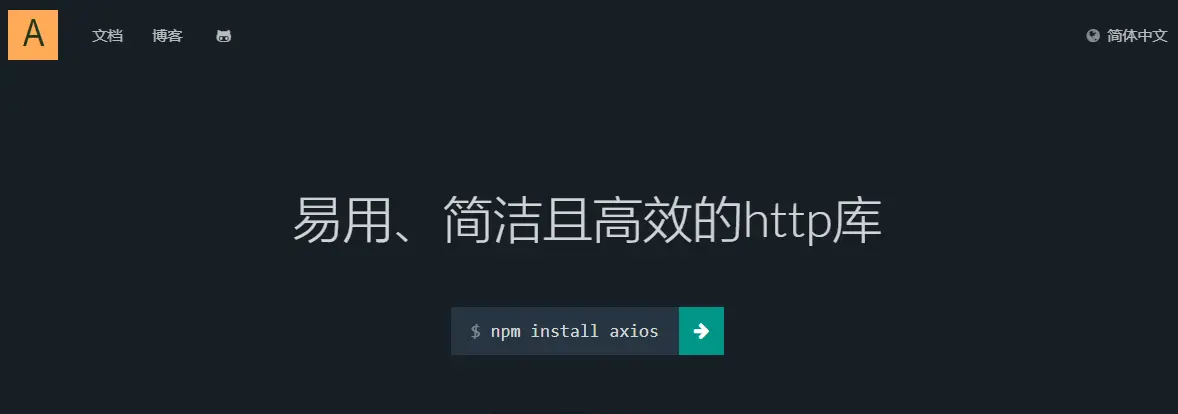
官方文档:www.axios-http.cn/docs/intro
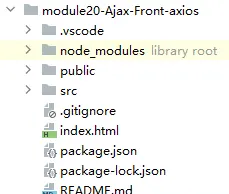
搭建环境
# 创建前端工程
npm create vite

# 进入工程目录
cd xxx

# 安装vue
npm install

# 安装axios
npm install axios@1.5.0
操作1:前端发送请求
<script setup>

  import axios from 'axios';

  let operation01SendRequest = ()=>{
    axios({
      "url":"http://localhost:8080/demo/AjaxServlet/operation01SendRequest", // 请求的目标地址
      "method":"post" // 请求方式
    });
  };
</script>

<template>
  <div>
    <p><button @click="operation01SendRequest()">操作1:发送请求</button></p>
  </div>
</template>
操作2:后端接收请求
①创建后端工程
- 创建module
- 添加web.xml
- 添加Tomcat依赖
- 创建Servlet(继承ServletPathParent)
②创建具体方法处理请求
public class AjaxServlet extends ServletPathParent {
    protected void operation01SendRequest(
            HttpServletRequest request,
            HttpServletResponse response) throws ServletException, IOException {
        System.out.println("AjaxServlet 接收到了 Ajax 请求");
    }
}
操作3:解决跨域问题
①概念
- 在A网站下发送Ajax请求,访问B网站,这样的操作有安全隐患
- 以下情况我们判断为跨域:
- IP地址不同
- A网站:47.36.211.6
- B网站:39.106.55.47
- 域名不同(二级域名不同)
- A网站:www.jd.com
- 下面情况是二级域名相同,三级域名不同,不属于跨域
- product.jd.com
- cart.jd.com
- order.jd.com
- B网站:www.tmall.com
- A网站:www.jd.com
- 端口号不同
- A网站:www.jd.com:8000
- B网站:www.jd.com:9000
- 协议不同
- A网站:http协议
- B网站:https协议
- IP地址不同
②解决办法
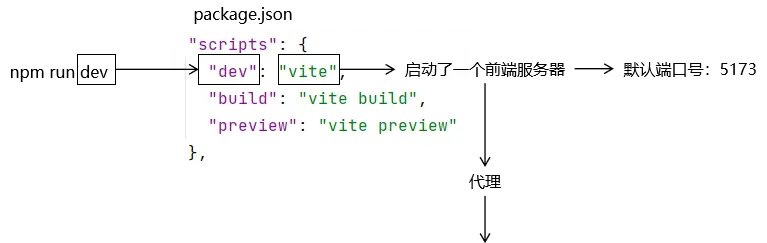
- 在前端解决:在vite.config.js文件配置代理(使用Vite服务器做一个代理)
- 在后端解决:CORS(把跨域的网址信息加入到后端服务器的信任列表中)
找到vite.config.js文件:
增加配置:
import { defineConfig } from 'vite'
import vue from '@vitejs/plugin-vue'

// https://vitejs.dev/config/
export default defineConfig({
  plugins: [vue()],
  server: {   // 针对 Vite 启动的服务器进行配置
    proxy: {  // 配置 Vite 服务器的代理功能
      "/api": { // 使用代理功能的请求的地址的前缀
        target: 'http://localhost:8080',  // 目标访问地址
        rewrite: (path) => path.replace(/^\/api/, ''),  // 把 /api 从请求地址中去掉
      }
    }
  }
})
注意:做了上面这个配置,以后所有前端请求都必须以/api开头!
③修改Ajax请求地址
"url":"/api/demo/AjaxServlet/operation01SendRequest"
操作4:后端返回数据:普通文本
protected void operation01SendRequest(
        HttpServletRequest request,
        HttpServletResponse response) throws ServletException, IOException {
    System.out.println("AjaxServlet 接收到了 Ajax 请求");

    response.setContentType("text/html;charset=UTF-8");
    response.getWriter().write("快到中午吃饭的时间了!");
}
操作5:前端接收服务器端返回的响应
axios({
  "url":"/api/demo/AjaxServlet/operation01SendRequest", // 请求的目标地址
  "method":"post" // 请求方式
}).then((response)=>{ // then() 函数在参数中传入了一个回调函数
  // 回调函数在服务器返回成功响应的时候调用
  // 回调函数的参数 response 就是对服务器返回响应的封装
  console.log(response);

  // 访问 response 对象的 data 属性,获得服务器返回响应的响应体
  console.log(response.data);
});
操作6:后端返回数据:JSON格式
①JSON格式回顾
- 最外层的符号
- {}:JSON对象
- []:JSON数组
- JSON对象
- 逗号分开的一组键值对
- 键和值之间使用冒号隔开
- JSON数组
- 逗号分开的一组值
- 键的类型:固定就是字符串
- 值的类型:
- 基本数据类型
- 引用类型
- JSON对象
- JSON数组
- JSON对象:Java的Map类型、Java的实体类类型
- JSON数组:Java的List集合、Set集合、数组
②后端操作JSON数据的类库
- 阿里:FastJSON
- XXX:Jackson
- 谷歌:Gson
- Java类型 –> JSON字符串
- JSON字符串 –> Java类型
③后端代码
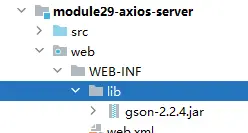
- 首先在后端工程中导入 Gson jar包
protected void operation02ReceiveJSON(HttpServletRequest request, HttpServletResponse response) throws ServletException, IOException {
    // 1、创建集合
    List<Company> companyList = new ArrayList<>();

    // 2、在集合中添加对象
    companyList.add(new Company(1, "name01", 100.00));
    companyList.add(new Company(2, "锤子科技", 200.00));
    companyList.add(new Company(3, "name03", 300.00));

    // 3、创建 Gson 对象(前提是把 gson-2.2.4.jar 导入)
    Gson gson = new Gson();

    // 4、把 Java 类型转换为 JSON 字符串
    String json = gson.toJson(companyList);

    // 5、为 JSON 格式的响应体设置内容类型
    response.setContentType("application/json;charset=UTF-8");

    // 6、把 JSON 字符串作为响应体返回给前端
    response.getWriter().write(json);

}
④前端代码
axios({
  "url":"/api/demo/AjaxServlet/operation02ReceiveJSON",
  "method":"get"
});
操作7:前端从JSON数据中读取属性
axios({
  "url":"/api/demo/AjaxServlet/operation02ReceiveJSON",
  "method":"get"
}).then((response)=>{
  // 获取响应体对象
  let companyList = response.data;

  // ※axios框架,底层已经帮我们把 JSON 字符串转换为了 JSON 数组
  // JSON.parse(JSON字符串) 解析得到 JSON 对象或数组
  // 所以对于服务器端返回的 JSON 数据,直接操作即可
  // JSON 对象:JSON 对象.属性名
  // JSON 数组:JSON 数组[index]
  // 遍历数组
  for (let i = 0; i < companyList.length; i++) {
    let company = companyList[i];
    console.log(company.companyId);
    console.log(company.companyName);
    console.log(company.companyPrice);
  }
});
操作8:前端发送请求参数
①前端代码
axios({
  "url":"/api/demo/AjaxServlet/operation03SendParam",
  "method":"post",
  "params":{
    "userName":"pig2023",
    "userPwd":"smallPig"
  }
});
即使是使用POST请求方式,axios在通过params发送请求参数的情况下,仍然是把请求参数放在URL地址后面

②后端代码
protected void operation03SendParam(HttpServletRequest request, HttpServletResponse response) throws ServletException, IOException {
    // 1、接收请求参数
    String userName = request.getParameter("userName");
    String userPwd = request.getParameter("userPwd");

    // 2、打印
    System.out.println("userName = " + userName);
    System.out.println("userPwd = " + userPwd);

}
操作9:前端发送JSON数据
①前端代码
axios({
  "url":"/api/demo/AjaxServlet/operation04SendJSON",
  "method":"post",
  "data":{
    "companyId": 8,
    "companyName": "小猪猪肉联厂",
    "companyPrice": 100000.00
  }
});
②请求体
请求体是JSON格式:

以POST请求方式提交普通表单:

所以服务器端接收这样的参数就不能再使用传统的方式了:request.getParameter(“xxx”)
③后端代码
protected void operation04SendJSON(HttpServletRequest request, HttpServletResponse response) throws ServletException, IOException {
    // 1、通过 request 对象获取能够读取请求体的字符输入流
    BufferedReader reader = request.getReader();

    // 2、创建 StringBuffer 对象用于保存请求体读取过程中每一行的数据
    StringBuffer stringBuffer = new StringBuffer("");

    // 3、声明一个字符串类型变量,用来临时保存读取到的每一行
    String line = null;

    // 4、循环读取请求体
    while ((line = reader.readLine()) != null) {
        stringBuffer.append(line);
    }

    // 5、把 StringBuffer 转为 String 类型
    String requestBody = stringBuffer.toString();
    System.out.println("requestBody = " + requestBody);

    // 6、创建 Gson 对象
    Gson gson = new Gson();

    // 7、从请求体 JSON 字符串中解析得到 Java 类型
    Company company = gson.fromJson(requestBody, Company.class);
    System.out.println("company = " + company);

}
操作10:后端处理请求失败
axios({
  "url":"/api/demo/AjaxServlet/not/found"
}).catch((axiosError)=>{ // 服务器端处理请求失败,执行 catch() 里面设置的回调函数

  // 回调函数的参数这里会传入 axios 封装的错误信息对象
  console.log(axiosError);

  // 访问 axiosError 的 response 属性得到响应对象
  console.log(axiosError.response);

  // 访问响应对象的 status 属性得到响应状态码
  console.log(axiosError.response.status);

  // 访问响应对象的 statusText 属性得到响应状态码的说明信息
  console.log(axiosError.response.statusText);

});
操作11:封装统一响应结果
①提出问题
- 不同功能模块:返回的数据不同
- 不同开发人员:返回的数据不同
造成:前端工程师针对每个请求的响应都需要进行识别,增加了工作量
②解决方案
开发一个通用的类型,从而保证项目中每个模块、每个功能、每个请求返回的数据,结构都是一样的
- 后端声明一个类:Result
- 每个请求处理的结果,封装到Result对象中
- 把Result对象转换为JSON字符串
- 把JSON字符串作为响应返回给前端
③声明Result
package com.atguigu.demo.entity;

/**
 * 开发一个通用的类型,从而保证项目中每个模块、每个功能、每个请求返回的数据,结构都是一样的
 */
public class Result<T> {

    // 声明常量,表示请求处理成功这个状态
    public static final String SUCCESS = "SUCCESS";

    // 声明常量,表示请求处理失败这个状态
    public static final String FAILED = "FAILED";

    // 请求处理的结果,是成功还是失败
    private String processResult;

    // 查询结果
    private T queryResultData;

    // 请求处理失败时,错误消息
    private String errorMessage;

    /**
     * 工具方法:处理请求成功,没有查询结果需要返回
     * @return
     */
     public static Result ok() {

        Result result = new Result();

        result.setProcessResult(SUCCESS);

        return result;
    }

    /**
     * 工具方法:处理请求成功,并且有查询结果需要封装
     * @param queryResultData
     * @return
     * @param <T>
     */
    public static <T> Result<T> ok(T queryResultData) {

        Result result = new Result();

        result.setProcessResult(SUCCESS);
        result.setQueryResultData(queryResultData);

        return result;
    }

    /**
     * 工具方法:处理请求失败
     * @param errorMessage
     * @return
     */    public static Result failed(String errorMessage) {

        Result result = new Result();

		result.setProcessResult(FAILED);
        result.setErrorMessage(errorMessage);

        return result;
    }

    public String getProcessResult() {
        return processResult;
    }

    public void setProcessResult(String processResult) {
        this.processResult = processResult;
    }

    public T getQueryResultData() {
        return queryResultData;
    }

    public void setQueryResultData(T queryResultData) {
        this.queryResultData = queryResultData;
    }

    public String getErrorMessage() {
        return errorMessage;
    }

    public void setErrorMessage(String errorMessage) {
        this.errorMessage = errorMessage;
    }

    @Override
    public String toString() {
        return "Result{" +
                "processResult='" + processResult + '\'' +
                ", queryResultData=" + queryResultData +
                ", errorMessage='" + errorMessage + '\'' +
                '}';
    }

    public Result(String processResult, T queryResultData, String errorMessage) {
        this.processResult = processResult;
        this.queryResultData = queryResultData;
        this.errorMessage = errorMessage;
    }

    public Result() {
    }
}
操作12:封装工具方法从请求体读取JSON数据
/**
 * 当请求体是 JSON 格式时,使用这个工具方法,把请求体转换为 Java 类型
 * @param request
 * @param clazz
 * @return
 * @param <T>
 */
public static <T> T readRequestBody(HttpServletRequest request, Class<T> clazz) {

    try {
        // 1、通过请求对象获取字符输入流
        BufferedReader reader = request.getReader();

        // 2、创建 stringBuilder 对象
        StringBuilder stringBuilder = new StringBuilder();

        // 3、声明变量,接收读取到的每一行
        String line = null;

        // 4、读取请求体
        while ((line = reader.readLine()) != null) {
            stringBuilder.append(line);
        }

        // 5、把 StringBuffer 转换为 String
		String requestBody = stringBuilder.toString();

        // 6、创建 Gson 对象
        Gson gson = new Gson();

        // 7、把 JSON 字符串解析为 Java 对象
        T t = gson.fromJson(requestBody, clazz);

        // 8、返回解析得到的 Java 对象
        return t;

    } catch (IOException e) {
        throw new RuntimeException(e);
    }
}
操作13:封装工具方法把Result对象作为响应体返回
/**
 * 每一次返回响应时,Servlet 方法只需要创建 Result 对象即可,当前方法负责把 Result 对象转换为 JSON
 * 然后作为响应体返回
 * @param result
 * @param response
 */
public static void generateResponseBody(Result result, HttpServletResponse response) {

    // 0、判空保护
    if (result == null || response == null) {
        throw new RuntimeException("result或response对象不能为空!");
    }

    try {
        // 1、给响应体设置内容类型
        response.setContentType("application/json;charset=UTF-8");

        // 2、把 Result 对象转换为 JSON 字符串
        Gson gson = new Gson();
        String responseBody = gson.toJson(result);

        // 3、返回响应体
        response.getWriter().write(responseBody);
    } catch (IOException e) {
        throw new RuntimeException(e);
    }

}
原文链接:https://juejin.cn/post/7343452738159149071 作者:小黄说Java