
基于React+Umi4+Three.js 实现3D模型数据可视化
项目效果
💡 Tips:需要对threejs 的基础知识有一定了解,代码中尽量使用ts以及中文注释了。
- 使用umi4+antd快速搭建项目框架。Umi是可扩展的企业级前端应用框架,也是蚂蚁集团的底层前端框架,Umi 以路由为基础,同时支持配置式路由和约定式路由,保证路由的功能完备,并以此进行功能扩展。然后配以生命周期完善的插件体系,覆盖从源码到构建产物的每个生命周期,支持各种功能扩展和业务需求。
- 参考开源项目对threejs的api进行基本的封装。建模并不是 Three.js 最核心和擅长的,Three.js 最核心功能是进行 浏览器 3D 场景渲染和交互。
项目地址:github.com/Gzx97/umi-t… 项目效果: 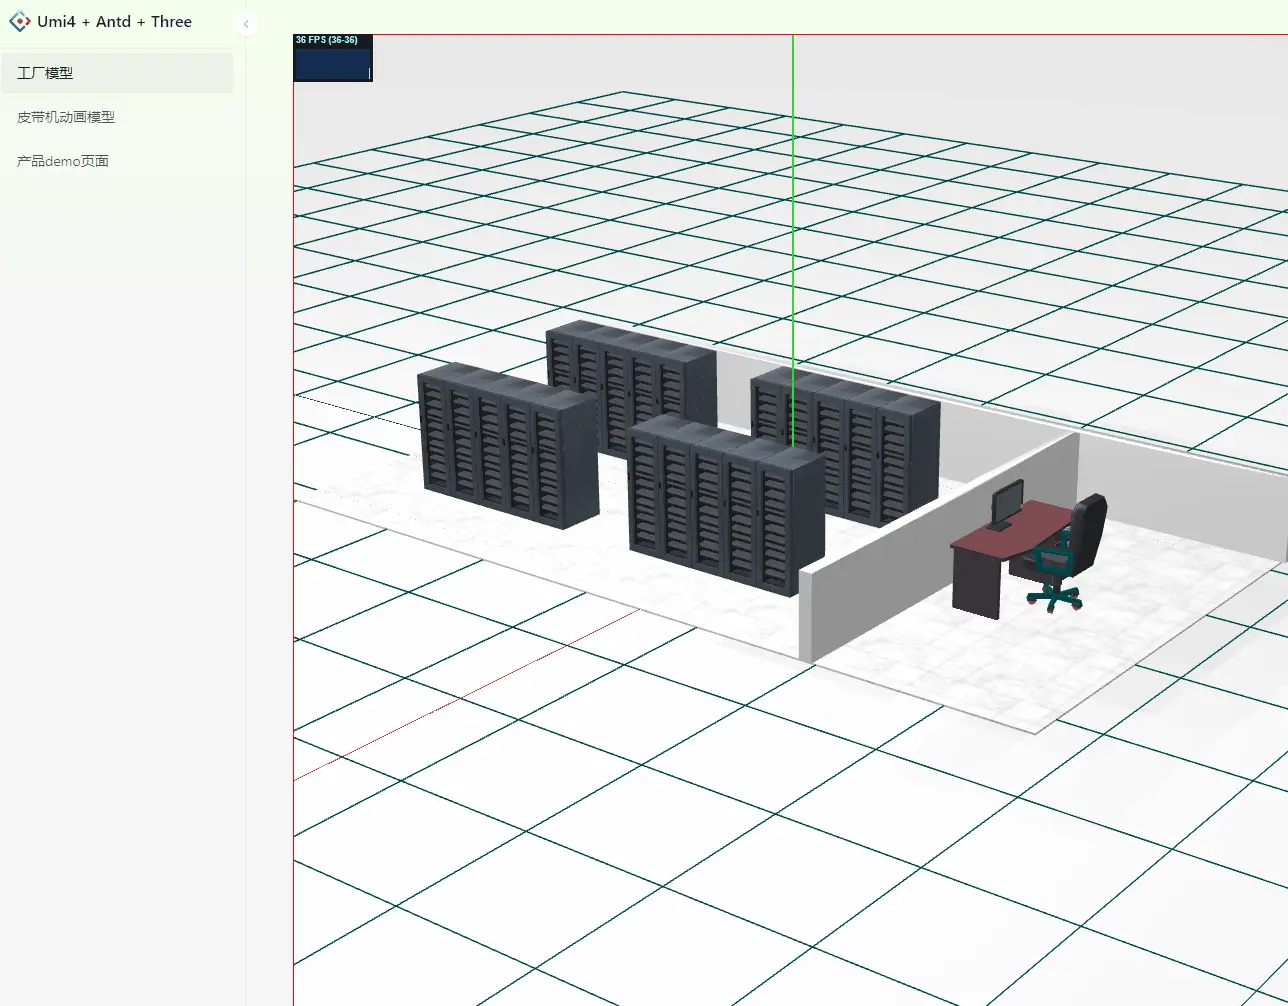

对于Threejs基本功能的封装
场景Viewer类
我们会在Viewer中封装好 初始化场景、摄像机、渲染器、灯光、鼠标监听,坐标轴、性能面板等。在业务代码中就不需要关注这一部分逻辑。业务代码中我们只需要关注数据与交互即可。对于相关逻辑,代码中皆有注释说明,这一部分代码的编写以及使用需要具备一定3D的基础知识,建议先去使用Threejs创建一个场景实现一两个demo之后就明白这一步的必要性了。
import {
Scene,
PerspectiveCamera,
AxesHelper,
WebGLRenderer,
Camera,
SRGBColorSpace,
AmbientLight,
Raycaster,
Vector2,
} from "three";
import * as THREE from "three";
import mitt, { type Emitter } from "mitt";
import Events from "./Events";
import { throttle } from "lodash";
import { OrbitControls } from "three/examples/jsm/controls/OrbitControls.js";
import Stats from "three/examples/jsm/libs/stats.module.js";
export default class Viewer {
public id: string;
public viewerDom!: HTMLElement;
public scene!: Scene;
public camera!: PerspectiveCamera;
public renderer!: WebGLRenderer;
public controls!: OrbitControls;
public skyboxs!: SkyBoxs;
public animateEventList: any[] = [];
public statsControls!: Stats;
public raycaster!: Raycaster;
public mouse!: Vector2;
public emitter!: Emitter<any>;
public mouseEvent: MouseEvent | undefined;
public raycasterObjects: THREE.Object3D[] = [];
public isDestroy = false;
constructor(id: string) {
this.id = id;
this.initViewer();
}
// TODO:场景、相机、灯光等
}
首先我们把threejs渲染图像的基本要素在Viewer中初始化出来:
private initScene() {
this.scene = new Scene();
}
private initCamera() {
// 渲染相机
this.camera = new PerspectiveCamera(
25,
window.innerWidth / window.innerHeight,
// 1,
1,
2000
);
//设置相机位置
this.camera.position.set(4, 2, -3);
//设置相机方向
this.camera.lookAt(0, 0, 0);
}
private initControl() {
this.controls = new OrbitControls(
this.camera as Camera,
this.renderer?.domElement
);
this.controls.enableDamping = false;
this.controls.screenSpacePanning = false; // 定义平移时如何平移相机的位置 控制不上下移动
this.controls.minDistance = 2;
this.controls.maxDistance = 1000;
this.controls.addEventListener("change", () => {
this.renderer.render(this.scene, this.camera);
});
}
private initLight() {
const ambient = new AmbientLight(0xffffff, 0.6);
this.scene.add(ambient);
const light = new THREE.DirectionalLight(0xffffff);
light.position.set(0, 200, 100);
light.castShadow = true;
light.shadow.camera.top = 180;
light.shadow.camera.bottom = -100;
light.shadow.camera.left = -120;
light.shadow.camera.right = 400;
light.shadow.camera.near = 0.1;
light.shadow.camera.far = 400;
// 设置mapSize属性可以使阴影更清晰,不那么模糊
light.shadow.mapSize.set(1024, 1024);
this.scene.add(light);
}
然后使用渲染器把场景以及添加在场景的元素渲染出来。
private initRenderer() {
// 获取画布dom
this.viewerDom = document.getElementById(this.id) as HTMLElement;
// 初始化渲染器
this.renderer = new WebGLRenderer({
logarithmicDepthBuffer: true,
antialias: true, // true/false表示是否开启反锯齿
alpha: true, // true/false 表示是否可以设置背景色透明
precision: "mediump", // highp/mediump/lowp 表示着色精度选择
premultipliedAlpha: true, // true/false 表示是否可以设置像素深度(用来度量图像的分辨率)
// preserveDrawingBuffer: false, // true/false 表示是否保存绘图缓冲
// physicallyCorrectLights: true, // true/false 表示是否开启物理光照
});
this.renderer.clearDepth(); //清除深度缓冲区。在渲染之前,这通常用于重置深度缓冲区,以确保正确的深度测试
this.renderer.shadowMap.enabled = true;
this.renderer.outputColorSpace = SRGBColorSpace; // 可以看到更亮的材质,同时这也影响到环境贴图。
this.viewerDom.appendChild(this.renderer.domElement);
}
因为需要进行鼠标事件监听,所以把鼠标以及射线事件封装进来,并且通过 setRaycasterObjects 方法,传递一个触发鼠标事件的模型范围,可以避免在整个场景中都去触发鼠标事件。这里也可以用一个 Map 去存不同模型的事件,在取消订阅时再移除。
/**注册鼠标事件监听 */
public initRaycaster() {
this.raycaster = new Raycaster();
const initRaycasterEvent: Function = (
eventName: keyof HTMLElementEventMap
): void => {
//这里的container就是画布所在的div,也就是说,这个是要拿整个scene所在的容器来界定的
let getBoundingClientRect = this.viewerDom.getBoundingClientRect();
let offsetWidth = this.viewerDom.offsetWidth;
let offsetHeight = this.viewerDom.offsetHeight;
const funWrap = throttle((event: any) => {
this.mouseEvent = {
...event,
//真正的鼠标相对于画布的位置
x: event.clientX - getBoundingClientRect.left,
y: event.clientY - getBoundingClientRect.top,
};
this.mouse.x =
((event.clientX - getBoundingClientRect.left) / offsetWidth) * 2 - 1;
this.mouse.y =
-((event.clientY - getBoundingClientRect.top) / offsetHeight) * 2 + 1;
this.emitter.emit(
(Events as any)[eventName].raycaster,
this.getRaycasterIntersectObjects()
);
}, 50);
this.viewerDom.addEventListener(eventName, funWrap, false);
};
initRaycasterEvent("click");
initRaycasterEvent("dblclick");
initRaycasterEvent("mousemove");
}
/**自定义鼠标事件触发的范围,给定一个模型组,对给定的模型组鼠标事件才生效 */
public setRaycasterObjects(objList: THREE.Object3D[]): void {
this.raycasterObjects = objList;
}
private getRaycasterIntersectObjects(): THREE.Intersection[] {
if (!this.raycasterObjects.length) return [];
this.raycaster.setFromCamera(this.mouse, this.camera);
// console.log(this.raycaster.intersectObjects(this.raycasterObjects, true));
return this.raycaster.intersectObjects(this.raycasterObjects, true);
}
除了这些基础的功能,还可以添加性能面板、坐标轴、新增地板场景、天空场景等方法,可以根据实际需求灵活编写运用。
模型加载 ModelLoder
模型的加载我们需要用的threejs里面的,GLTFLoader、DRACOLoader 这两个类。 模型加载器 ModelLoder 初始化的时候需要把 Viewer 的实例传进去。 需要注意的是,需要把 draco 从 node_modules 拷贝到项目的 public 目录中去。
import { GLTFLoader } from "three/examples/jsm/loaders/GLTFLoader.js";
import { DRACOLoader } from "three/examples/jsm/loaders/DRACOLoader.js";
import BaseModel from "../BaseModel";
import type Viewer from "../Viewer";
type LoadModelCallbackFn<T = any> = (arg: T) => any;
/**模型加载器 */
export default class ModelLoder {
protected viewer: Viewer;
private gltfLoader: GLTFLoader;
private dracoLoader: DRACOLoader;
constructor(viewer: Viewer, dracolPath = "/draco/") {
this.viewer = viewer;
this.gltfLoader = new GLTFLoader();
this.dracoLoader = new DRACOLoader();
// 提供一个DracLoader实例来解码压缩网格数据
// 没有这个会报错 dracolPath 默认放在public文件夹当中
this.dracoLoader.setDecoderPath(dracolPath);
this.gltfLoader.setDRACOLoader(this.dracoLoader);
}
/**模型加载到场景 */
public loadModelToScene(
url: string,
callback: LoadModelCallbackFn<BaseModel>
) {
this.loadModel(url, (model) => {
this.viewer.scene.add(model.object);
callback && callback(model);
});
}
private loadModel(url: string, callback: LoadModelCallbackFn<BaseModel>) {
this.gltfLoader.load(url, (gltf) => {
const baseModel = new BaseModel(gltf, this.viewer);
callback && callback(baseModel);
});
}
}
import type { Object3DExtends } from "@/types";
import * as THREE from "three";
import type { GLTF } from "three/examples/jsm/loaders/GLTFLoader.js";
import type { Material } from "three";
import { clone } from "three/examples/jsm/utils/SkeletonUtils.js";
import type Viewer from "../Viewer";
import type { Animate } from "../Viewer";
export default class BaseModel {
protected viewer: Viewer;
public gltf: GLTF;
public object: THREE.Group;
/**模型原始材质 */
public originMaterials: Material[] = [];
public isSaveMaterial = false;
public animaIndex = -1;
public mixer!: THREE.AnimationMixer;
public clock: THREE.Clock;
public animaObject!: Animate;
constructor(gltf: GLTF, viewer: Viewer) {
this.gltf = gltf;
this.viewer = viewer;
this.object = gltf.scene || gltf;
this.clock = new THREE.Clock();
}
/**
* 设置模型比例
* @param x 可以只填写一个参数
* @param y 纵轴缩放
* @param z 横轴缩放
*/
public setScalc(x: number, y?: number, z?: number) {
this.object.scale.set(x, y || x, z || x);
}
public getLength() {
const box = new THREE.Box3();
box.setFromObject(this.object);
const size = box.getSize(new THREE.Vector3());
return size;
}
/**
* 设置模型动画
* @param i 选择模型动画进行播放
*/
public startAnima(i = 0) {
this.animaIndex = i;
if (!this.mixer) this.mixer = new THREE.AnimationMixer(this.object);
if (this.gltf.animations.length < 1) return;
this.mixer.clipAction(this.gltf.animations[i]).play();
// 传入参数需要将函数与函数参数分开,在运行时填入
this.animaObject = {
fun: this.updateAnima,
content: this,
};
this.viewer.addAnimate(this.animaObject);
}
private updateAnima(e: any) {
e.mixer.update(e.clock.getDelta());
}
/**
* 克隆模型
* @param x
* @param y
* @param z
* @returns {*}
*/
public cloneModel([x, y, z] = [0, 0, 0]) {
const newScene = { ...this.gltf };
const newModel = clone(this.object);
newModel.position.set(x, y, z);
this.viewer.scene.add(newModel);
newScene.scene = newModel as any;
return new BaseModel(newScene, this.viewer);
}
/**
* 开启模型阴影 数组中移除阴影
*/
public openCastShadow(names = []) {
this.gltf.scene.traverse((model: Object3DExtends) => {
if (model.isMesh && !names.includes(model.name as never)) {
//它会在渲染对象之前检查每一帧对象是否位于相机的视锥体中。 如果设置为 false,则即使对象不在相机的视锥体中,也会在每一帧进行渲染。
model.frustumCulled = false;
model.castShadow = true; //对象是否渲染成阴影贴图。
}
});
}
/**设置模型颜色 */
public setColor(color = "yellow", opacity = 0.5) {
if (!this.isSaveMaterial) this.originMaterials = [];
this.gltf.scene.traverse((model: Object3DExtends) => {
if (model.isMesh) {
if (!this.isSaveMaterial)
this.originMaterials.push(model.material as Material);
model.material = new THREE.MeshPhongMaterial({
side: THREE.DoubleSide,
transparent: true,
depthTest: false,
depthWrite: true, // 无法被选择,鼠标穿透
color: new THREE.Color(color),
opacity: opacity,
});
}
});
this.isSaveMaterial = true;
}
/**设置模型材质 */
public setMaterial(material = new THREE.MeshBasicMaterial()) {
if (!this.isSaveMaterial) this.originMaterials = [];
this.gltf.scene.traverse((model: Object3DExtends) => {
if (model.isMesh) {
if (!this.isSaveMaterial)
this.originMaterials.push(model.material as Material);
model.material = material;
}
});
this.isSaveMaterial = true;
}
// 还原模型材质
public setDefault() {
let i = 0;
this.gltf.scene.traverse((model: Object3DExtends) => {
if (model.isMesh) {
model.material = this.originMaterials[i];
i++;
}
});
}
}
使用方式
使用这些封装好的方法,可以实现加载外部glb/gltf的模型文件,并且可以播放文件动画,可以根据模型的结构对相应的模块进行交互操作,包含报警、信息展示、模型部分显示隐藏等交互操作。
import React, { useEffect, useRef, useState } from "react";
import * as THREE from "three";
import Viewer, { Animate } from "@/modules/Viewer";
import ModelLoader from "@/modules/ModelLoder";
import BoxHelperWrap from "@/modules/BoxHelperWrap";
import styles from "./index.less";
import Floors from "@/modules/Floors";
import { checkNameIncludes, findParent } from "@/utils";
import Event from "@/modules/Viewer/Events";
import { Object3DExtends } from "@/types";
import Popover from "./components/Popover";
const PAGE_ID = "FACTORY_CONTAINER";
const ThreeDemo: React.FC = () => {
const [rackList, setRackList] = useState<THREE.Object3D[]>([]);
const [showPopover, setShowPopover] = useState<boolean>(false);
const [popoverPosition, setPopoverPosition] = useState({ top: 0, left: 0 });
const [popoverData, setPopoverData] = useState({});
let viewer: Viewer;
let modelLoader: ModelLoader;
let boxHelperWrap: BoxHelperWrap;
// 加载
const init = () => {
viewer = new Viewer(PAGE_ID);
viewer.addAxis();
viewer.addStats();
viewer.initRaycaster();
modelLoader = new ModelLoader(viewer);
const floors = new Floors(viewer);
floors.addGird(8, 25, 0x004444, 0x004444);
boxHelperWrap = new BoxHelperWrap(viewer);
viewer.emitter.on(
Event.mousemove.raycaster,
(list: THREE.Intersection[]) => {
onMouseMove(list);
}
);
viewer.emitter.on(Event.click.raycaster, (list: THREE.Intersection[]) => {
onMouseClick(list);
});
};
const checkIsRack = (obj: THREE.Object3D): boolean => {
return checkNameIncludes(obj, "rack");
};
const onMouseClick = (intersects: THREE.Intersection[]) => {
if (!intersects.length) return;
const selectedObject = intersects?.[0].object || {};
selectedObject.visible = !selectedObject.visible;
};
const onMouseMove = (intersects: THREE.Intersection[]) => {
if (!intersects.length) {
boxHelperWrap.setVisible(false);
setShowPopover(false);
return;
}
const selectedObject = intersects[0].object || {};
let selectedObjectName = "";
const findClickModel = (object: THREE.Object3D) => {
if (object.type === "Group") {
selectedObjectName = object.name;
return;
}
if (object.parent && object.type !== "Scene") {
findClickModel(object.parent);
}
};
findClickModel(selectedObject);
const rack = findParent(selectedObject, checkIsRack);
if (rack) {
// console.log(rack);
boxHelperWrap.attach(rack);
updateRackInfo(rack.name);
}
};
const updateRackInfo = (name: string) => {
if (!name) {
setShowPopover(false);
return;
}
const event = viewer.mouseEvent as MouseEvent;
setPopoverPosition({
top: event.y + 10,
left: event.x + 10,
});
setPopoverData({ title: name });
setShowPopover(true);
};
// 修改颜色
const changeWarningColor = (model: THREE.Object3D) => {
model.traverseVisible((item: Object3DExtends) => {
if (item.isMesh) {
item.material = new THREE.MeshStandardMaterial({
metalness: 1.0,
roughness: 0.5,
});
item.material.color = item?.oldMaterial?.warningColor;
}
});
};
// 通过name修改成警告颜色
const changeWarningColorByName = (name: string) => {
console.log(rackList);
const model = rackList.find((item) => item.name === name);
if (model) {
changeWarningColor(model);
}
};
// 加载模型
const initModel = () => {
modelLoader.loadModelToScene("/models/datacenter.glb", (baseModel) => {
// /models/datacenter.glb
// /models/GuiGu-factory.glb
console.log(baseModel);
// 设置基础模型的缩放比例
baseModel.setScalc(0.15);
// 暂时注释掉旋转代码
// baseModel.object.rotation.y = Math.PI / 2;
// 获取实际的模型对象
const model = baseModel.gltf.scene;
model.position.set(0, 0, 0.3);
// 为模型设置名称
model.name = "机房1";
model.uuid = "机房1";
console.log(model);
// 启用基础模型的投射阴影功能
baseModel.openCastShadow();
let rackList: Object3DExtends[] = [];
model.traverse((item) => {
if (checkIsRack(item)) {
rackList.push(item);
}
if (item instanceof THREE.Mesh) {
// 保存原始颜色数据,以及警告颜色
if (item.isMesh) {
item.material.warningColor = {
r: 1,
g: 0,
b: 0,
isColor: true,
};
// 保存旧的材质
(item as Object3DExtends).oldMaterial = item.material;
}
}
});
setRackList(rackList);
// console.log("rackList------", rackList);
// 将 rackList 中的机架设置为 viewer 的射线检测对象
viewer.setRaycasterObjects(rackList);
});
};
useEffect(() => {
init();
initModel();
return () => {
viewer.destroy();
};
}, []);
// 模拟报警测试
useEffect(() => {
setTimeout(() => {
changeWarningColorByName("rackA_3");
}, 5000);
}, [rackList]);
return (
<div className={styles.wrapper}>
<div
id={PAGE_ID}
style={{ width: 1000, height: 1000, border: "1px solid red" }}
></div>
<Popover show={showPopover} {...popoverPosition} data={popoverData} />
</div>
);
};
export default ThreeDemo;
import React from "react";
import styles from "./Popover.less";
import { Descriptions, Typography } from "antd";
export type PopoverProps = {
top?: number;
left?: number;
show?: boolean;
data?: Record<string, any>;
};
const Popover: React.FC<PopoverProps> = ({
top = 0,
left = 0,
show = false,
data = { title: "" },
}) => {
const position = {
top: `${top}px`,
left: `${left}px`,
};
return (
<div
style={{
...position,
display: show ? "block" : "none",
color: "white",
}}
className={styles.wrapper}
>
<Descriptions
labelStyle={{ color: "white" }}
contentStyle={{ color: "white" }}
column={1}
title={<div style={{ color: "white" }}>{data?.title}</div>}
>
<Descriptions.Item label="温度">{data?.title}℃</Descriptions.Item>
<Descriptions.Item label="湿度">{data?.title}</Descriptions.Item>
<Descriptions.Item label="Live">Hangzhou, Zhejiang</Descriptions.Item>
<Descriptions.Item label="Remark">empty</Descriptions.Item>
</Descriptions>
</div>
);
};
export default Popover;
TODO:
基于这些功能,还可以继续封装对模型的控制、可视化的移动、视角切换等功能。敬请期待。
最后
项目参考了以下开源项目: github.com/Cqqgyh/smar… github.com/fh332393900…
原文链接:https://juejin.cn/post/7346032359437254665 作者:却黑97