
前言:
大家好,我是小瑜,今天更新一篇将静态html网页进行webpakc工程化(第一篇)。
本文涉及js代码,css代码,不同页面的html接入工程化并打包,并增加开发配置自动热更新,解决静态资源404。
接下来针对此项目,还会持续更新其他工程化改造的知识。
静态网页项目
https://github.com/NewCoder798/ZBestPC
第一阶段:项目webpack改造
项目初始化
- 创建npm项目
- 安装webpack依赖
- 创建js入口文件
- 创建webpack配置文件
- 配置package.json的build命令
- 执行npm run build打包

npm install -D webpack webpack-cli

const path = require('path')

module.exports = {
  mode: 'development',
  entry: './src/index.js',
  output: {
    filename: 'bundle.js',
    path: path.resolve(__dirname, './dist'),
  },
}
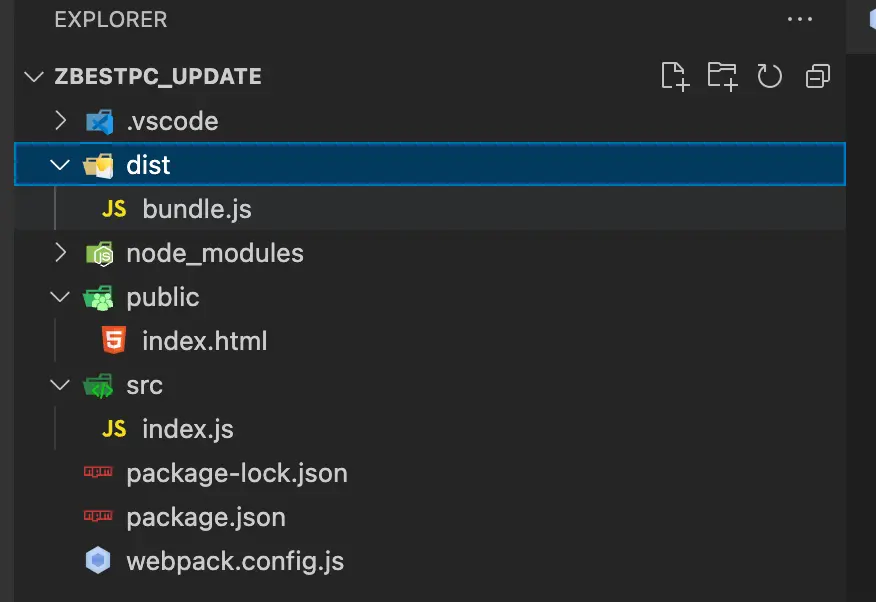
首页移植
资源文件拷贝,将源码中html/js/css/img文件拷贝纸新项目中:
  a. 将index.html拷贝至src/index.html
  b. 将js目录拷贝至src/js
  c. 将css目录拷贝至src/css
  d. 将img目录拷贝至src/img
删除 index.html 中所有link 和script 的引用
安装 html-webpack-plugin 插件
通过这个插件,可以将文件资源路径自动引入至打包后的html文件中
npm i html-webpack-plugin --save-dev
const path = require('path')
const HtmlWebpackPlugin = require('html-webpack-plugin')

module.exports = {
  mode: 'development',
  entry: './src/index.js',
  output: {
    filename: 'bundle.js',
    path: path.resolve(__dirname, './dist'),
  },
  plugins: [
    new HtmlWebpackPlugin({
      filename: 'index.html',
      template: './src/index.html',
    }),
  ],
}
这么做的目的是,html-webpack-plugin 会自动将html以及对应的js导入,此时无需手动通过路径的方式导入
打包css
因为HtmlWebpackPlugin插件的存在,所以打包后的css会自动引入
- 将css文件导入src/index.js中
import './css/index.css'
import './css/public.css'
- 下载loader
npm i -D css-loader style-loader
- 配置loader
const path = require('path')
const HtmlWebpackPlugin = require('html-webpack-plugin')

module.exports = {
  mode: 'development',
  entry: './src/index.js',
  output: {
    filename: 'js/[name].js',
    path: path.resolve(__dirname, './dist'),
  },
  module: {
    rules: [
      {
        test: /\.css$/,
        use: ['style-loader', 'css-loader'],
      },
    ],
  },
  plugins: [
    new HtmlWebpackPlugin({
      filename: 'index.html',
      template: './src/index.html',
    }),
  ],
}
打包图片
这里暂时只能打包css中文的图片
使用
webpack.docschina.org/guides/asse…
const path = require('path')
const HtmlWebpackPlugin = require('html-webpack-plugin')

module.exports = {
  mode: 'development',
  entry: './src/index.js',
  output: {
    filename: 'js/[name].js',
    path: path.resolve(__dirname, './dist'),
  },
  module: {
    rules: [
      {
        test: /\.css$/,
        use: ['style-loader', 'css-loader'],
      },
      {
        test: /\.(png|svg|jpg|jpeg|gif)$/i,
        type: 'asset',
        parser: {
          dataUrlCondition: {
            maxSize: 8 * 1024,
          },
        },
        generator: {
          filename: 'images/[name].[hash:6][ext]',
        },
      },
    ],
  },
  plugins: [
    new HtmlWebpackPlugin({
      filename: 'index.html',
      template: './src/index.html',
    }),
  ],
}
打包js
- 在src/index.js中导入全部使用的js文件,包括在html.js中script标签中的js代码
import './css/index.css'
import './css/public.css'

import './js/jquery-1.12.4.min'
import './js/jquery.flexslider-min'
import './js/public'
import './js/nav'
在build后发现问题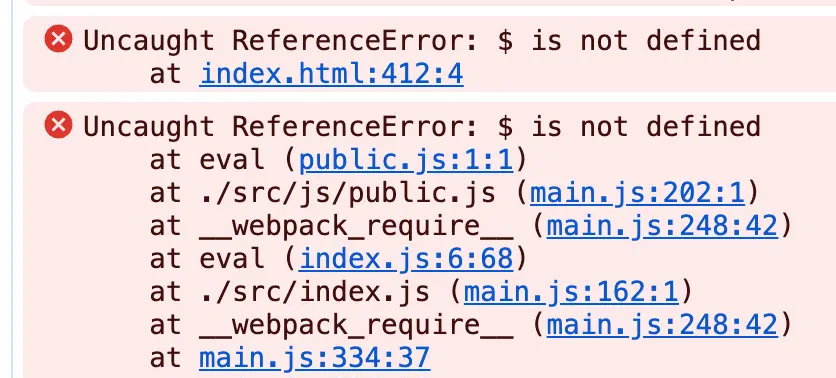
- 解决 $ 映射 ProvidePlugin
- 首先需要下载jquery库
npm i -S jquery flexslider
- 修改src/index.js中的导入
import './css/index.css'
import './css/public.css'

import 'jquery'
import 'flexslider'
import './js/public'
import './js/nav'
- 使用ProvidePlugin webpack自带的插件做映射
const { ProvidePlugin } = require('webpack')

plugins: [
    ...
    new ProvidePlugin({
      $: 'jquery',
      jQuery: 'jquery',
    }),
  ],
此时就没有$找不到这个问题了,接下去就需要解决在html img标签上找不到图片的问题
解决img标签找不到图片路径的问题
解决html中img标签图片路径问题
只需要全局进行替换路径即可!
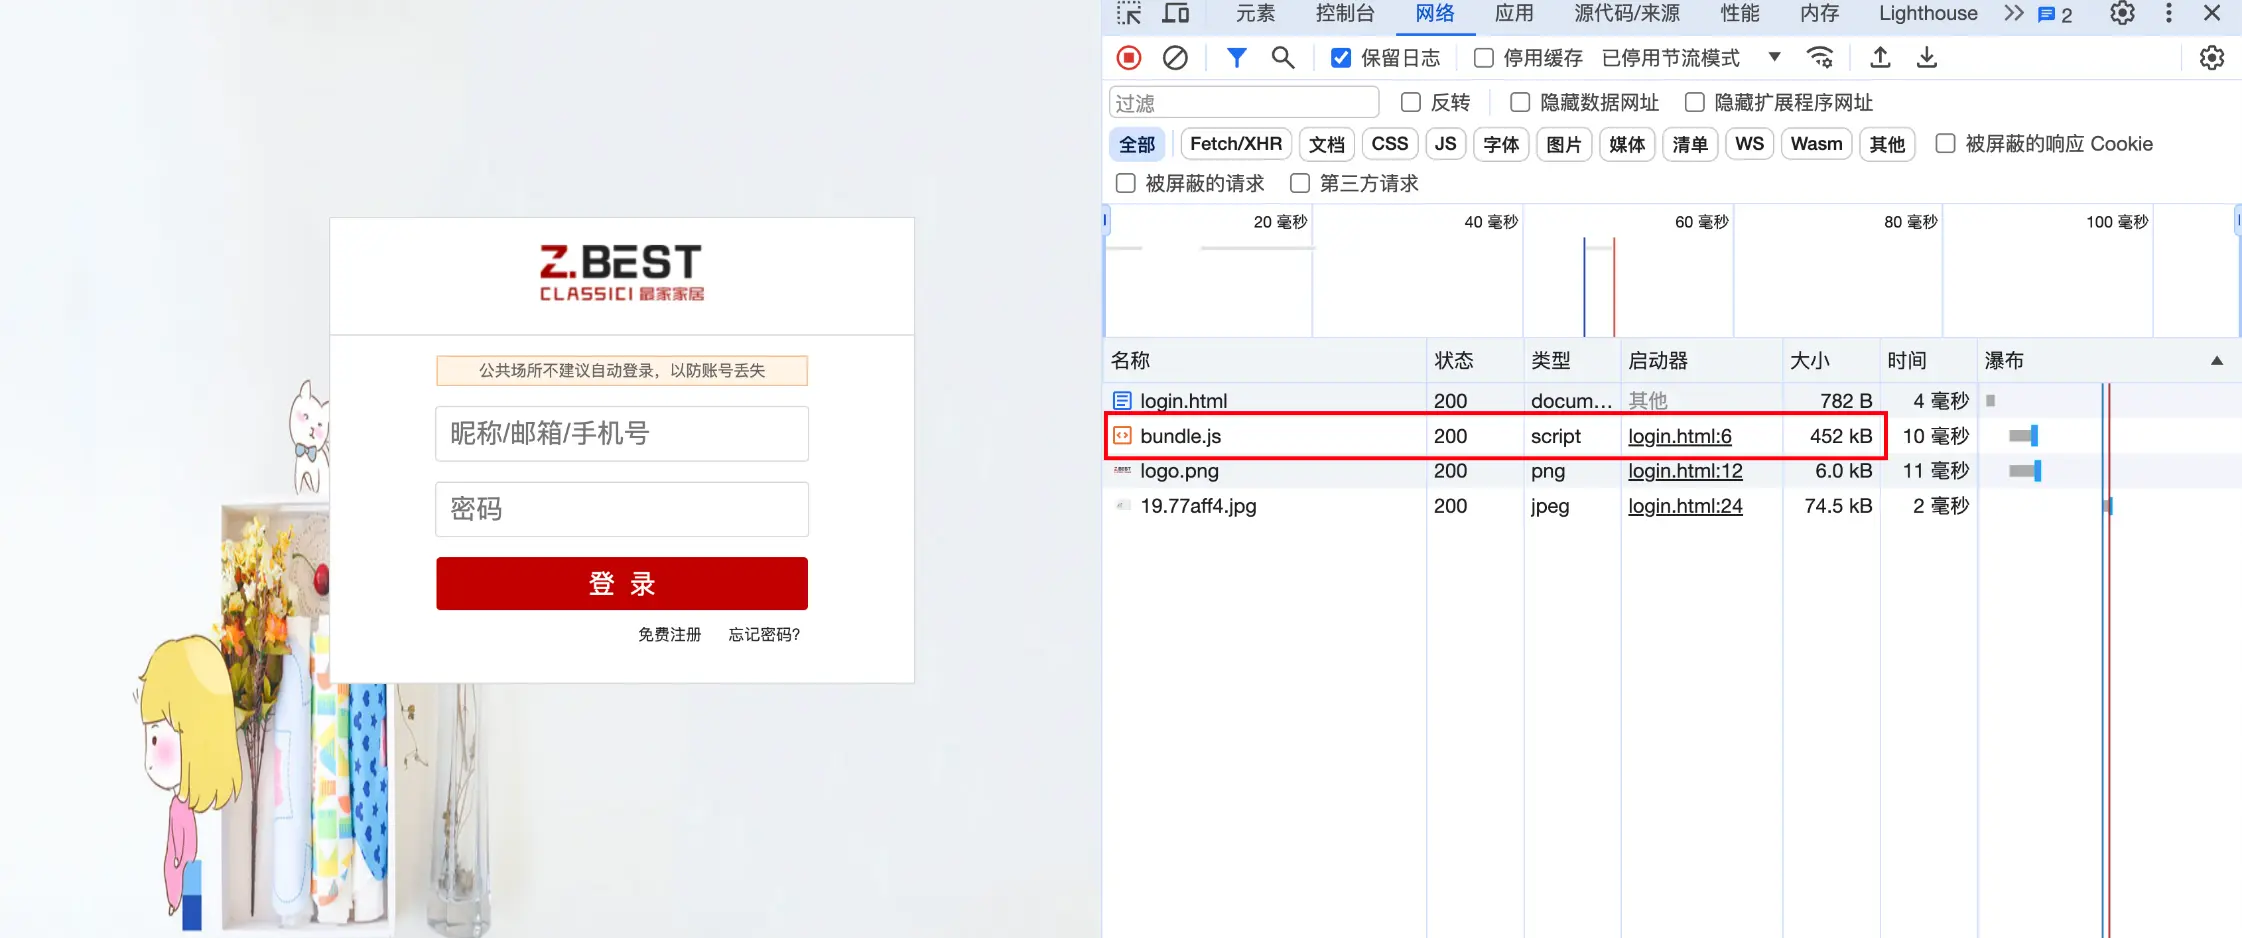
登录移植
删除link引入的css 将css引入至index.js文件。并且将html中img文件路径进行替换。
最后需要修改webpack.config.js对login.html进行配置
注意:HtmlWebpackPlugin 如果要配置另外一个页面,需要单独再写一个配置
const path = require('path')
const HtmlWebpackPlugin = require('html-webpack-plugin')
const { ProvidePlugin } = require('webpack')
module.exports = {
  mode: 'development',
   ......
  plugins: [
    new HtmlWebpackPlugin({
      filename: 'index.html',
      template: './src/index.html',
    }),
    // 配置登录页面资源
    new HtmlWebpackPlugin({
      filename: 'login.html',
      template: './src/login.html',
    }),
    new ProvidePlugin({
      $: 'jquery',
      jQuery: 'jquery',
    }),
  ],
}
将bundle.js文件分离
目前 js打包后的代码没有做拆分,导致不论是首页还是登录页,不论是否使用到这部分的js,都会进行加载,且很大。此时就需要进行打包优化,对js进行按需的加载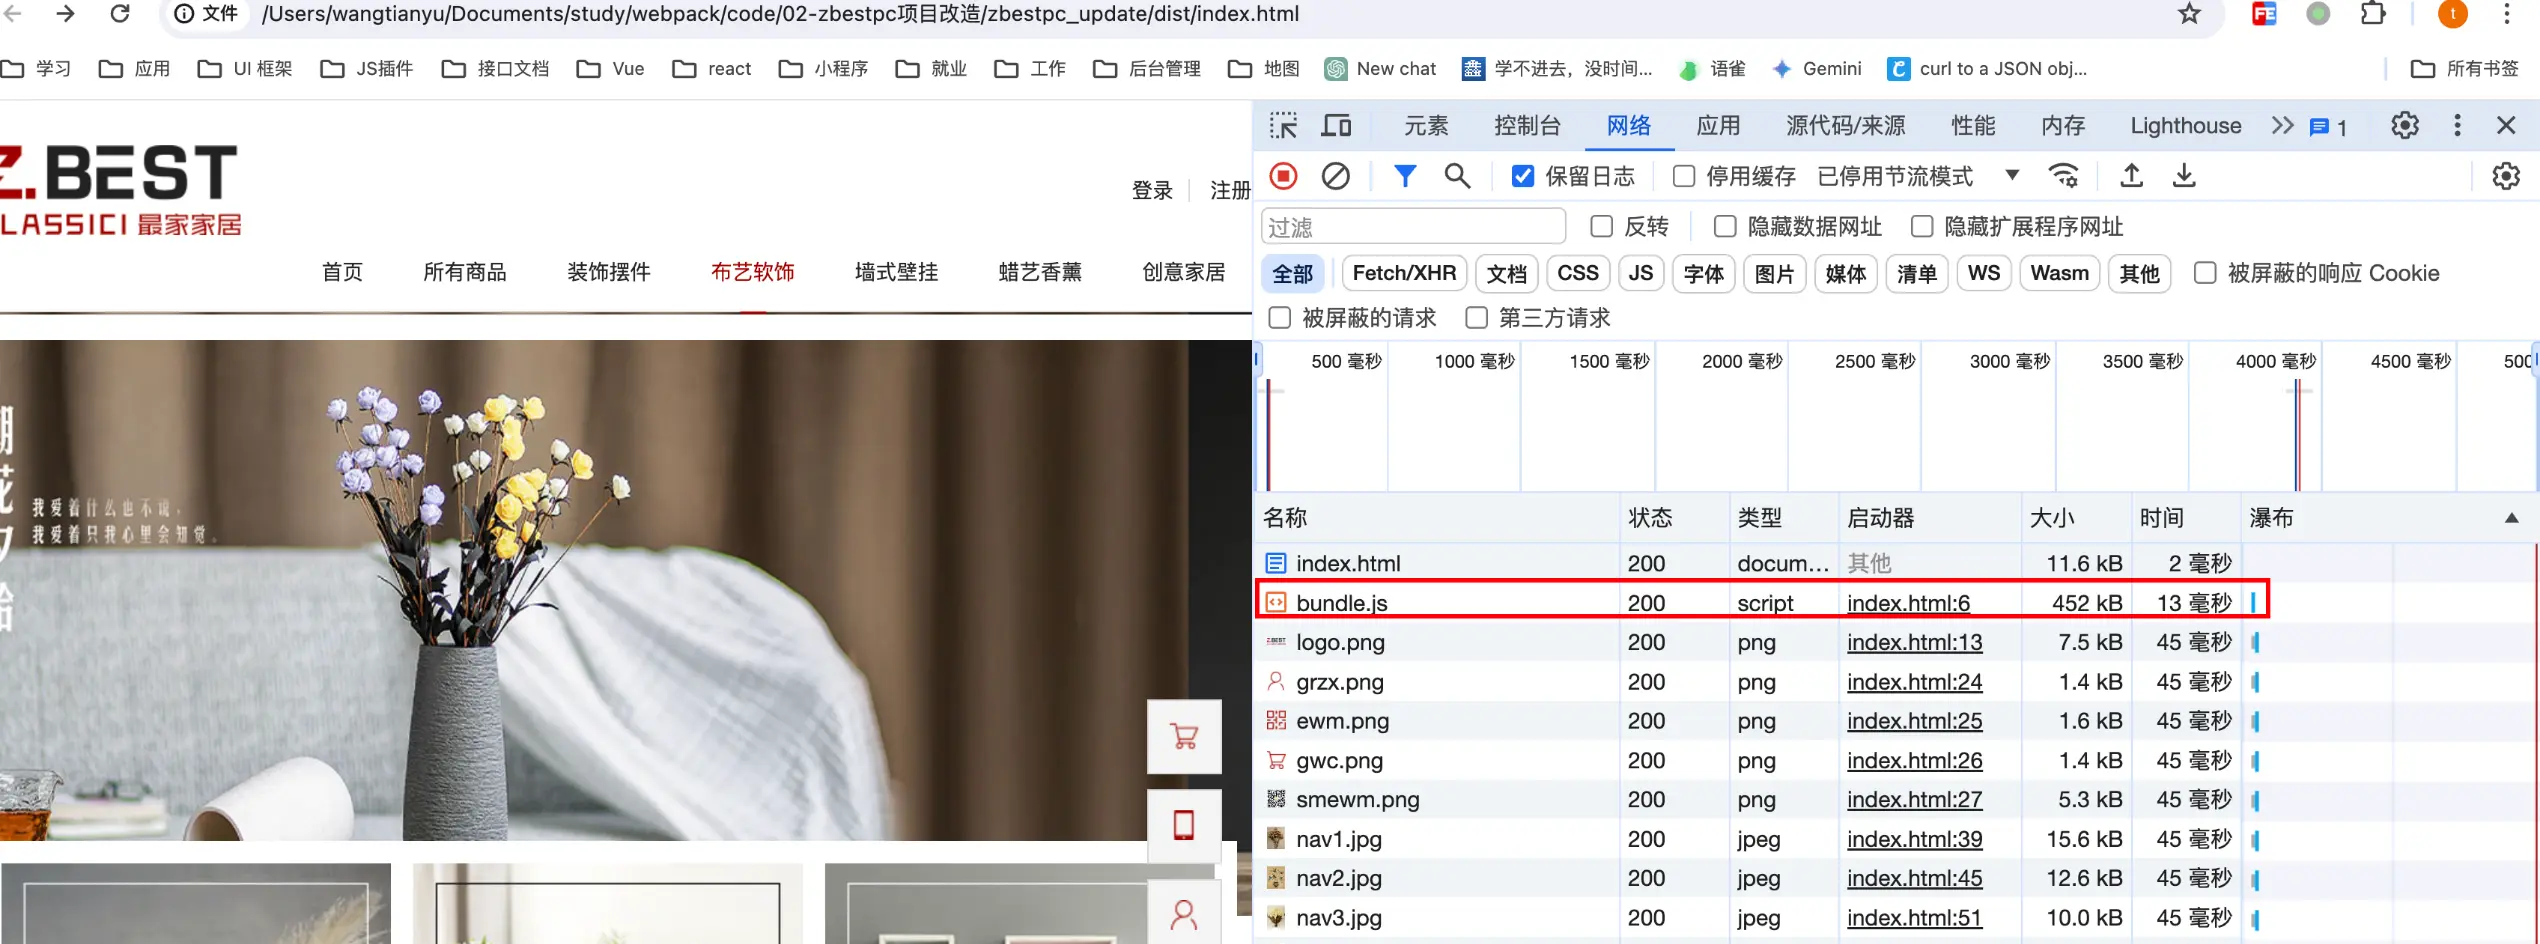
分离代码
在/src 入口处,分离index.js 和login.js代码
// index.html 页面的资源
import './css/index.css'
import './css/public.css'

import 'jquery'
import 'flexslider'
import './js/public'
import './js/nav'
// login页面的js和css资源
import './css/public.css'
import './css/login.css'
webpack指定入口
module.exports = {
  mode: 'development',
  // 入口
  entry: {
    // 首页入口文件
    index: './src/index.js',
    // 登录入口文件
    login: './src/login.js',
  },
}
在HtmlWebpackPlugin中设置chunk
plugins: [
    // 配置首页资源
    new HtmlWebpackPlugin({
      filename: 'index.html',
      template: './src/index.html',
      // 指定 入口 index.js
      chunks: ['index'],
    }),
    // 配置登录页面资源
    new HtmlWebpackPlugin({
      filename: 'login.html',
      template: './src/login.html',
      // 指定 入口 login.js
      chunks: ['login'],
    }),
  ]
完整配置
const path = require('path')
const HtmlWebpackPlugin = require('html-webpack-plugin')
const { ProvidePlugin } = require('webpack')
module.exports = {
  mode: 'development',
  // 入口
  entry: {
    index: './src/index.js',
    login: './src/login.js',
  },
  output: {
    // 注意 文件名需要修改成动态的
    filename: 'js/[name].js',
    path: path.resolve(__dirname, './dist'),
  },
  module: {
    rules: [
      {
        test: /\.css$/,
        use: ['style-loader', 'css-loader'],
      },
      {
        // 打包文件
        test: /\.(png|svg|jpg|jpeg|gif)$/i,
        // webpack自带
        type: 'asset',
        // 如果图片小于8kb,就会被转换成base64
        parser: {
          dataUrlCondition: {
            maxSize: 8 * 1024,
          },
        },
        // 大于8kb的图片会被打包到images文件夹下
        generator: {
          filename: 'images/[name].[hash:6][ext]',
        },
      },
    ],
  },
  plugins: [
    // 配置首页资源
    new HtmlWebpackPlugin({
      filename: 'index.html',
      template: './src/index.html',
      chunks: ['index'],
    }),
    // 配置登录页面资源
    new HtmlWebpackPlugin({
      filename: 'login.html',
      template: './src/login.html',
      chunks: ['login'],
    }),
    // 路径别名
    new ProvidePlugin({
      $: 'jquery',
      jQuery: 'jquery',
    }),
  ],
}
现在看效果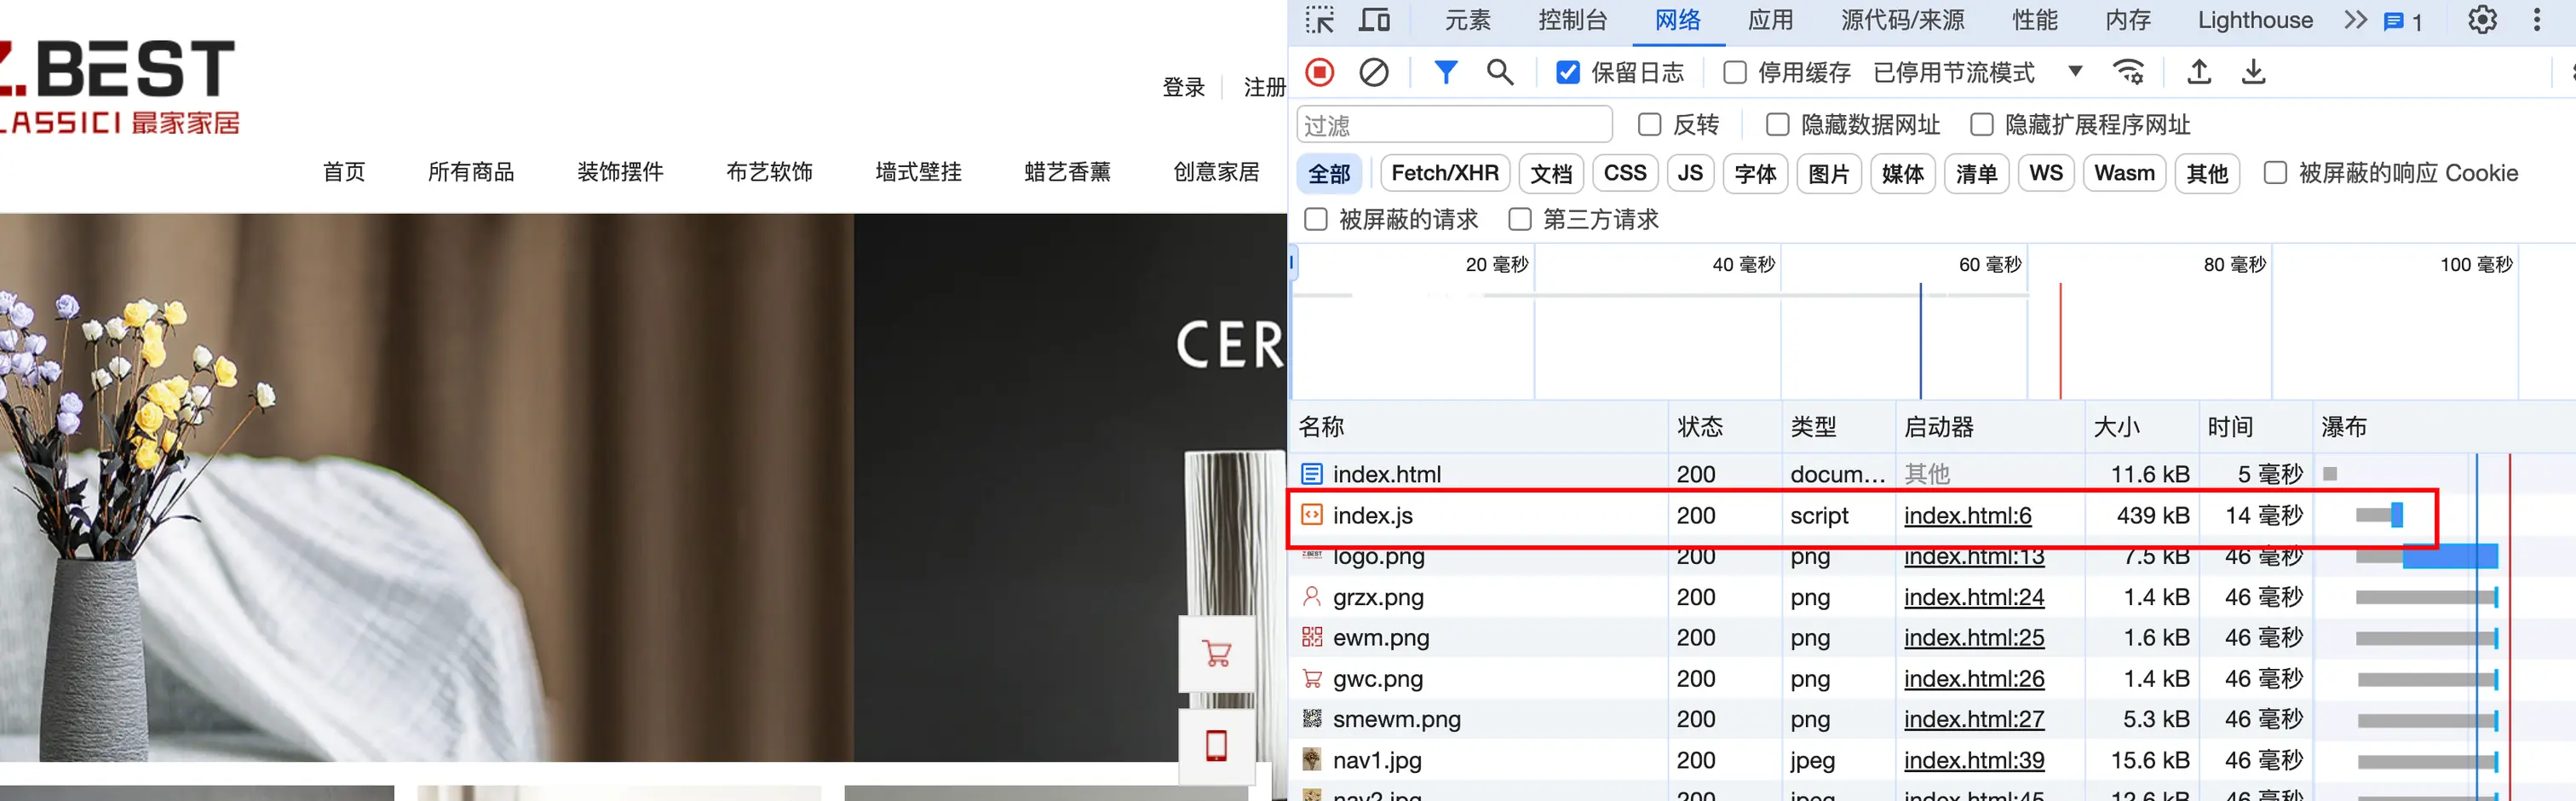

配置开发环境
自动打包
npm i -D webpack-dev-server

devServer: {
    static: {
      directory: path.resolve(__dirname, 'dist'),
    },
    port: 3000,
    // 服务器压缩
    compress: true,
    // 自动打开浏览器
    open: true,
    // 开启热更新
    hot: true,
  },
此时发现图片无法正常显示,因为前面的路径换成的项目的启动地址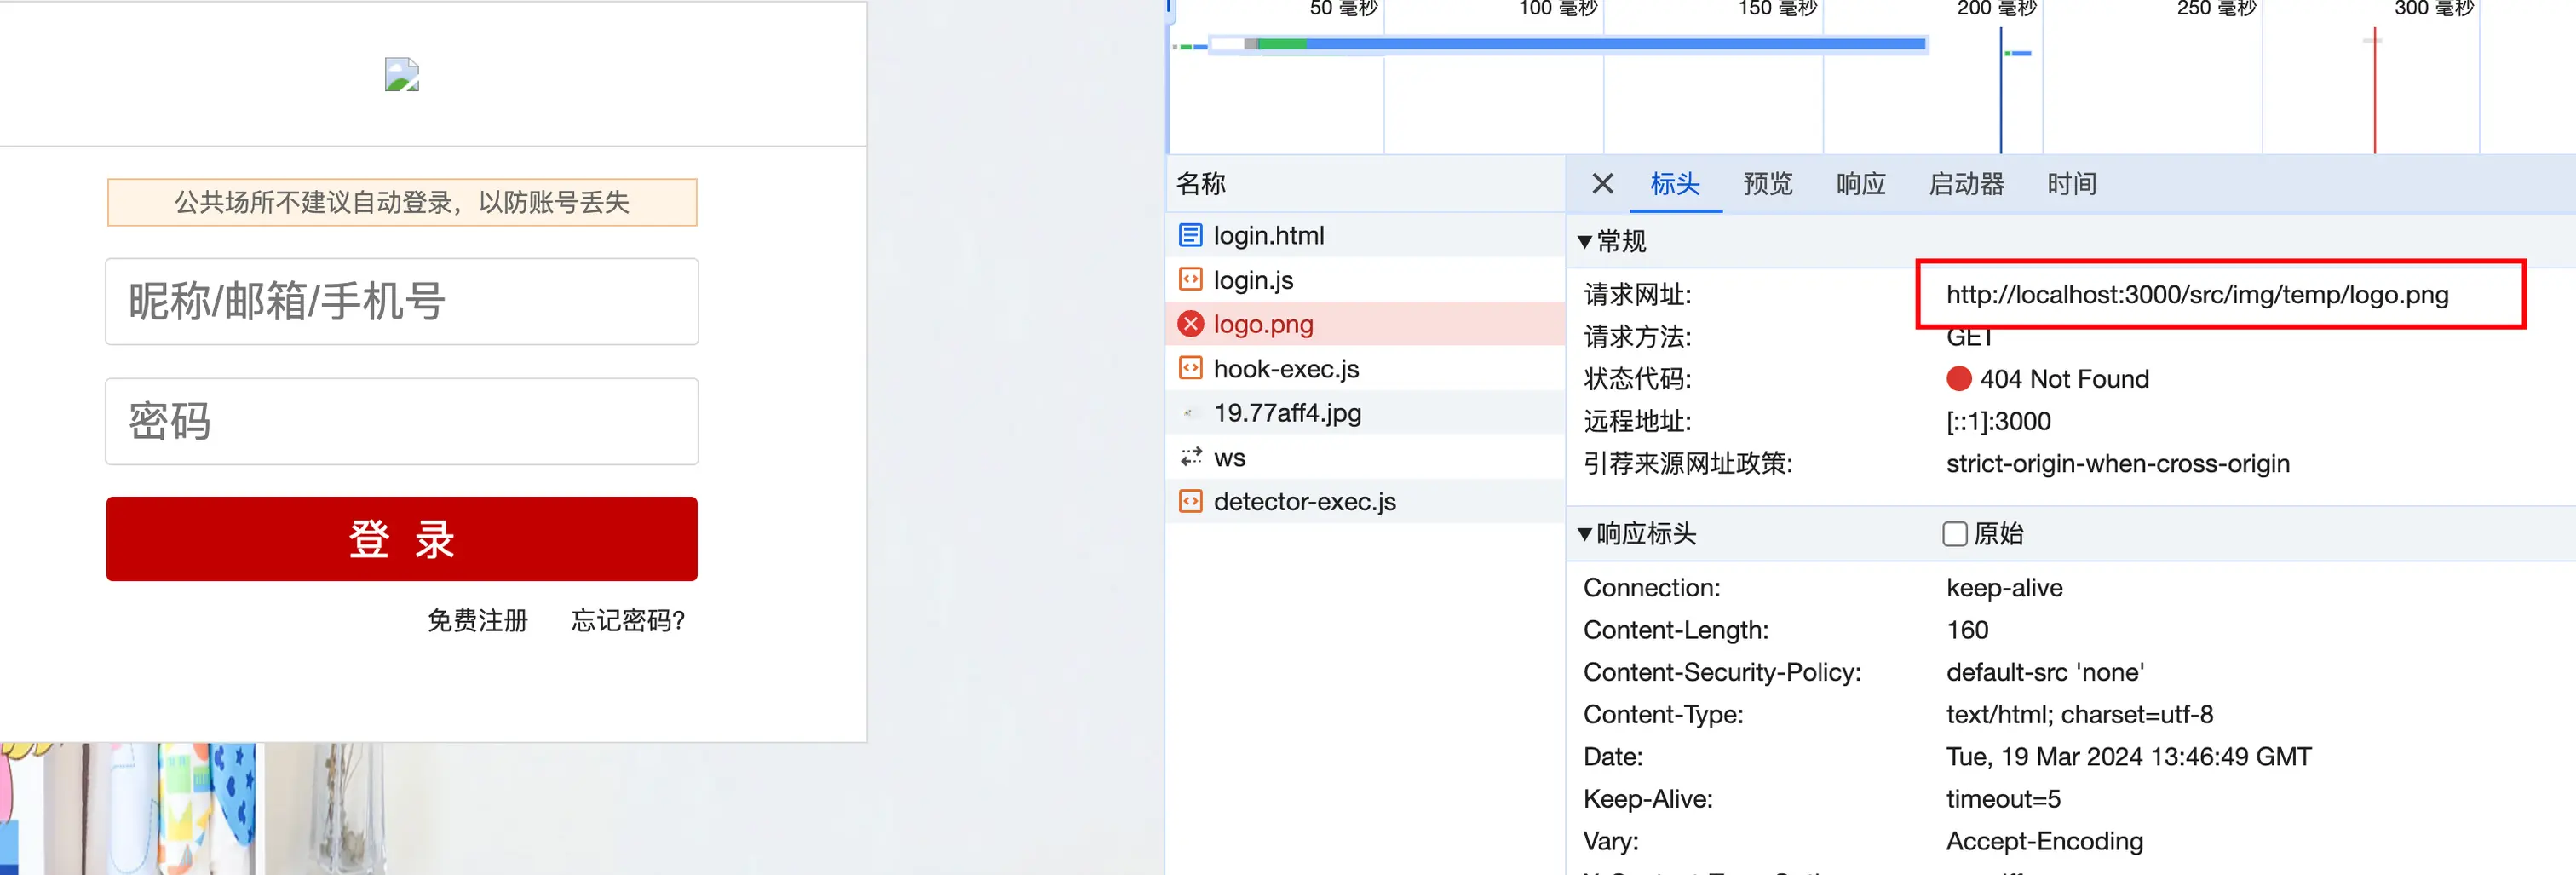
解决图片路径问题
需要把图片全部放在dist目录下,并且修改图片的路径为img/
可以通过 webpack插件 复制文件的方式自动将图片目录拷贝至dist下,而非手动进行
npm i copy-webpack-plugin --save-dev


// 从.. 拷贝文件 至..
    new CopyWebpackPlugin({
      patterns: [
        {
          from: path.resolve(__dirname, './src/img'),
          to: path.resolve(__dirname, './dist/img'),
        },
      ],
    }),g
未完,待续…
原文链接:https://juejin.cn/post/7347952593811505186 作者:不知名小瑜