
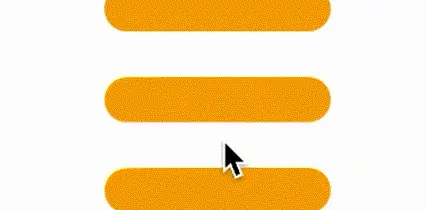
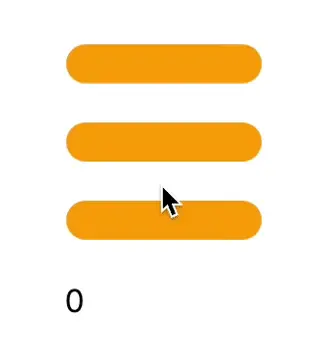
效果图
先看效果,点击会使三条杠变成一个叉,再次点击会使这个叉变回三条杠。

一、css 动画效果实现思路
首先,要有一个大盒子来装三条杠,然后放进三条杠并他们一个外形,用定位给他们分开。
//盒子和杠
<View className='cross'>
        <View className='line'></View>
        <View className='line'></View>
        <View className='line'></View>
      </View>

//css
//定位子绝父相
.cross {
    width:100px;
    height:100px;
    position: relative;
}
.line {
    width: 100px;
    height: 20px;
    border-radius: 10px;
    background: orange;
    position: absolute;
  }
然后再分别给这三条杠,一个 top 值,第一个给零,第二个为 50px,第三个为 80px。再用@keyframes(动画)实现变化,通过改变 className來改变动画的样式。
但是在这里遇到了一些问题,让我在这里被难住了
动画移动时旋转中心总是不知道在哪里,不是在中心点旋转
@keyframes corss {
     0%{top: 0px;}
    50%{
      top: 40px;
      transform: rotate(0deg);
    }
    100%{
      transform: rotate(45deg);
    }
}
//原来是想着旋转忘记了 top值已经回到原位去了,所以旋转中心点就不是杠的中心了


//正确写法
@keyframes corss {
     0%{top: 0px;}
    50%{
      top: 40px;
      transform: rotate(0deg);
    }
    100%{
    top; 40px
      transform: rotate(45deg);
    }
}
全部的 css 代码就是这样的
.cross {
    width: 100px;
    height: 100px;
    position: relative;

    //&是连写符号,相当于.cross.line
    & .line {

    //避免被 animation这个简写属性覆盖,所以每个属性都单独设置
      animation-fill-mode: forwards;
      animation-duration: 1s;

      &:nth-child(1) {
        top: 0;
      }
      &:nth-child(2) {
        top: 40px;
      }
      &:nth-child(3) {
        top: 80px;
      }
    }

    &.active .line {
      &:nth-child(1) {
        top: 0px;
        animation-name: upon1;
      }
      &:nth-child(2) {
        top: 40px;
        animation-name: opacity1;
      }

      &:nth-child(3) {
        top: 80px;
        animation-name: upon2;
      }
    }

    &.reactive .line {
      &:nth-child(1) {
        top: 40px;
        animation-name: reupon1;
      }

      &:nth-child(2) {
        top: 40px;
        animation-name: reopacity1;
      }

      &:nth-child(3) {
        top: 40px;
        animation-name: reupon2;
      }
    }
  }

  .line {
    width: 100px;
    height: 20px;
    border-radius: 10px;
    background: orange;
    position: absolute;
  }

  @keyframes upon1 {
    0%{top: 0px;}
    50%{
      top: 40px;
      transform: rotate(0deg);
    }
    100%{
      top: 40px;
      transform: rotate(45deg);
    }
  }

  @keyframes reupon1 {
    0% {
      top: 40px;
      transform: rotate(45deg);
    }

    50% {
      top: 40px;
      transform: rotate(0deg);
    }

    100% {
      top: 0px;
      transform: rotate(0deg);
    }
  }

    @keyframes opacity1 {
      0% {
        opacity: 1;
      }

      50% {
        opacity: 0;
      }

      100% {
        opacity: 0;
      }
    }
    @keyframes reopacity1 {
      0% {
        opacity: 0;
      }

      50% {
        opacity: 0;
      }

      100% {
        opacity: 1;
      }
    }

    @keyframes upon2 {
      0% {
        top: 80px;
      }

      50% {
        top: 40px;
        transform: rotate(0deg);
      }

      100% {
        top: 40px;
        transform: rotate(-45deg);
      }
    }

    @keyframes reupon2 {
      0% {
        top: 40px;
        transform: rotate(-45deg);
      }

      50% {
        top: 40px;
        transform: rotate(0deg);
      }

      100% {
        top: 80px;
        transform: rotate(0deg);
      }
    }
动画和样式都写完了,想办法改变cross盒子的 className。(这里操作的父级元素,这样就不用一个一个去改变子元素)
用onClick确实可以在点击cross实现交叉的动画,但是没办法变回去了
    const[iconclassname,setIconclassname] = useState('cross')
    <View className={iconclassname} onClick={()=>setIconclassname('cross active')}></View>
所以这里还要用判断来添加className
//先设定一个初始值
const [process, setProcess] = useState(0)

//当动画结束的时会会调用这个函数,改变process的值
function AnimationEndhandler() {
  if (process === 0) {
    setProcess(1)
  }
  if (process === 1) {
    setProcess(0)
    setIconclassname('cross')
  }
}

//第一次点击 process为零所以就会为 corss 盒子添加 active这个 className
 function iconclickhandler() {
    let _style
    if (process === 0) {
      _style = classnames('cross', { active: true })
      setIconclassname(_style)
    }
    if (process === 1) {
      _style = classnames('cross', { active: true }, { reactive: true })
      setIconclassname(_style)
    }
  }

  //onAnimationend动画结束时触发,onClick点击触发
  <View className={iconclassname} onClick={iconclickhandler}>
        <View className='line' onAnimationEnd={AnimationEndhandler}></View>
        <View className='line'></View>
        <View className='line'></View>
      </View>
二、css 过渡效果实现思路\
用过渡效果盒子还是一样,只是 css 有些不同
  .cross {
    width: 100px;
    height: 100px;
    position: relative;

  .line {
    width: 100px;
    height: 20px;
    border-radius: 10px;
    background: orange;
    position: absolute;
    transition: all 0.5s;

    &:nth-child(1) {
      top: 0;
      transform: rotate(0deg);
    }

    &:nth-child(2) {
      top: 40px;
    }

    &:nth-child(3) {
      top: 80px;
      transform: rotate(0deg);
    }
  }
  &.first .line{
        &:nth-child(1) {
          top: 40px;
        }

        &:nth-child(2) {
          opacity: 1;
        }

        &:nth-child(3) {
          top: 40px;
        }
      }


    &.second .line {
      &:nth-child(1) {
        transform: rotate(45deg);
      }

      &:nth-child(2) {
        opacity: 0;
      }

      &:nth-child(3) {
        transform: rotate(-45deg);
      }
    }
}
在&符号这里踩坑了,因为一个小空格导致属性没有生效,我一直写的是同级关系,就算给cross 添加了 className,也找不到子元素里面的 line,因为他们是同级的
&bigbox.box
//这是并列关系
&bigbox .box
//这是父子级关系
样式设置好了,就要是开始让它动起来,还是一样点击触发,但是这里和animation不一样,动画是可以实现复杂的变化,直接变化完成,而transition 它只能实现一种变化。就是说我 width 变宽 10px,没办法在这个基础上再变宽 10px;
这里先让第一个动画发生,然后利用onTransitionEnd 来监听变化结束,然后再给他添加第二段动画
  const [process, setProcess] = useState(0)

  const [iconclassname, setIconclassname] = useState('cross')

   // -----

  function Change() {
    let _style
    if (process === 0) {
      _style = classnames('cross', { first: true })
      setIconclassname(_style)
      setProcess(1)
    }
    if (process === 1) {
      _style = classnames('cross', { first: true })
      setIconclassname(_style)
      setProcess(0)
    }
  }

  function TransitionEndhandler() {
    let _style2
    if (process === 1) {
      _style2=classnames('cross',{first: true},{second:true})
      setIconclassname(_style2)
    }
    if (process === 0) {
      setIconclassname('cross')
    }
  }
运行时,想着动画结束后监听去改变数据,但是把改数据的函数写在监听结束(onTransitionEnd)的函数里面,因为要运动两次才能完成,每次运动结束就会触发这个,结果它自己就可以改数据,属于自给自足了,一直自己变化都不用我点,玩嗨了
所以要把改变判断数据的的函数放在点击(onClick)函数里,这样动画结束就不会触发改变数据里,只有点击才会改变数据,而点击了会发生变化又会触发 onTransitionEnd从而完成整个变化。
原文链接:https://juejin.cn/post/7353483477554167849 作者:安和桥661