
- 现在整个游戏只差一个结束场景,目前小鸟的碰撞和玩家得分都已经实现,接下来就是衔接结束场景
结束场景
-
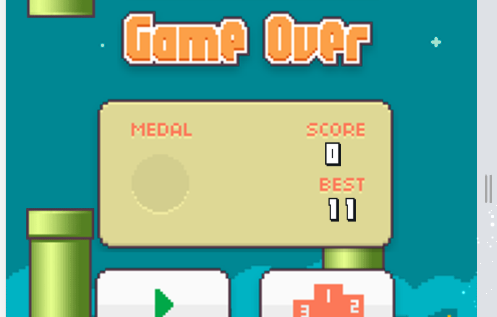
结束场景跟准备场景相似,由一个
Game Over文字图片、计分板图片、重新开始按钮、排名按钮组成 -
该场景的元素基本也只作显示使用,所以同样继承
PIXI.Container -
新建
OverScene.js,定义结束场景- 结束场景需要显示分数,所以需要接收分数的纹理作为参数
- 结束场景一开始不显示,则设置其可见性为
false
class OverScene extends Container {
constructor(options) {
super();
this.texture = options.texture;
this.gameWidth = options.width;
this.gameHeight = options.height;
this.scoreTexture = options.scoreTexture;
this.visible = false; // 设置其可见性为false
this.initScene(); // 初始化场景
}
}

- 先声明
initScene对场景进行初始化,需要注意的是结束场景显示时是需要一个白色蒙层的,这也需要在初始化时一同设置
initScene() {
// gameOver图片文字
this.gameOver = new Sprite(this.texture.tip);
// 结束面板
this.board = new Sprite(this.texture.board);
// 重新开始按钮
this.startBtn = new Sprite(this.texture.startBtn);
// 排名按钮
this.rankBtn = new Sprite(this.texture.rankBtn);
// 玩家分数
this.userScore = new UserScore(this.scoreTexture);
// 最高分数
this.bestScore = new UserScore(this.scoreTexture);
// 白色遮罩层
this.whiteMask = new Graphics();
this.whiteMask.beginFill(0xffffff);
this.whiteMask.drawRect(0, 0, this.gameWidth, this.gameHeight);
this.whiteMask.endFill();
this.whiteMask.alpha = 0;
// 设置各个元素的坐标位置
this.board.scale.set(0.8, 0.8);
this.board.x = this.gameWidth - this.board.width - 120;
this.board.y = (this.gameHeight - this.board.height) / 2;
this.gameOver.scale.set(0.8, 0.8);
this.gameOver.x = this.gameWidth - this.gameOver.width - 150;
this.gameOver.y = this.board.y - this.gameOver.height - 20;
this.startBtn.scale.set(0.8, 0.8);
this.startBtn.x = this.board.x - 5;
this.startBtn.y = this.board.y + this.board.height + 20;
this.rankBtn.scale.set(0.8, 0.8);
this.rankBtn.x = this.startBtn.x + this.startBtn.width + 20;
this.rankBtn.y = this.startBtn.y;
this.userScore.x = this.board.x + this.board.width - 112;
this.userScore.y = this.board.y + 70;
this.bestScore.x = this.userScore.x;
this.bestScore.y = this.userScore.y + 85;
this.addChild(
this.gameOver,
this.board,
this.startBtn,
this.rankBtn,
this.userScore,
this.bestScore,
this.whiteMask
);
}
-
在
Game.js中完善其initScene方法,实例化结束场景- 注意该场景下的按钮是可以点击的,所以要给重新开始按钮元素绑定
tap/click事件,当点击的时候重新让游戏进入准备状态
- 注意该场景下的按钮是可以点击的,所以要给重新开始按钮元素绑定
initScene() {
//...
// 初始化游戏结束场景
this.overScene = new OverScene({
width: this.width,
height: this.height,
texture: this.assets.over,
scoreTexture: this.assets.score,
});
this.overScene.zIndex = 1;
// 给元素设置可交互
this.overScene.startBtn.interactive = true;
this.overScene.startBtn.on("tap", (event) => {
event.stopPropagation(); // 阻止冒泡
event.stopped = true;
this.gameReady(); // 让游戏重新进入准备状态
});
this.stage.addChild(this.readyScene, this.overScene);
}
- 那么在
gameReady中需要将结束场景隐藏
 gameReady() {
   this.readyScene.visible = true;
   //...
   // 隐藏结束场景
   this.overScene.hide();
 }
- 在
gameOver中,如果小鸟碰撞障碍物或者已落地,则需要将结束场景显示
 gameOver() {
   //...
   // 需要当前分数和最好分数,在结束场景中显示
   this.overScene.show(this.curScore, this.bestScore);
   //...
 }
- 在
OverScene.js中声明一个hide方法用于隐藏场景,隐藏时不需要设置场景下的元素可见性为false,而是设置透明度为0,因为在显示时方便做过渡
hide() {
// 隐藏场景
this.visible = false;
// 设置透明度
this.gameOver.alpha = 0;
this.board.alpha = 0;
this.userScore.alpha = 0;
this.bestScore.alpha = 0;
this.startBtn.alpha = 0;
this.rankBtn.alpha = 0;
// 设置偏移,在出现时营造上升效果
this.board.y += 150;
this.userScore.y += 150;
this.bestScore.y += 150;
}
- 在
OverScene.js中声明一个show方法用于显示场景,场景显示时需要做过渡效果,则需要使用Ease - 该方法需要传入当前得分和最好得分作为参数,用于显示分数
show(score, bestScore) {
this.visible = true;
this.userScore.setData(score);
this.bestScore.setData(bestScore);
this.whiteMask.alpha = 1;
// 元素缓动
const ease = new Ease();
ease.add(this.gameOver, { alpha: 1 }, { duration: 100 });
ease.add(
this.board,
{ alpha: 1, y: this.board.y - 150 },
{ duration: 200, wait: 200 }
);
ease.add(
this.userScore,
{ alpha: 1, y: this.userScore.y - 150 },
{ duration: 200, wait: 200 }
);
ease.add(
this.bestScore,
{ alpha: 1, y: this.bestScore.y - 150 },
{ duration: 200, wait: 200 }
);
ease.add(this.startBtn, { alpha: 1 }, { duration: 200, wait: 600 });
ease.add(this.rankBtn, { alpha: 1 }, { duration: 200, wait: 600 });
ease.add(this.whiteMask, { alpha: 0 }, { duration: 400 });
}
- 至此,当游戏结束时,结束场景就会显示

玩家交互
-
在此游戏中,玩家只有一种交互方式,在移动端是触碰屏幕,则让舞台
stage监听tap事件- 注意需要开启舞台的交互效果
 initApp() {
   // ...

   this.app.stage.sortableChildren = true; // 开启容器内children层级排序
   this.app.stage.interactive = true;
   this.app.stage.on("tap", this.onUserClick);

   //...
 },
- 声明
onUserClick方法,用于控制游戏,当游戏不在结束状态时,启动游戏,并控制小鸟往上飞
 onUserClick() {
   if (this.game.state === "over") return;
   if (this.game.state !== "running") this.game.gameStart();
   this.game.bird.birdStartFly();
 },
小结
-
至此,整个
Flappy Bird游戏所有的功能就基本开发完成了,我们用到了PIXI的大部分功能- 加载器: 用
PIXI.Loader预加载图片等资源 - 容器: 用
PIXI.Container组合和管理各种游戏对象 - 纹理: 用
Texture构建显示对象的资源 - 精灵: 所有游戏对象都需要通过精灵显示,如
TilingSprite、AnimatedSprite、普通精灵等 - 图形: 用
Graphics实现白屏Mask效果 - 矩形: 用
Rectangle对纹理资源进行截取 - 缓动动画: 用
pixi-ease库来创建各种缓动动画 - 碰撞检测: 自定义一个碰撞检测方法,用于检测可视对象的是否发生碰撞
- 时钟: 用
PIXI.Ticker更新对象各种属性和状态 - 事件交互: 用对元素或舞台绑定
tap事件,用于玩家交互
- 加载器: 用
原文链接:https://juejin.cn/post/7214005088510640188 作者:一如彷徨