

在上一篇文章中,我们已经实现了路由权限的功能,拿到了路由表和menu的列表。本节我们来实现一下Layout布局。
布局分析
首先我们来分析一下整个页面:
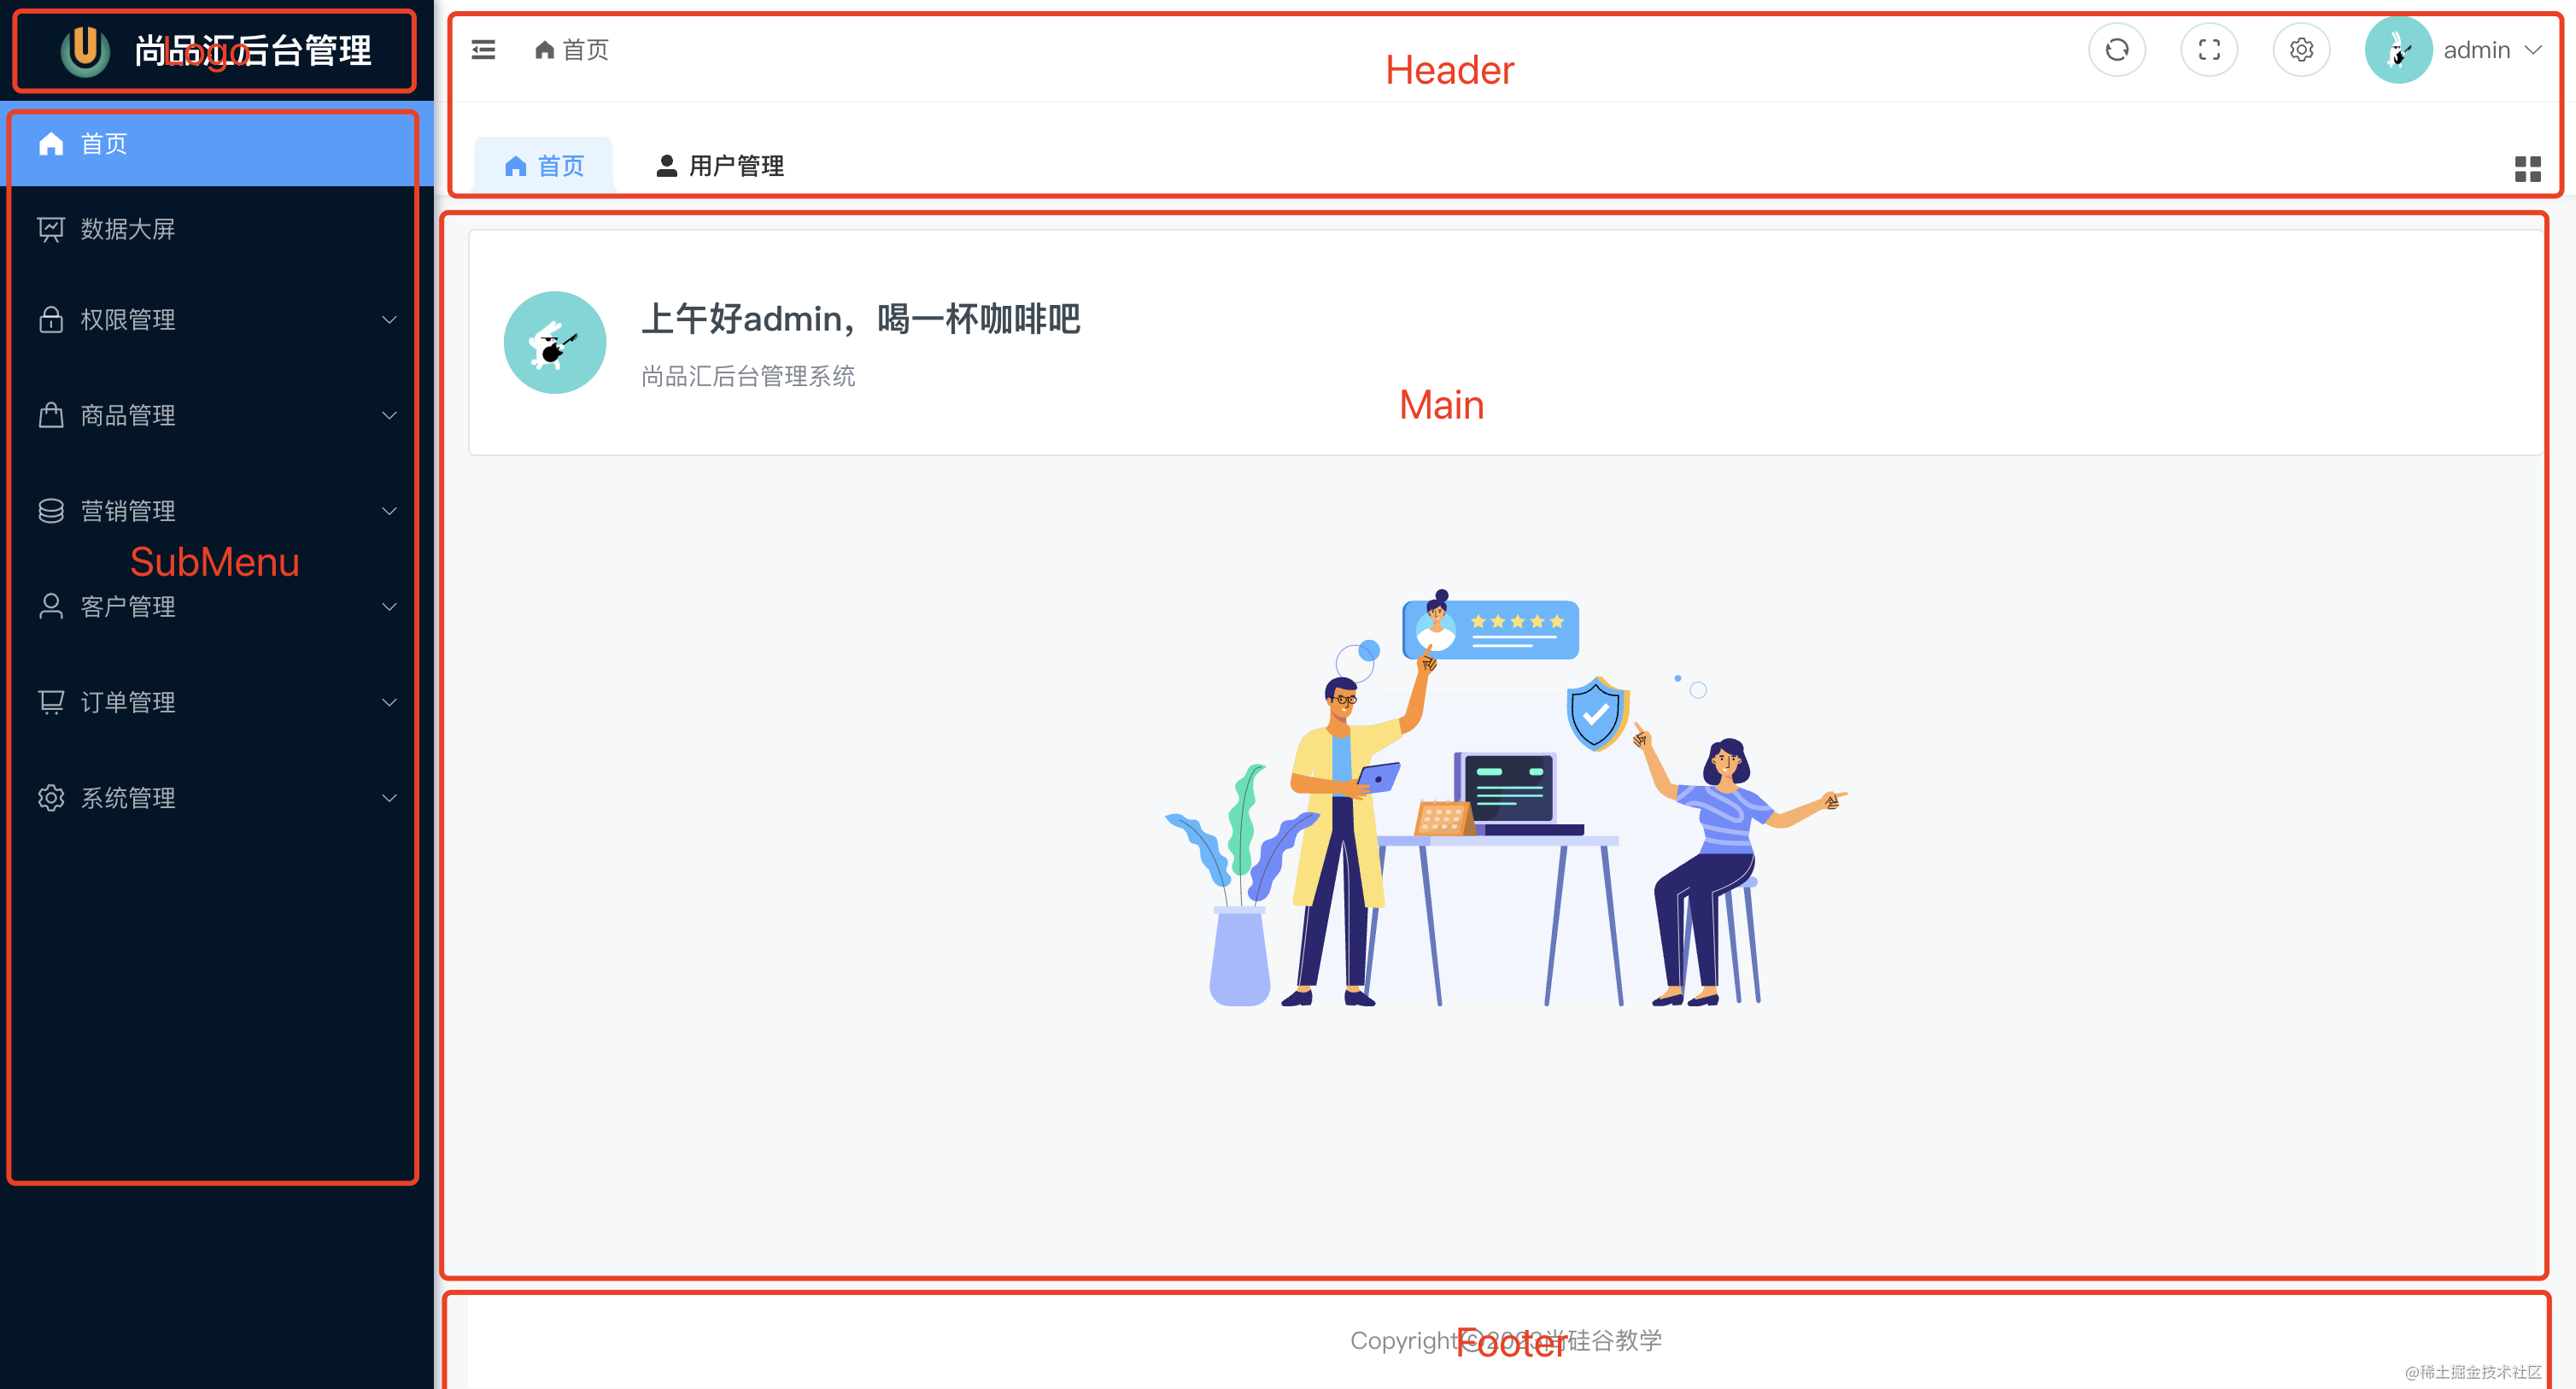

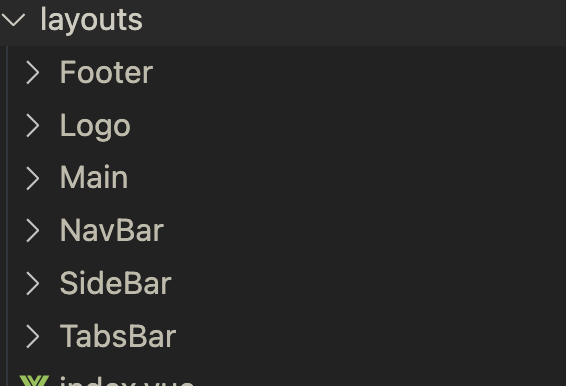
整体布局分为五大块:Logo、SubMenu、Header、Main、Footer。按照功能划分,我们的目录结构可以是下面这样的子:
我们先来搭个主体结构,在sec/layouts下面新建index.vue文件:
<template>
  <div class="layout-admin-wrapper">
    <div class="layout-container-vertical fixed">
      <!-- SubMenu -->
      <LayoutSideBar />
      <div class="layout-main" :class="{ 'is-collapse': collapse }">
        <!-- Header -->
        <div
          class="layout-header fixed-header"
          :class="{ 'is-collapse': collapse }"
        >
          <LayoutNavBar />
          <LayoutTabsBar />
        </div>
        <div class="app-main-container">
          <!-- Main -->
          <LayoutMain />
          <!-- Footer -->
          <LayoutFooter />
        </div>
      </div>
    </div>
  </div>
</template>
先来说说布局。
- 在最外层有个
<div id="app"><div>,为了让整个页面高度撑开,我们把最外层的高度设置为height: 100vh。 - 由于头部是用的fixed,
layout-container-vertical整体需要设置一个padding-top,值是头部的高度。 LayoutSideBar是SubMenu,需要固定在左侧,所以layout-main需要设置一个padding-left,值是SubMenu的宽度。
接下来就是collapse,当点击展开收起SubMenu的时候,SubMenu的宽度layout-main的padding-left需要变化。
上面的这些css变量需要使用variable.scss提前声明好:
// 横向布局时top-bar、logo、一级菜单的高度
$base-top-bar-height: 60px;

// 纵向布局时logo的高度
$base-logo-height: 75px;

// 顶部nav-bar的高度
$base-nav-bar-height: 60px;

// 顶部多标签页tabs-bar的高度
$base-tabs-bar-height: 55px;

// 顶部多标签页tabs-bar中每一个item的高度
$base-tag-item-height: 34px;

// 菜单li标签的高度
$base-menu-item-height: 50px;

// 头部高度
$base-header-height: calc(#{$base-nav-bar-height} + #{$base-tabs-bar-height});

// app-footer高度
$base-app-footer-height: 55px;

// app-main的高度
$base-app-main-height: calc(
  100vh - $base-nav-bar-height - $base-tabs-bar-height - 56px - 40px
);

// 纵向布局时左侧导航未折叠时的宽度
$base-left-menu-width: 256px;

// 纵向布局时左侧导航未折叠时右侧内容的宽度
$base-right-content-width: calc(100% - #{$base-left-menu-width});

// 纵向布局时左侧导航已折叠时的宽度
$base-left-menu-width-min: 64px;

// 纵向布局时左侧导航已折叠时右侧内容的宽度
$base-right-content-width-min: calc(100% - #{$base-left-menu-width-min});
页面整体的样式如下:
@mixin fix-header {
  position: fixed;
  top: 0;
  right: 0;
  z-index: $base-z-index - 2;
  width: calc(100% - $base-left-menu-width);
}

.layout-container-vertical {
  &.fixed {
    padding-top: calc(#{$base-top-bar-height} + #{$base-tabs-bar-height});
  }

  .layout-main {
    min-height: 100%;
    margin-left: $base-left-menu-width;

    &.is-collapse {
      margin-left: $base-left-menu-width-min;
      border-right: 0;
    }

    .layout-header {
      box-shadow: 0 1px 4px rgb(0 21 41 / 8%);

      &.fixed-header {
        @include fix-header;
      }

      &.is-collapse {
        width: calc(100% - $base-left-menu-width-min);
      }
    }

    .app-main-container {
      padding: 20px;
    }
  }
}
接下来我们来实现侧边栏。
侧边栏实现
侧边栏组件为LayoutSideBar。这里我们把Logo部分也包含进去了。布局如下:
<template>
  <div class="layout-sidebar-container" :class="{ 'is-collapse': collapse }">
    <logo />

    <el-scrollbar>
      <el-menu
        background-color="#001529"
        text-color="hsla(0,0%,100%,.65)"
        active-text-color="#fff"
        :defaultActive="activeMenu"
        :collapse="collapse"
        :unique-opened="true"
      >
        <sub-menu :menuList="menuList"></sub-menu>
      </el-menu>
    </el-scrollbar>
  </div>
</template>
这里主要用el-menu,设置一下侧边栏的整体背景颜色,文字默认颜色,选中文字颜色,默认激活路由,展开收起等状态。里面套了一个子组件:sub-menu,来须渲染路由菜单menuList
在sub-menu组件中,就是通过组件递归的形式,来循环渲染菜单。
<template>
  <template v-for="subItem in menuList" :key="subItem.path">
    <el-sub-menu
      v-if="subItem.children && subItem.children.length > 1"
      :index="subItem.path"
    >
      <template #title>
        <el-icon>
          <component :is="subItem.meta.icon"></component>
        </el-icon>
        <span>{{ subItem.meta.title }}</span>
      </template>
      <!-- 有children递归本次组件 -->
      <sub-menu :menuList="subItem.children" />
    </el-sub-menu>
    <el-menu-item
      v-else-if="subItem.children && subItem.children.length == 1"
      :index="subItem.children[0].path"
      @click="handleClickMenu(subItem.children[0])"
    >
      <el-icon>
        <component :is="subItem.children[0].meta.icon"></component>
      </el-icon>
      <template #title>
        <span>{{ subItem.children[0].meta.title }}</span>
      </template>
    </el-menu-item>
    <el-menu-item
      v-else
      :index="subItem.path"
      @click="handleClickMenu(subItem)"
    >
      <el-icon>
        <component :is="subItem.meta.icon"></component>
      </el-icon>
      <template #title>
        <span>{{ subItem.meta.title }}</span>
      </template>
    </el-menu-item>
  </template>
</template>
这里之所以做了这么多的判断,是因为当路由只有一层,也就是children只有一个的时候,比如首页路由:
{
    path: '/',
    name: 'LAYOUT',
    component: LAYOUT,
    redirect: HOME_URL,
    meta: {
      title: '首页',
      icon: 'HomeFilled',
    },
    children: [
      {
        path: '/index',
        name: 'Index',
        component: () => import('@/views/home/index.vue'),
        meta: {
          title: '首页',
          icon: 'HomeFilled',
          affix: true,
        },
      },
    ],
  },
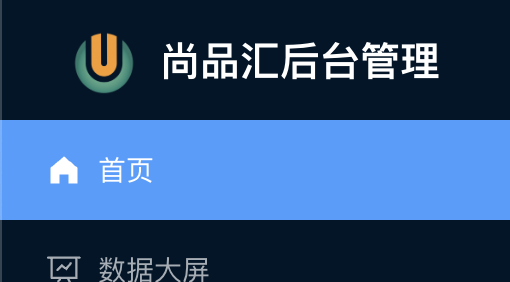
这种情况下,只需要渲染第一层就OK了。也就是这样:
如果路由有children并且不止一个的时候,就需要用到组件递归:
<sub-menu :menuList="subItem.children" />
添加事件,点击每一个菜单需要跳转路由:
<script lang="ts">
import { Menu } from '@element-plus/icons-vue'
import { defineComponent } from 'vue'
import { useRouter } from 'vue-router'

export default defineComponent({
  name: 'SubMenu',
  props: {
    menuList: {
      type: Menu.MenuOptions,
      default: () => {
        return []
      },
    },
  },
  setup() {
    const router = useRouter()
    function handleClickMenu(subItem: Menu.MenuOptions) {
      // 跳转外部链接
      if (subItem.meta.isLink) return window.open(subItem.meta.isLink, '_blank')
      router.push(subItem.path)
    }
    return {
      handleClickMenu,
    }
  },
})
</script>
这里判断了是不是外部连接,通过meta.isLink来区别。不是外部连接,就通过router.push来跳转路由。
OK,现在侧边栏有了,当我们点击菜单的时候,跳转到不同的路由,需要渲染不同的页面内容,也就是改变Main区域的内容。
Main实现
Main区域的实现只有下面这些代码:
<template>
  <section class="app-mian-height">
    <router-view v-slot="{ Component, route }" v-if="isShow">
      <transition appear name="fade-transform" mode="out-in">
        <component :is="Component" :key="route.path" />
      </transition>
    </router-view>
  </section>
</template>

<script lang="ts">
import { defineComponent, nextTick, ref, watch } from 'vue'
import { useSettingsStore } from '@/store/modules/settings'

export default defineComponent({
  setup() {
    const settingsStore = useSettingsStore()
    const isShow = ref(true)
    watch(
      () => settingsStore.refresh,
      () => {
        isShow.value = false
        nextTick(() => {
          isShow.value = true
        })
      },
    )
    return { isShow }
  },
})
</script>

<style scoped lang="scss">
.app-mian-height {
  min-height: $base-app-main-height;

  // padding: 20px;
  background-color: inherit;
}
</style>
先注意Main区域的高度,因为要主区域撑满整个屏幕,所以要把它的高度需要减去Header和Footer的高度,这我们已经通过scss变量的形式计算好了:
// app-main的高度,这里额外减掉了padding的值
$base-app-main-height: calc(
  100vh - $base-nav-bar-height - $base-tabs-bar-height - 56px - 40px
);
渲染组件的时候我们使用router-view插槽的形式,具体用法参考链 的 v-slot。
现在基本上已经可以正常使用了。下面我们添加更多的功能。
NavBar实现
在NavBar组件中,包含以下功能:

左侧为collapse和Breadcrumb,右侧为功能按钮和user信息展示。
布局如下:
<template>
  <div class="nav-bar-container">
    <el-row :gutter="15">
      <el-col :sm="12" :md="12" :lg="12" :xl="12">
        <div class="left-panel">
          <el-icon class="fold-unfold" @click="handleCollapse">
            <component :is="collapse ? 'Expand' : 'Fold'"></component>
          </el-icon>
          <Breadcrumb />
        </div>
      </el-col>
      <el-col :sm="12" :md="12" :lg="12" :xl="12">
        <div class="right-panel">
          <Refresh />
          <ScreenFull />
          <Settings />
          <User />
        </div>
      </el-col>
    </el-row>
  </div>
</template>
collapse实现
collapse是一个全局配置字段,我们通过pinia来管理。事件触发的时候,通过
settingsStore.changeCollapse()
来修改collapse的值。在useSettingsStore中是这样设置的:
import { defineStore } from 'pinia'
export const useSettingsStore = defineStore({
  id: 'app-settings',
  state: (): SettingsState => ({
    collapse: false,
  }),

  actions: {
    changeCollapse() {
      this.collapse = !this.collapse
    },
  },
  persist: true,
})
当我们缩小浏览器宽度的时候,当屏幕宽度小于1200px的时候,会收起SubMenu。在src/layouts/index.vue中添加下面的逻辑即可:
setup() {
  const settingsStore = useSettingsStore()
  const collapse = computed(() => settingsStore.collapse)
  // 监听窗口大小变化,折叠侧边栏
  const screenWidth = ref(0)
  const listeningWindow = useDebounceFn(() => {
    screenWidth.value = document.body.clientWidth
    if (!collapse.value && screenWidth.value < 1200)
      settingsStore.changeCollapse()
    if (collapse.value && screenWidth.value > 1200)
      settingsStore.changeCollapse()
  }, 100)

  window.addEventListener('resize', listeningWindow, false)

  onBeforeUnmount(() => {
    window.removeEventListener('resize', listeningWindow)
  })
}
Breadcrumb实现
面包屑的实现也很简单,就是通过route.matched来获取菜单的匹配:
<template>
  <el-breadcrumb class="app-breadcrumb" separator-icon="ArrowRight">
    <transition-group name="breadcrumb" mode="out-in">
      <el-breadcrumb-item v-for="(item, index) in matched" :key="item.path">
        <el-icon size="14">
          <component :is="item.meta.icon"></component>
        </el-icon>
        <span
          v-if="item.redirect === 'noRedirect' || index == matched.length - 1"
          class="no-redirect"
        >
          {{ item.meta.title }}
        </span>
        <a v-else @click.prevent="handleLink(item)">{{ item.meta.title }}</a>
      </el-breadcrumb-item>
    </transition-group>
  </el-breadcrumb>
</template>

<script lang="ts">
import { defineComponent } from 'vue'
import { useRoute, useRouter, RouteRecordRaw } from 'vue-router'
import { computed } from 'vue'

export default defineComponent({
  setup() {
    const route = useRoute()
    const router = useRouter()
    const handleLink = (item: RouteRecordRaw) => {
      router.push({
        path: item.path,
      })
    }

    const matched = computed(() =>
      route.matched.filter(
        (item) =>
          item.meta &&
          item.meta.title &&
          item.meta.breadcrumb !== false &&
          item.children.length !== 1,
      ),
    )

    return {
      handleLink,
      matched,
    }
  },
})
</script>
Refresh实现
Refresh是刷新当前路由,刷新以后,页面路由会刷新
<template>
  <div class="btn">
    <el-tooltip content="刷新">
      <el-button circle @click="onRefresh">
        <IconifyIcon icon="ri:refresh-line" height="16" />
      </el-button>
    </el-tooltip>
  </div>
</template>

<script lang="ts">
import { defineComponent } from 'vue'
import { useSettingsStore } from '@/store/modules/settings'
import { IconifyIcon } from '@/components/IconifyIcon'

export default defineComponent({
  components: {
    IconifyIcon,
  },
  setup() {
    const settingsStore = useSettingsStore()
    const onRefresh = () => {
      settingsStore.setRefresh()
    }
    return { onRefresh }
  },
})
</script>

<style scoped lang="scss">
.btn {
  margin-right: 20px;
  cursor: pointer;
  transition: all 0.3s;
}
</style>
这里修改了refresh的值以后,在Main组件中,
<router-view v-slot="{ Component, route }" v-if="isShow">
  <transition appear name="fade-transform" mode="out-in">
    <component :is="Component" :key="route.path" />
  </transition>
</router-view>
watch(
  () => settingsStore.refresh,
  () => {
    isShow.value = false
    nextTick(() => {
      isShow.value = true
    })
	},
)
通过watch监听refresh的值,一旦变化,就从新赋值isShow的值为false,这个组件就会隐藏,然后在nextTick中又赋值为true,组件又会重新渲染一次。这样就做到了路由重新渲染的目的,非常巧妙。
ScreeFull实现
ScreeFull是进行全屏的操作。这里使用了@vueuse/core中的useFullscreen方法,具体写大如下:
<template>
  <div class="m-screenful">
    <el-tooltip
      effect="dark"
      :content="!isFullscreen ? '全屏' : '收起'"
      placement="bottom"
    >
      <el-button circle @click="toggle">
        <IconifyIcon
          v-if="!isFullscreen"
          icon="fluent:full-screen-maximize-24-filled"
          height="16"
        />
        <IconifyIcon
          v-else
          icon="fluent:full-screen-minimize-24-filled"
          height="18"
        />
      </el-button>
    </el-tooltip>
  </div>
</template>

<script lang="ts">
import { useFullscreen } from '@vueuse/core'
import { defineComponent } from 'vue'

export default defineComponent({
  setup() {
    const { toggle, isFullscreen } = useFullscreen()
    return {
      toggle,
      isFullscreen,
    }
  },
})
</script>

<style lang="scss" scoped>
.m-screenful {
  padding-right: 20px;
  cursor: pointer;
  transition: all 0.3s;
}
</style>
useFullscreen具体原理我们不做深究。
主题设置我们单独放一个小节讲,我们把主题设置和暗黑模式统一进行处理。
用户信息展示
用户信息这里就展示一个头像和用户名。还有个退出登陆的操作。我们主要讲讲退出登陆执行的逻辑。
<template>
  <el-dropdown @visible-change="onChange" @command="handleCommand">
    <div class="avatar-dropdown">
      <img class="user-avatar" :src="avatar" alt="" />
      <div class="user-name">{{ name }}</div>
      <el-icon class="up-down">
        <component :is="visible ? 'ArrowUp' : 'ArrowDown'" />
      </el-icon>
    </div>
    <template #dropdown>
      <el-dropdown-menu>
        <el-dropdown-item command="logout">
          <svg-icon name="logout" size="16px" />
          <span>退出登陆</span>
        </el-dropdown-item>
      </el-dropdown-menu>
    </template>
  </el-dropdown>
</template>

<script lang="ts">
import { defineComponent, ref } from 'vue'
import { useRouter, useRoute } from 'vue-router'
import { useUserStore } from '@/store/modules/user'
import { ArrowUp, ArrowDown } from '@element-plus/icons-vue'
import { ElMessage, ElMessageBox } from 'element-plus'
import { LOGIN_URL } from '@/config/config'
export default defineComponent({
  components: {
    ArrowUp,
    ArrowDown,
  },
  setup() {
    const router = useRouter()
    const route = useRoute()
    const userStore = useUserStore()

    const { name, avatar } = userStore.userInfo || {}
    const visible = ref(false)

    function onChange(show: boolean) {
      visible.value = show
    }

    function handleCommand(command: string) {
      if (command === 'logout') {
        logout()
      }
    }

    // 退出登陆
    function logout() {
      ElMessageBox.confirm('您确定要退出吗?', '提示', {
        confirmButtonText: '确认',
        cancelButtonText: '取消',
        type: 'warning',
      }).then(async () => {
        await userStore.Logout()
        router.push({ path: LOGIN_URL, query: { redirect: route.fullPath } })
        ElMessage.success('退出登录成功!')
      })
    }
    return {
      name,
      avatar,
      visible,
      onChange,
      handleCommand,
    }
  },
})
</script>
点击退出登陆,请求退出登陆接口,跳转到登陆页面。在useUserStore中处理了退出登陆的逻辑
import { defineStore } from 'pinia'
import { logout } from '@/api'
import { RESEETSTORE } from '@/utils/reset'
export const useUserStore = defineStore({
  id: 'app-user',
  state: (): UserState => ({
    token: '',
    userInfo: null,
  }),
  actions: {
    async Logout() {
      await logout()
      RESEETSTORE()
    },
  },
  // 设置为true,缓存state
  persist: true,
})
这里的RESEETSTORE方法我们之前已经讲过了,重置一下useUserStore和useAuthStore,清空用户信息缓存。
import { useUserStore } from '@/store/modules/user'
import { useAuthStore } from '@/store/modules/auth'
export function RESEETSTORE() {
  const userStore = useUserStore()
  const authStore = useAuthStore()

  userStore.$reset()
  authStore.$reset()
  // 清除用户信息缓存
  localStorage.removeItem('app-user')
}
TabsBar实现

逻辑有些多,这里讲个大概思路。
首先从authMenuList获取默认的TabsBar信息,在添加路由的时候,我们在路由中通过meta.affix: true声明的会默认显示在TabsBar中:
{
    path: '/',
    name: 'LAYOUT',
    component: LAYOUT,
    redirect: HOME_URL,
    meta: {
      title: '首页',
      icon: 'HomeFilled',
    },
    children: [
      {
        path: '/index',
        name: 'Index',
        component: () => import('@/views/home/index.vue'),
        meta: {
          title: '首页',
          icon: 'HomeFilled',
          affix: true,
        },
      },
    ],
  },
在TabsBar组件初始化的时候,在onMountend中,初始化TabsBar的列表数据,存储到pinia中:
<script lang="ts">
import { computed, defineComponent, ref, onMounted, watch } from 'vue'
import { useTabsBarStore } from '@/store/modules/tabsBar'
import { useRoute, useRouter, RouteRecordRaw } from 'vue-router'
import path from 'path-browserify'
import { useAuthStore } from '@/store/modules/auth'
import { routersType } from './types'
export default defineComponent({
setup() {
const tabsBarStore = useTabsBarStore()
const authStore = useAuthStore()
const routes = computed(() => authStore.authMenuList)
const visitedViews = computed<routersType[]>(
() => tabsBarStore.visitedViews,
)
const route = useRoute()
const router = useRouter()
let affixTags = ref<RouteRecordRaw[]>([])
// 添加当前路由
const addTags = () => {
const { name } = route
if (name === 'Login') {
return
}
if (name) {
tabsBarStore.addView(route as unknown as RouteRecordRaw)
}
return false
}
function filterAffixTags(routes: RouteRecordRaw[], basePath = '/') {
let tags = [] as any
routes.forEach((route) => {
if (route.meta && route.meta.affix) {
// 获取 path
const tagPath = path.resolve(basePath, route.path)
tags.push({
fullPath: tagPath,
path: tagPath,
name: route.name,
meta: { ...route.meta },
})
}
if (route.children) {
const tempTags = filterAffixTags(route.children, route.path)
if (tempTags.length >= 1) {
tags = [...tags, ...tempTags]
}
}
})
return tags
}
/**
* @description: 拿到需要固定的路由表,添加进 store
* @author: codeBo
*/
const initTags = () => {
let routesNew = routes.value as RouteRecordRaw[]
let affixTag = (affixTags.value = filterAffixTags(routesNew))
for (const tag of affixTag) {
if (tag.name) {
tabsBarStore.addVisitedView(tag)
}
}
}
onMounted(() => {
initTags()
addTags()
})
watch(route, () => {
addTags()
})
const activeTabsValue = computed({
get: () => {
return tabsBarStore.activeTabsValue
},
set: (val) => {
tabsBarStore.setTabsMenuValue(val)
},
})
// 删除以后切换到下一个
function toLastView(activeTabPath: string) {
let index = visitedViews.value.findIndex(
(item) => item.path === activeTabPath,
)
const nextTab =
visitedViews.value[index + 1] || visitedViews.value[index - 1]
if (!nextTab) return
router.push(nextTab.path)
tabsBarStore.addVisitedView(nextTab)
}
// 点击事件
const tabClick = (tabItem: TabsPaneContext) => {
let path = tabItem.props.name as string
router.push(path)
}
const isActive = (path: string): boolean => {
return path === route.path
}
const removeTab = async (activeTabPath: TabPaneName): Promise<any> => {
if (isActive(activeTabPath as string)) {
toLastView(activeTabPath as string)
}
await tabsBarStore.delView(activeTabPath)
}
// 按钮事件
const closeCurrentTab = () => {
tabsBarStore.toLastView(route.path)
tabsBarStore.delView(route.path)
}
const closeOtherTab = () => {
tabsBarStore.delOtherViews(route.path)
}
const closeAllTab = async () => {
tabsBarStore.delAllViews()
tabsBarStore.goHome()
}
return {
activeTabsValue,
tabClick,
removeTab,
visitedViews,
closeCurrentTab,
closeOtherTab,
closeAllTab,
}
},
})
</script>
在pinia中,单独对TabsBar做了管理,addVisitedView方法会对每个tab进行添加,然后统一放到visitedViews中,最终会通过visitedViews来渲染,下面是useTabsBarStore:
// tabsBar.ts
import { defineStore } from 'pinia'
import router from '@/router/index'
import { RouteRecordRaw } from 'vue-router'
export const useTabsBarStore = defineStore({
// id: 必须的,在所有 Store 中唯一
id: 'app-tabsBar',
// state: 返回对象的函数
state: (): {
activeTabsValue: string
visitedViews: RouteRecordRaw[]
cachedViews: any[]
} => ({
activeTabsValue: '/index',
visitedViews: [], // 选中过的路由表
cachedViews: [], // 使用 keepAlive 时的缓存
}),
getters: {},
// 可以同步 也可以异步
actions: {
setTabsMenuValue(val: string) {
this.activeTabsValue = val
},
addView(view: RouteRecordRaw) {
this.addVisitedView(view)
},
removeView(routes: RouteRecordRaw[]) {
return new Promise((resolve) => {
this.visitedViews = this.visitedViews.filter(
(item) => !routes.includes((item as any).path),
)
resolve(null)
})
},
addVisitedView(view: RouteRecordRaw) {
this.setTabsMenuValue(view.path)
if (this.visitedViews.some((v) => v.path === view.path) || !view.meta)
return
this.visitedViews.push(
Object.assign({}, view, {
title: view.meta.title || 'no-name',
}),
)
if (view.meta.keepAlive && view.name) {
this.cachedViews.push(view.name)
}
},
delView(activeTabPath: any) {
return new Promise((resolve) => {
this.delVisitedView(activeTabPath)
this.delCachedView(activeTabPath)
resolve({
visitedViews: [...this.visitedViews],
cachedViews: [...this.cachedViews],
})
})
},
toLastView(activeTabPath: string) {
const index = this.visitedViews.findIndex(
(item) => item.path === activeTabPath,
)
const nextTab =
this.visitedViews[index + 1] || this.visitedViews[index - 1]
if (!nextTab) return
router.push(nextTab.path)
this.addVisitedView(nextTab)
},
delVisitedView(path: string) {
return new Promise((resolve) => {
this.visitedViews = this.visitedViews.filter((v) => {
if (!v.meta) return
return v.path !== path || v.meta.affix
})
this.cachedViews = this.cachedViews.filter((v) => {
return v.path !== path || v.meta.affix
})
resolve([...this.visitedViews])
})
},
delCachedView(view: RouteRecordRaw) {
return new Promise((resolve) => {
const index = this.cachedViews.indexOf(view.name)
index > -1 && this.cachedViews.splice(index, 1)
resolve([...this.cachedViews])
})
},
clearVisitedView() {
this.delAllViews()
},
delAllViews() {
this.visitedViews = this.visitedViews.filter(
(v) => v.meta && v.meta.affix,
)
this.cachedViews = this.visitedViews.filter((v) => v.meta && v.meta.affix)
},
delOtherViews(path: string) {
this.visitedViews = this.visitedViews.filter((item) => {
return item.path === path || (item.meta && item.meta.affix)
})
this.cachedViews = this.visitedViews.filter((item) => {
return item.path === path || (item.meta && item.meta.affix)
})
},
goHome() {
this.activeTabsValue = '/index'
router.push({ path: '/index' })
},
updateVisitedView(view: RouteRecordRaw) {
for (let v of this.visitedViews) {
if (v.path === view.path) {
v = Object.assign(v, view)
break
}
}
},
},
})
当个进行tab切换的时候,拿到当前点击的path,直接通过router.push进行跳转:
// 点击事件
const tabClick = (tabItem: TabsPaneContext) => {
let path = tabItem.props.name as string
router.push(path)
}
当我们切换路由的时候,会监听路由的变化,然后添加新的tab到visitedViews当中:
// 添加当前路由
const addTags = () => {
const { name } = route
if (name === 'Login') {
return
}
if (name) {
tabsBarStore.addView(route as unknown as RouteRecordRaw)
}
return false
}
addView方法是一个action
addView(view: RouteRecordRaw) {
this.addVisitedView(view)
},
addVisitedView(view: RouteRecordRaw) {
this.setTabsMenuValue(view.path)
if (this.visitedViews.some((v) => v.path === view.path) || !view.meta)
return
this.visitedViews.push(
Object.assign({}, view, {
title: view.meta.title || 'no-name',
}),
)
if (view.meta.keepAlive && view.name) {
this.cachedViews.push(view.name)
}
},
这里会判断当前tab是否已经添加过了。
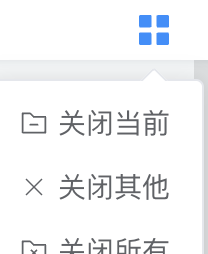
当然这里还有关系当前tab,关闭其他tab,关闭所有tab等等操作。
具体逻辑可以自行查看项目下的代码:src/layouts/TabsBar/index.vue,这里不再赘述。
总体布局如下:
<template>
<div class="tabs-bar-container">
<div class="tabs-content">
<el-tabs
type="card"
v-model="activeTabsValue"
@tab-click="tabClick"
@tab-remove="removeTab"
>
<el-tab-pane
v-for="item in visitedViews"
type="card"
:key="item.path"
:path="item.path"
:label="item.title"
:name="item.path"
:closable="!(item.meta && item.meta.affix)"
>
<template #label>
<el-icon
size="16"
class="tabs-icon"
v-if="item.meta && item.meta.icon"
>
<component :is="item.meta.icon"></component>
</el-icon>
{{ item.title }}
</template>
</el-tab-pane>
</el-tabs>
</div>
<div class="tabs-action">
<el-dropdown trigger="hover">
<el-icon color="rgba(0, 0, 0, 0.65)" :size="20">
<Menu />
</el-icon>
<template #dropdown>
<el-dropdown-menu>
<el-dropdown-item @click="closeCurrentTab">
<el-icon :size="14"><FolderRemove /></el-icon>
关闭当前
</el-dropdown-item>
<el-dropdown-item @click="closeOtherTab">
<el-icon :size="14"><Close /></el-icon>
关闭其他
</el-dropdown-item>
<el-dropdown-item @click="closeAllTab">
<el-icon :size="14"><FolderDelete /></el-icon>
关闭所有
</el-dropdown-item>
</el-dropdown-menu>
</template>
</el-dropdown>
</div>
</div>
</template>
到此,Layout布局已经实现完毕。下一节我们来实现主题切换和暗黑模式的切换。
代码地址
原文链接:https://juejin.cn/post/7215125397347680314 作者:白哥学前端