
Axios + TS 弱鸡封装
实现功能
1.可以创建多个创建多个互不干扰,完全独立的axios实例
2.通过创建的实例调用各种方法(request,get,post……)
封装的前置认识
类的基本使用
TS
AxiosInstance —— axios实例的类型
AxiosResponse —— 响应的数据类型
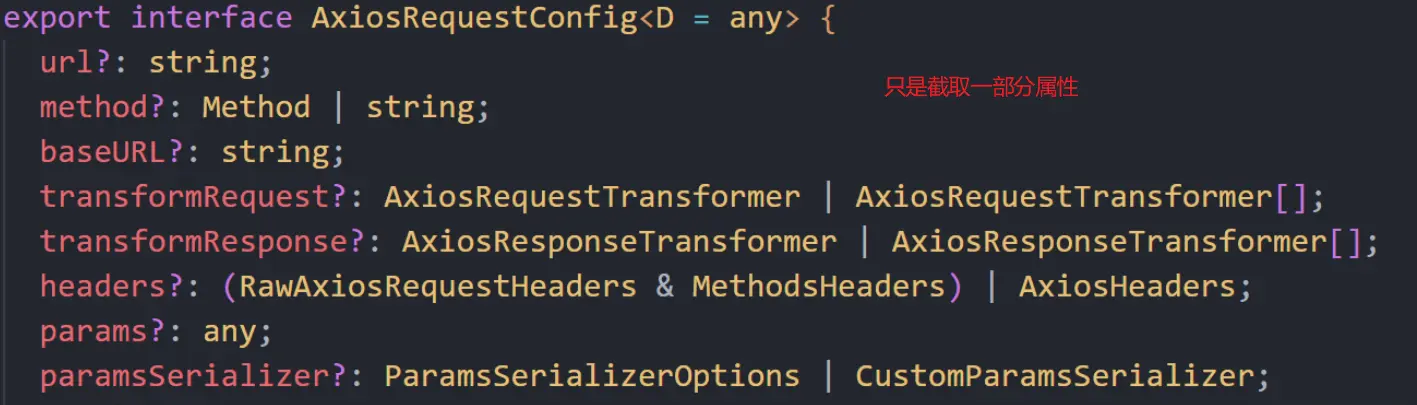
InternalAxiosRequestConfig —— 传入配置config的类型/请求的数据类型


为什么要对Axios进行封装
弊端:对axios的依赖太强了,如果日后更换网络请求库会很麻烦
好处:将各个请求相同的配置写在一块,减少重复的垃圾代码
封装过程
一.创建多个axios实例
可能应用场景:你有多个baseurl,需要去多个服务器请求数据,这时候就需要创建多个互不干扰,完全独立的axios实例
我们通过以下代码实现
// service/index
import TTRequest from './request'
const ttRequest = new TTRequest({
    baseURL:'http://201314xxx'
    timeout:1000
})
const ttRequest2 = new TTRequest({
    baseURL:'http://666666xxx'
    timeout:2000
})
export default ttRequest
// service/request/index.ts
import axios from 'axios'
import type { AxiosInstance, InternalAxiosRequestConfig } from 'axios'
class TTRequest {
instance: AxiosInstance //该类型是axios里面规定好的,不是我瞎编的
constructor(config: InternalAxiosRequestConfig) {
this.instance = axios.create(config)
}
}
export default TTRequest
拦截器的封装
一.全局拦截器的封装
在constructor直接设置拦截器,因为在new TTRequest()时,会执行constructor的代码,这样所有实例都具有此拦截器
class TTRequest {
instance: AxiosInstance
constructor(config: AxiosRequestConfig) {
// 创建axios实例
this.instance = axios.create(config)
// 保存拦截器
this.interceptors = config.interceptors
//全局拦截器(所有实例都有的拦截器)
this.instance.interceptors.request.use(
(config) => {
console.log('全局request成功')
return config
},
(err) => {
console.log('全局request失败')
return err
}
)
this.instance.interceptors.response.use(
(config) => {
console.log('全局response成功')
return config
},
(err) => {
console.log('全局response失败')
return err
}
}
二.单个实例拦截器的封装(仅在一个实例有效的)
想要实现只在单个实例中生效的拦截器,我希望在该类中传递我们需要的拦截器。
但是因为TTRequest 想要我们传递InternalAxiosRequestConfig类型的参数,而InternalAxiosRequestConfig却是没有拦截器interceptors属性
所以我们需要为InternalAxiosRequestConfig扩展一个interceptors属性,用到的是接口继承的知识点
步骤:
一. 用interface接口定义类型 TTRequestInterceptors
二. 在 TTRequestConfig 中扩展 interceptors 拦截器属性
三. 为 TTRequest 添加一个interceptors ,并声明其类型为TTRequestInterceptors
四. 再将每个实例的拦截器对象从config.interceptors拿出,添加到axios的实例拦截器里面
interface TTRequestInterceptors {
requestInterceptor?: (config: InternalAxiosRequestConfig) => InternalAxiosRequestConfig
requestInterceptorCatch?: (err: any) => any
responseInterceptor?: (config: AxiosResponse) => AxiosResponse
responseInterceptorCatch?: (err: any) => any
}
// 为InternalAxiosRequestConfig类型扩展interceptors属性
interface TTRequestConfig extends InternalAxiosRequestConfig {
interceptors?: TTRequestInterceptors
}
class TTRequest {
instance: AxiosInstance
interceptors?: TTRequestInterceptors
constructor(config: TTRequestConfig) {
// 创建axios实例
this.instance = axios.create(config)
// 保存拦截器
this.interceptors = config.interceptors
//全局拦截器代码省略
// 调用单个实例拦截器
this.instance.interceptors.request.use(
this.interceptors?.requestInterceptor,
this.interceptors?.requestInterceptorCatch
)
this.instance.interceptors.response.use(
this.interceptors?.responseInterceptor,
this.interceptors?.responseInterceptorCatch
)
} //注意此时的InternalAxiosRequestConfig已经被换成TTRequestConfig
}
方法的封装
为了在调用ttRequest的时候能拿到请求成功返回的数据,我们需要返回一个Promise,这样就可以在调用时.then得到数据
补充:所有方法封装都是调用的request函数
// 方法封装
request<T>(config: TTRequestConfig): Promise<T> {
return new Promise((resolve) => {
this.instance.request(config).then((res) => resolve(res))
})
}
get<T>(config: TTRequestConfig): Promise<T> {
return this.request<T>({ ...config, method: 'GET' })
}
post<T>(config: TTRequestConfig): Promise<T> {
return this.request<T>({ ...config, method: 'POST' })
}
delete<T>(config: TTRequestConfig): Promise<T> {
return this.request<T>({ ...config, method: 'DELETE' })
}
patch<T>(config: TTRequestConfig): Promise<T> {
return this.request<T>({ ...config, method: 'PATCH' })
}
interface DateType {
  data: any
  returnCode: String
  success: Boolean
}
// 调用ttRequest
ttRequest
  .get<DateType>({
    url: 'xxxxx'
  })
  .then((res) => {
    console.log(res)
  })
结尾
第一次写博客,如果有写的不对的,或者是不清楚的,欢迎各位大神批评指正,大家互相交流共同进步
原文链接:https://juejin.cn/post/7312749480674607140 作者:兔兔26