


- Next.js 构建博客之资源抓取
- Next.js 构建博客之博客搭建
- Next.js 构建博客之打包 SSG
- Next.js 构建博客之常见问题处理
- Next.js 构建博客之功能拓展
- Next.js 构建博客之自动构建
这是 Next.js 构建博客的第六篇文章,上一篇文章 Next.js 构建博客之功能拓展 介绍了 Next.js 如何添加额外的功能,这一篇主要介绍自动化提交部署相关的部分。
如果你想看已经部署博客的地址可以点击查看,代码仓库地址点击查看。
在正式说之前需要对 Github Actions 有所了解,具体的文章这里推荐两篇
阅读完成上面两篇会大概对 Github Actions 是什么东西有所了解,之后就是跟着我一步步操作了
GitHub Pages
Next build 之后是一堆静态文件,可以托管到自己的网站也可以白嫖一下 Github Pages,开启 Github Pages 的方法也很简单。
仓库点击 Settings 找到 Pages,之后设置 GitHub Pages 为 Github Actions 即可。

nextjs.yml
新建一个文件 .github/workflows/nextjs.yml
# Sample workflow for building and deploying a Next.js site to GitHub Pages
#
# To get started with Next.js see: https://nextjs.org/docs/getting-started
#
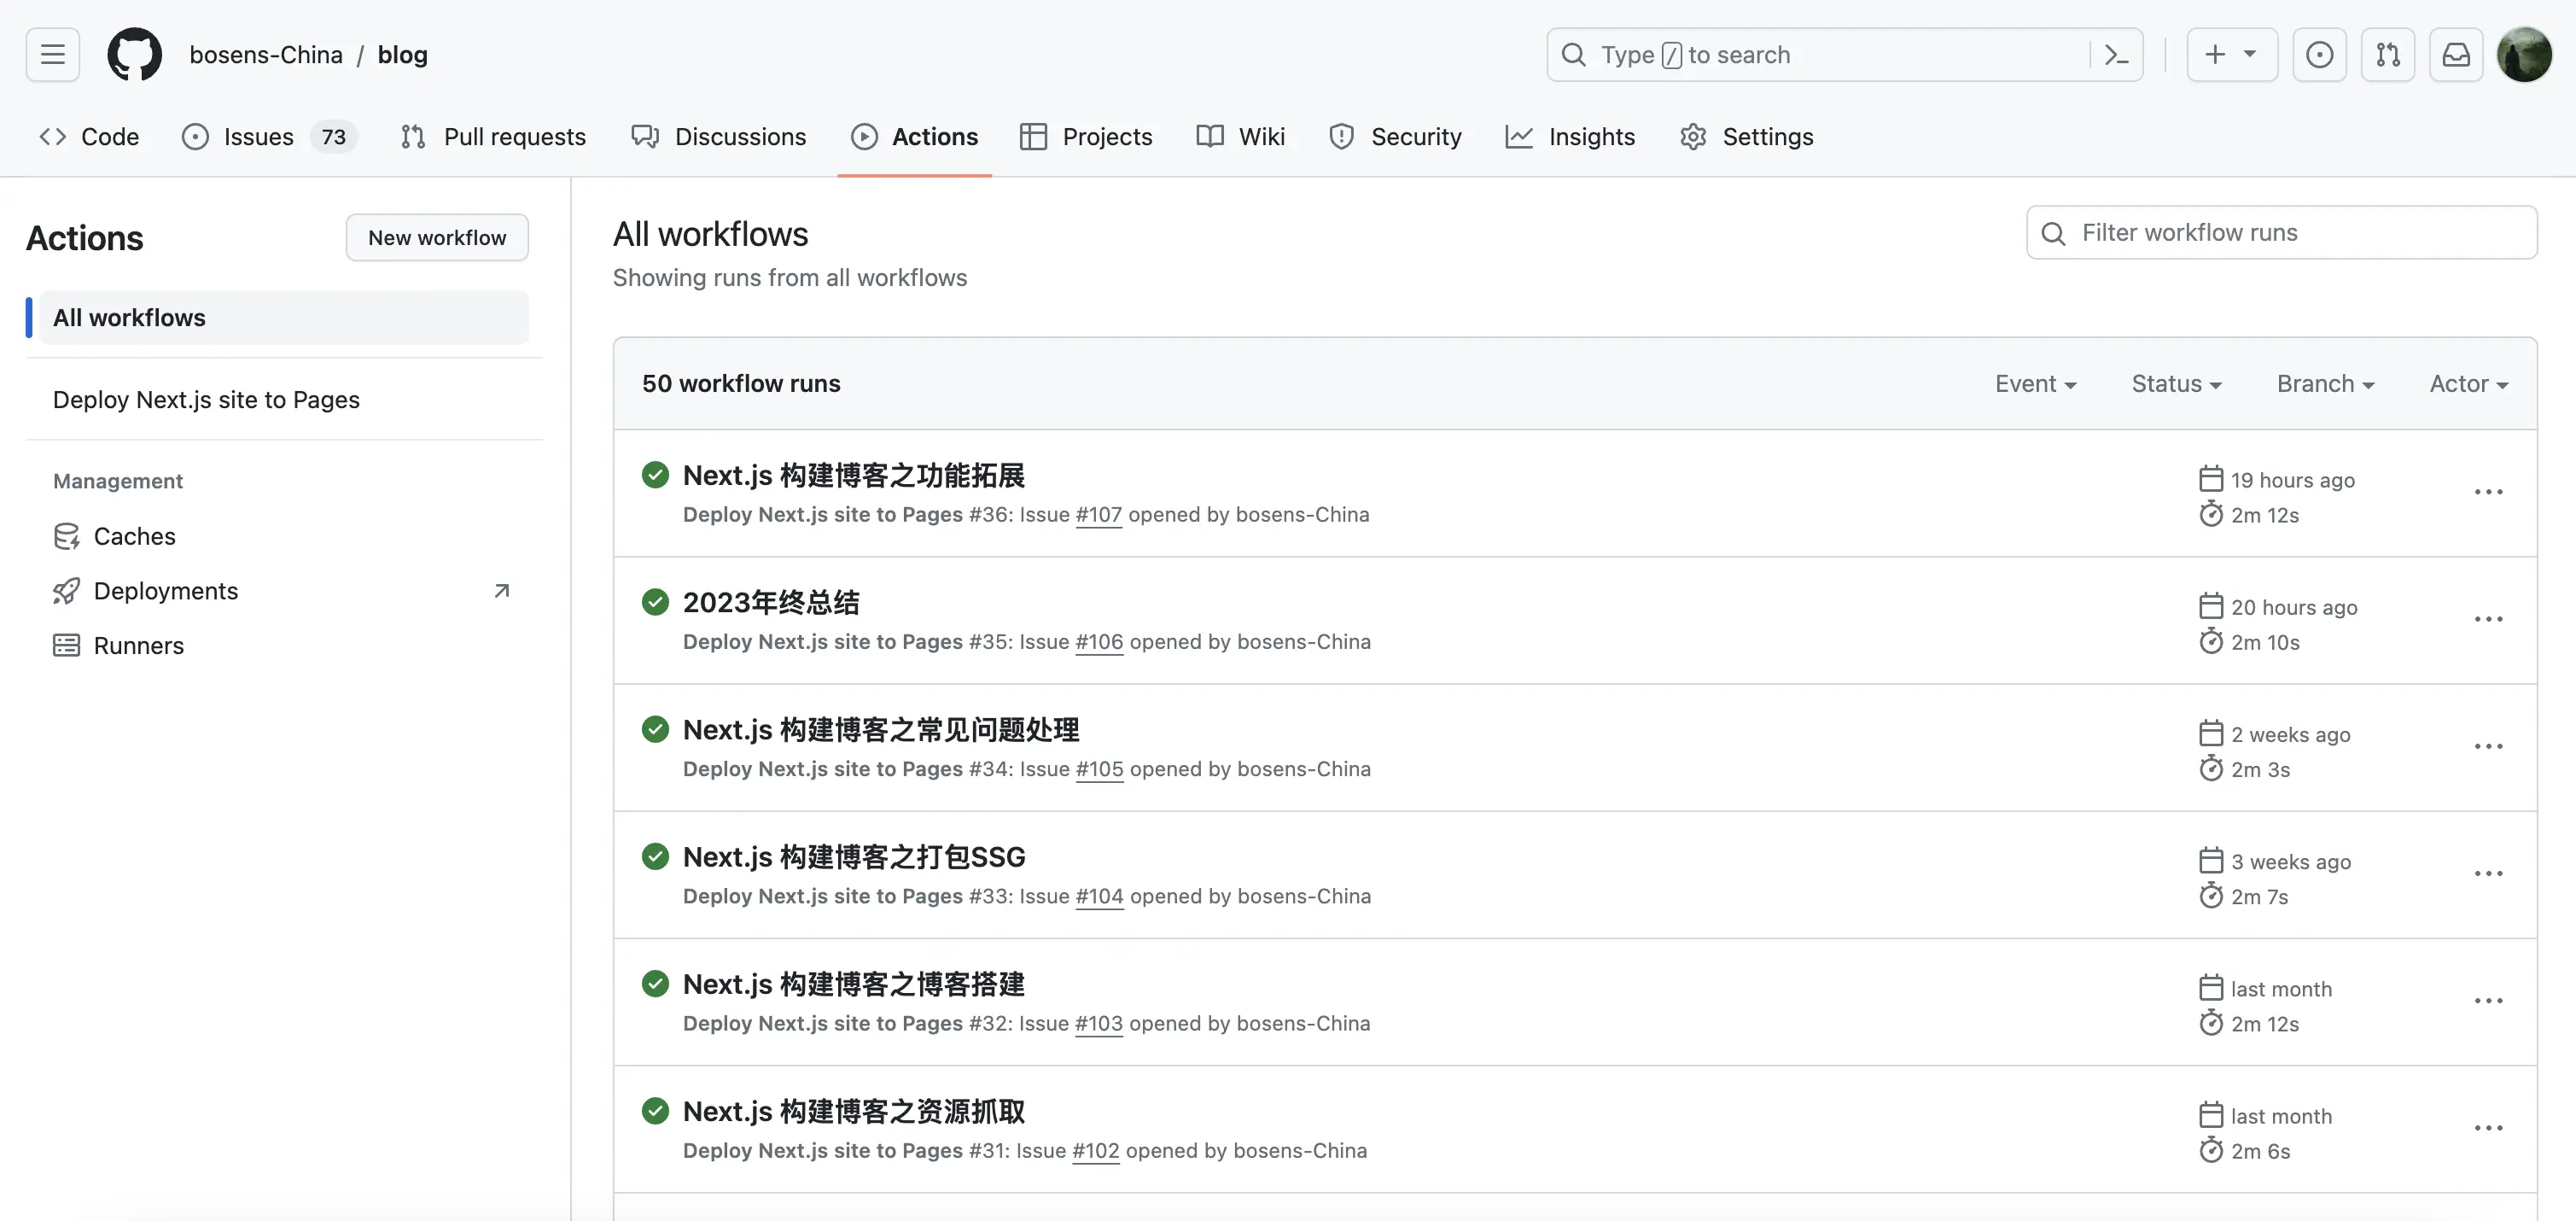
name: Deploy Next.js site to Pages
on:
# Runs on pushes targeting the default branch
push:
branches: ["main"]
issues:
types:
- opened
- edited
- deleted
- closed
- reopened
# Allows you to run this workflow manually from the Actions tab
workflow_dispatch:
# Sets permissions of the GITHUB_TOKEN to allow deployment to GitHub Pages
permissions:
contents: write
pages: write
id-token: write
# Allow only one concurrent deployment, skipping runs queued between the run in-progress and latest queued.
# However, do NOT cancel in-progress runs as we want to allow these production deployments to complete.
concurrency:
group: "pages"
cancel-in-progress: false
jobs:
# Build job
build:
runs-on: ubuntu-latest
steps:
- name: Checkout
uses: actions/checkout@v3
- uses: pnpm/action-setup@v2
with:
version: 8.10.2
- name: Setup Node
uses: actions/setup-node@v3
with:
node-version: "20"
cache: pnpm
- name: Restore cache
uses: actions/cache@v3
with:
path: |
.next/cache
# Generate a new cache whenever packages or source files change.
key: ${{ runner.os }}-nextjs-${{ hashFiles('**/package-lock.json') }}-${{ hashFiles('**/*.[jt]s', '**/*.[jt]sx') }}
# If source files changed but packages didn't, rebuild from a prior cache.
restore-keys: |
${{ runner.os }}-nextjs-${{ hashFiles('**/package-lock.json') }}-
- name: Install dependencies
run: pnpm install
- name: Build userData
env:
GITHUB_REPOSITORY: ${{github.repository}}
AUTHORIZATION: ${{ secrets.ACTION_DEPLOY_KEY }}
run: pnpm run -F @blog/side-effect build
- name: Commit and Push Changes
uses: crazy-max/ghaction-github-pages@v2
with:
target_branch: ${{github.ref_name}}
build_dir: ./
allow_empty_commit: false
env:
# @see https://docs.github.com/cn/actions/reference/authentication-in-a-workflow#about-the-github_token-secret
GITHUB_TOKEN: ${{ secrets.GITHUB_TOKEN }}
- name: Setup Pages
uses: actions/configure-pages@v3
with:
# Automatically inject basePath in your Next.js configuration file and disable
# server side image optimization (https://nextjs.org/docs/api-reference/next/image#unoptimized).
#
# You may remove this line if you want to manage the configuration yourself.
static_site_generator: next
- name: Build with Next.js
run: pnpm run -F @blog/view build
- name: Upload artifact
uses: actions/upload-pages-artifact@v2
with:
path: ./packages/view/out
# Deployment job
deploy:
# Deploy to the github-pages environment
environment:
name: github-pages
url: ${{ steps.deployment.outputs.page_url }}
runs-on: ubuntu-latest
needs: build
steps:
- name: Deploy to GitHub Pages
id: deployment
uses: actions/deploy-pages@v2
上面放了一个完整的 yml 文件,用文字概述一下它做了哪些事情
jobs build
- 安装系统 ubuntu-latest
- 拉取代码
- 安装 pnpm
- 安装 node
- 添加缓存
- 安装 pnpm 依赖
- 运行爬虫
- 推送 README.md 文件到仓库
- Next build 资源
- 将输出资源上传到磁盘中
jobs deploy
- 安装系统 ubuntu-latest
- 将磁盘文件提交到 pages 下
整体流程就是这样,结合on事件当你代码被提交或者issues发生变化,上面的yml文件就会被执行。
额外说一下,Github Actions十分强大,例如可以定时跑爬虫、npm发版等。
最后
结合 on 事件可以指定触发的场景,例如我的配置如下
on:
  # Runs on pushes targeting the default branch
  push:
    branches: ["main"]
  issues:
    types:
      - opened
      - edited
      - deleted
      - closed
      - reopened
  # Allows you to run this workflow manually from the Actions tab
  workflow_dispatch:
只有推送分支和 issues 发生变化的时候才执行 Action,例如我想更新我的博客只需要在仓库 new issue 就可以触发这个 Action 然后重新构建我的博客,如果遇到问题可以参考我的仓库进行查看。
最后如果有什么错误或者不对地方欢迎指出,如果对你有帮助也可以 star 支持一下,整个 Nextjs 构建博客全系列就讲完了。
原文链接:https://juejin.cn/post/7316931384877531176 作者:小蜗1号