
引言
今天有朋友面试被问到GraphQL 于是乎给他讲解了下,顺便这里做一个记录,希望也能帮到其他需要的人。
认识GraphQL
介绍
官网: graphql.org/
中文: graphql.cn/
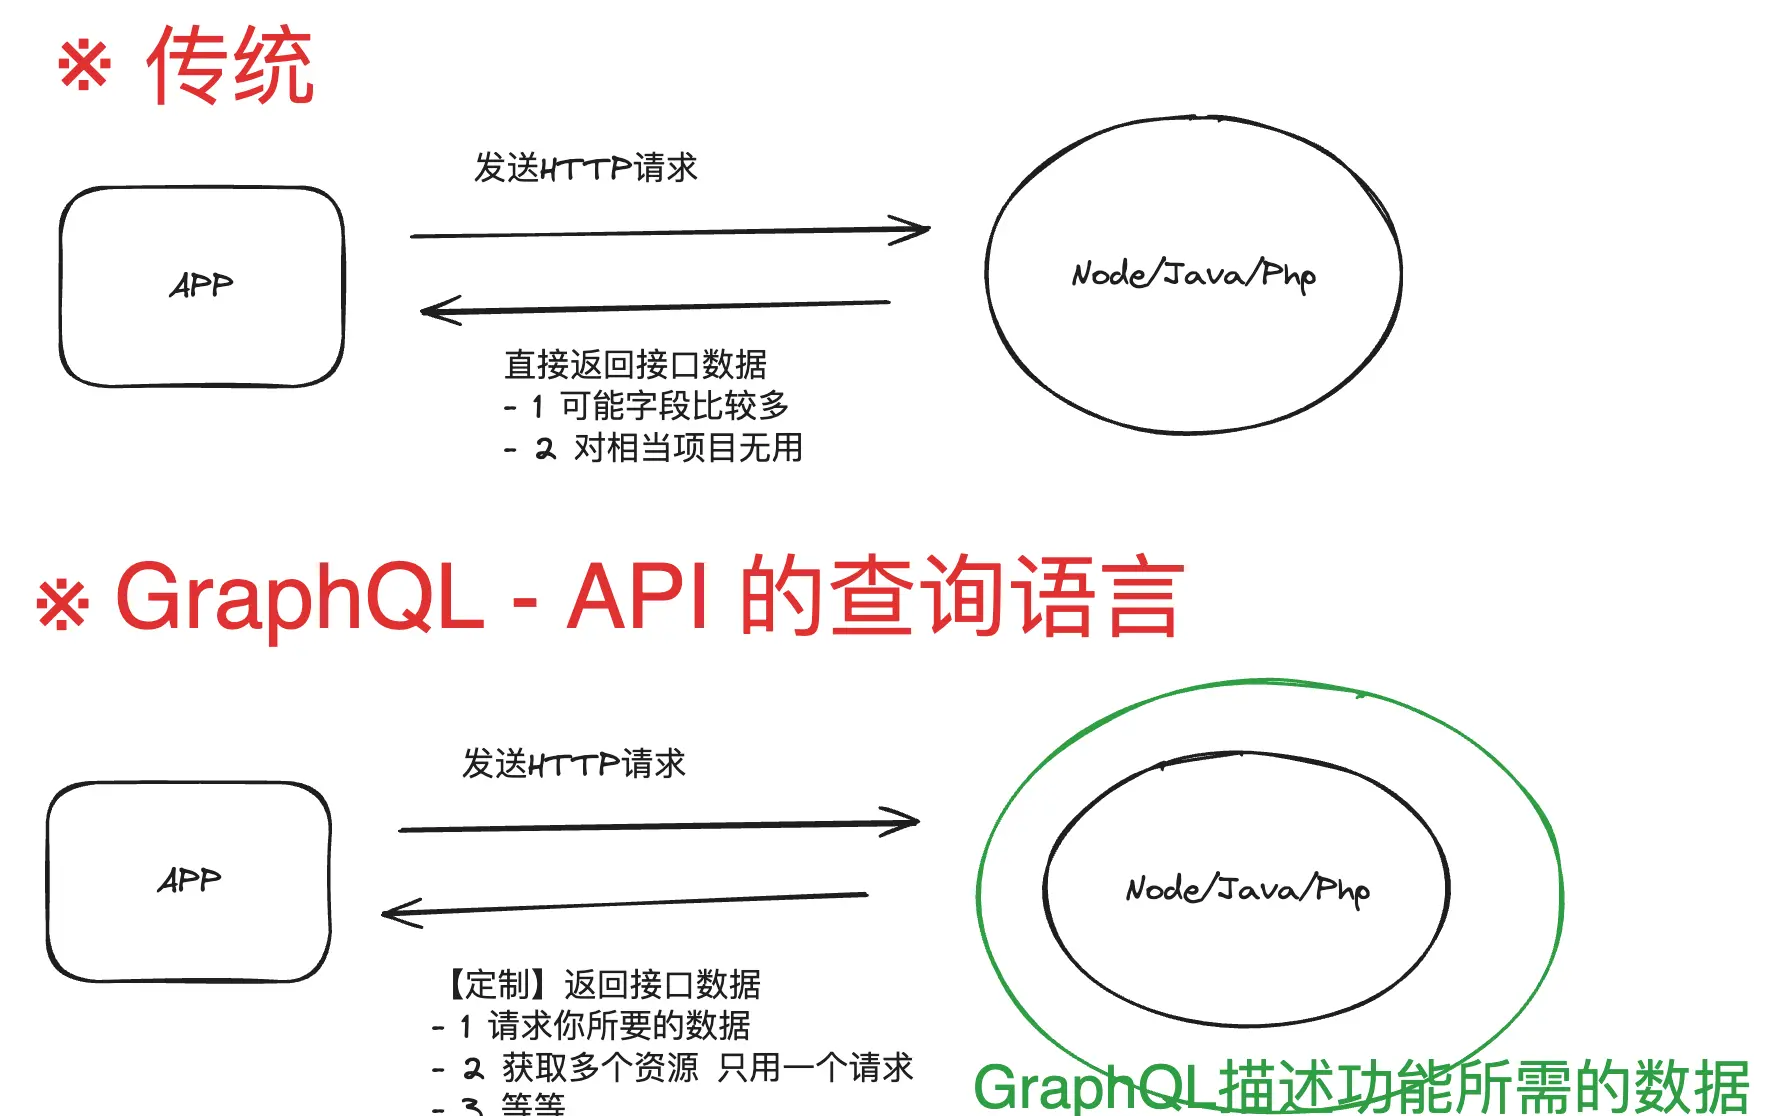
GraphQL是一种用于 API 的查询语言。GraphQL对你的 API 中的数据提供了一套易于理解的完整描述,使得客户端能够准确地获得它需要的数据,而且没有任何冗余,也让 API 更容易地随着时间推移而演进,还能用于构建强大的开发者工具。
上述是官网的解释,可以通过下述特点来更加直观的理解
特点
- 请求你所要的数据
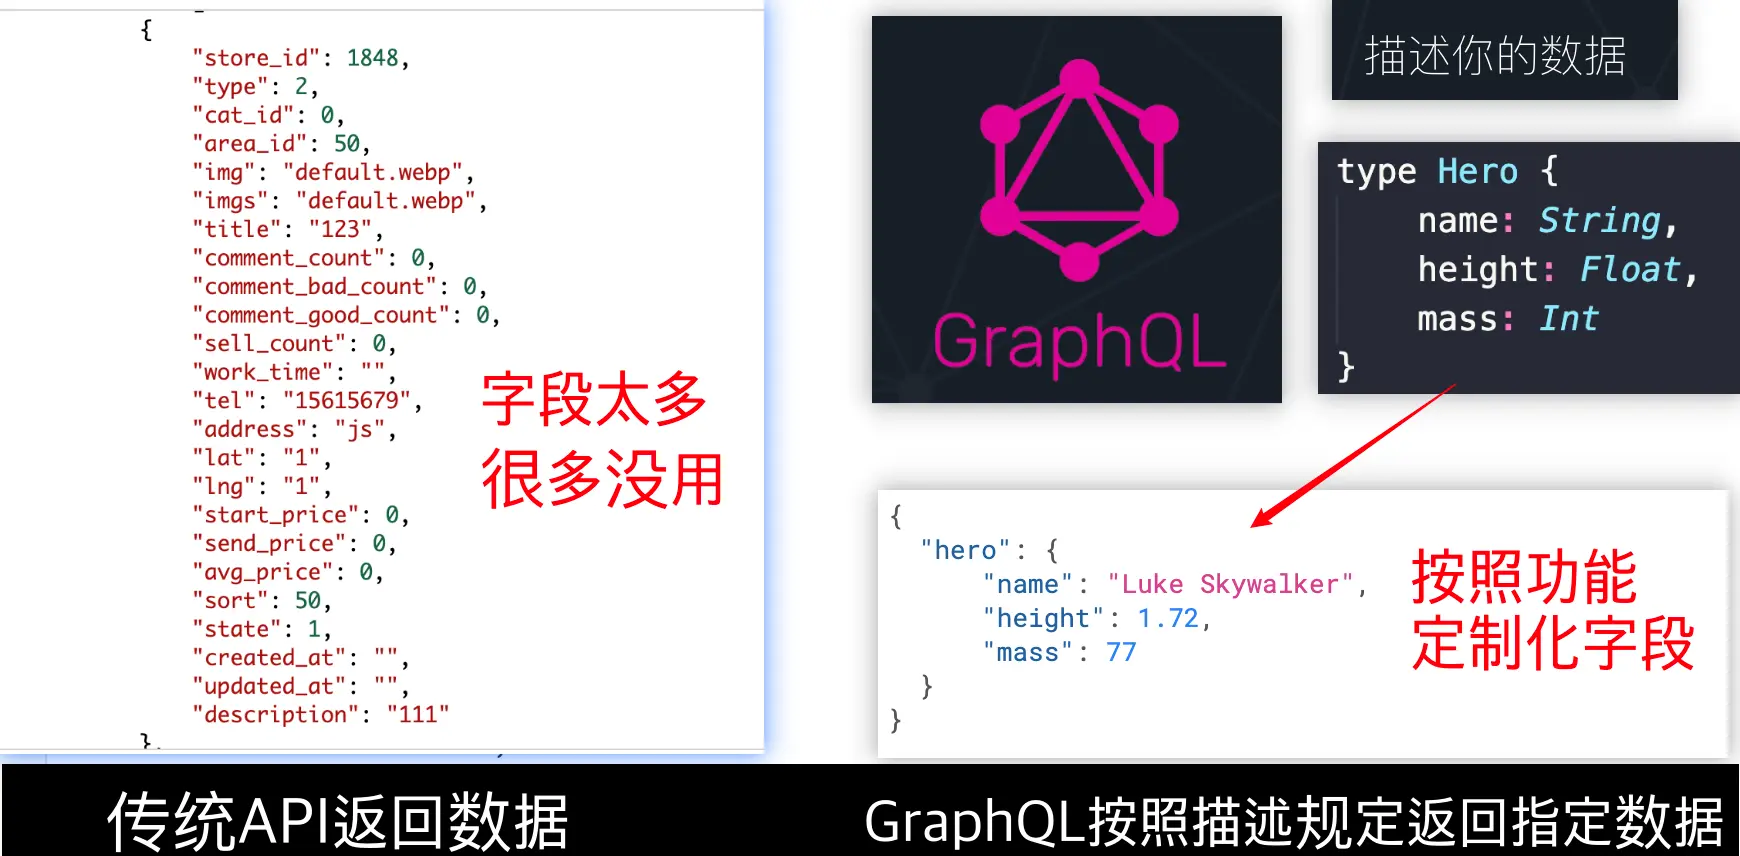

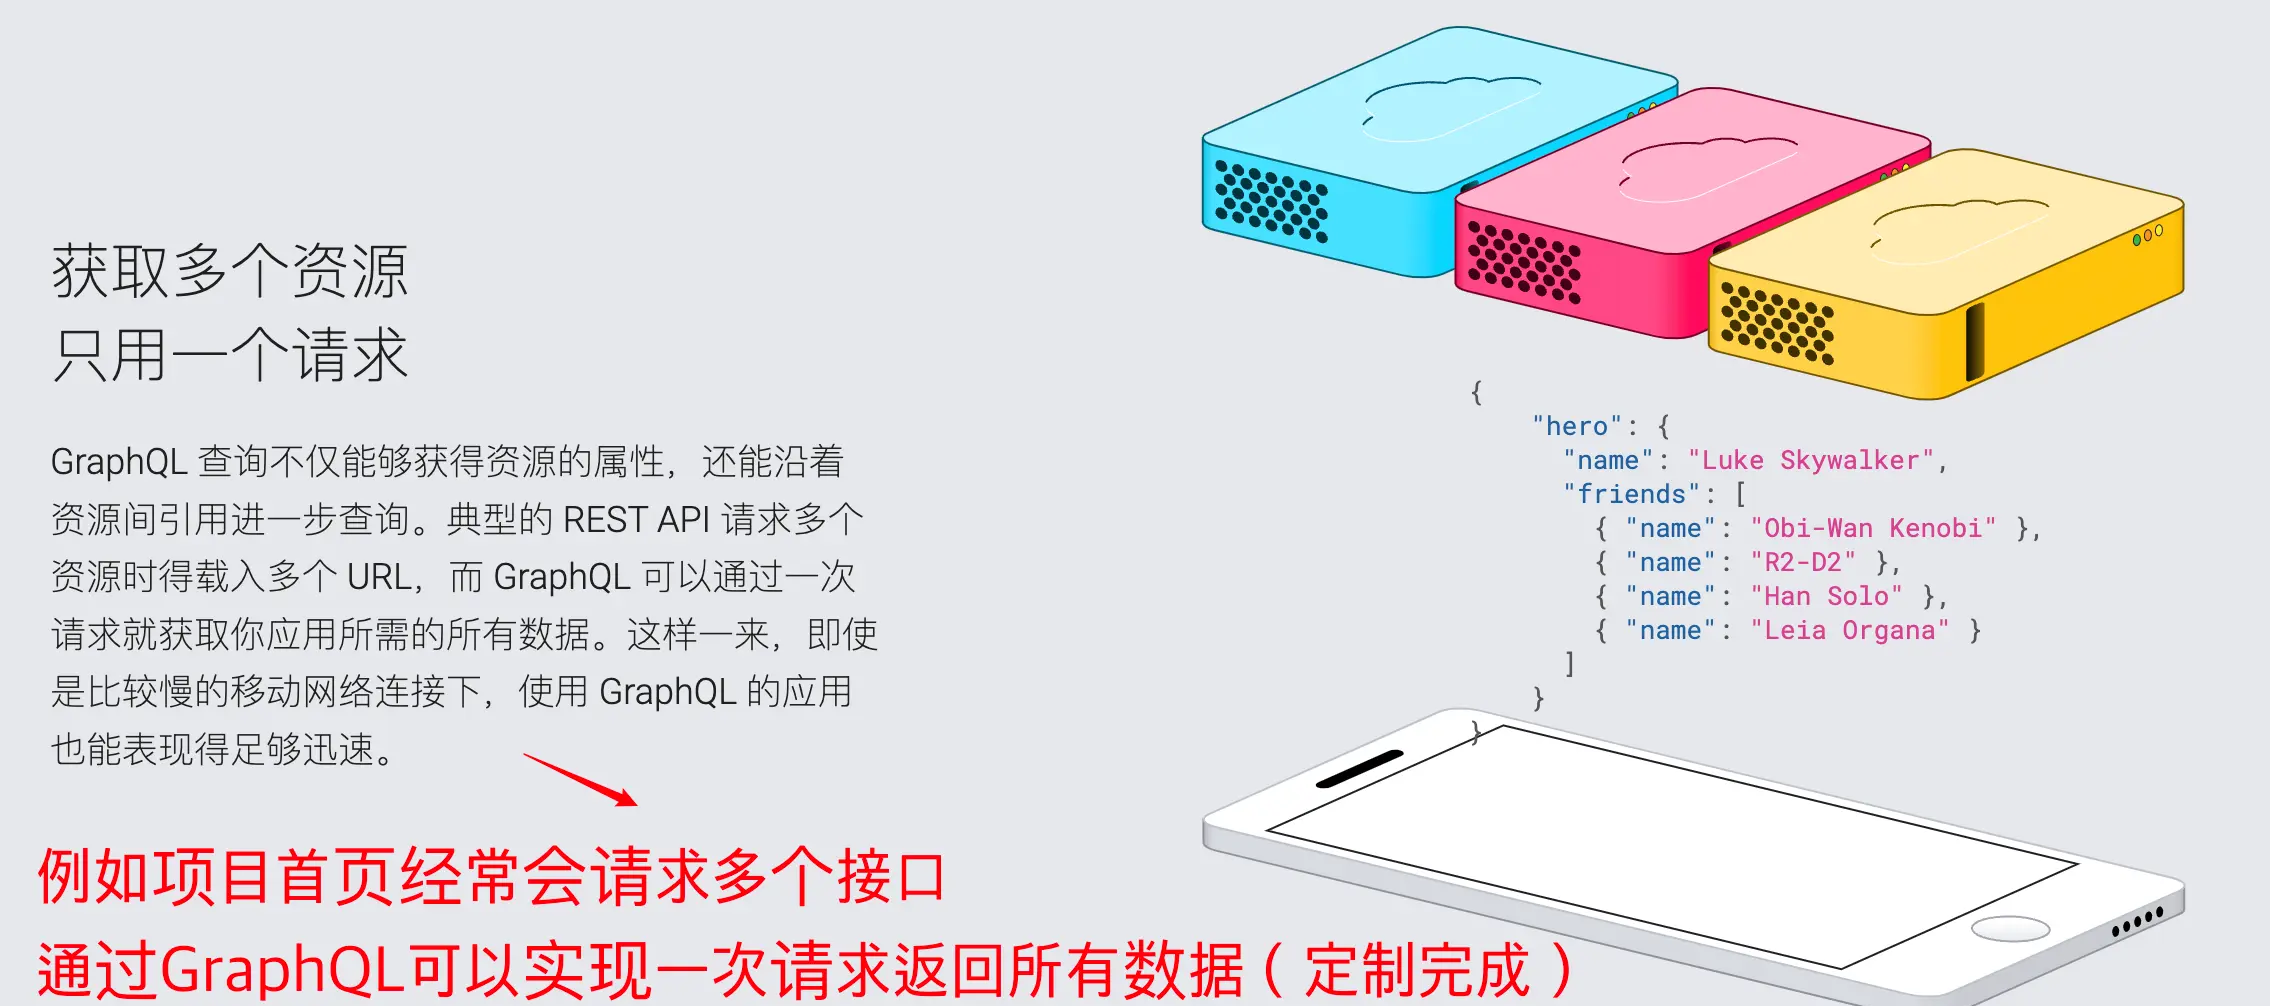
- 获取多个资源 只用一个请求
- 等等
跑Hello World
开发思想
初体验
可以先创建一个graphql目录,然后执行pnpm add express@4.16.4 express-graphql@0.7.1 graphql@14.0.2命令,创建hello.js
// 导入模块
const express = require("express");
const { buildSchema } = require("graphql");
const graphqlHttp = require("express-graphql");
const cors = require("cors");

// 定义schema,查询和类型
const schema = buildSchema(`
    type Film {
        id: Int,
        content: String
    }

    type Query {
        hello: String
        list: [Film]
        detail(id:Int!): Film
    }
`);

// 定义查询对应的处理器
const root = {
    hello() {
        // 后期操作数据库
        return "hello";
    },
    list() {
        // 后期操作数据库
        return [
            { id: 1, content: "a" },
            { id: 2, content: "b" },
            { id: 3, content: "c" },
            { id: 4, content: "d" },
        ];
    },
    detail({ id }) {
        // 后期操作数据库
        const data = [
            { id: 1, content: "a" },
            { id: 2, content: "b" },
            { id: 3, content: "c" },
            { id: 4, content: "d" },
        ];
        return data.filter((item) => item.id === id)[0];
    }
};

// 创建web服务器
const app = express();
app.use(cors()); // 允许跨域请求

// 定义路由 返回test1
app.use("/test1", (req, res) => {
    res.send("test1");
});

// 定义路由 交给graphql处理并返回数据
app.use(
    "/test2",
    graphqlHttp({
        schema,
        rootValue: root,
        graphiql: true,
    })
);

// 启动服务器3000端口
app.listen(3000, () => {
    console.log("http://localhost:3000");
});
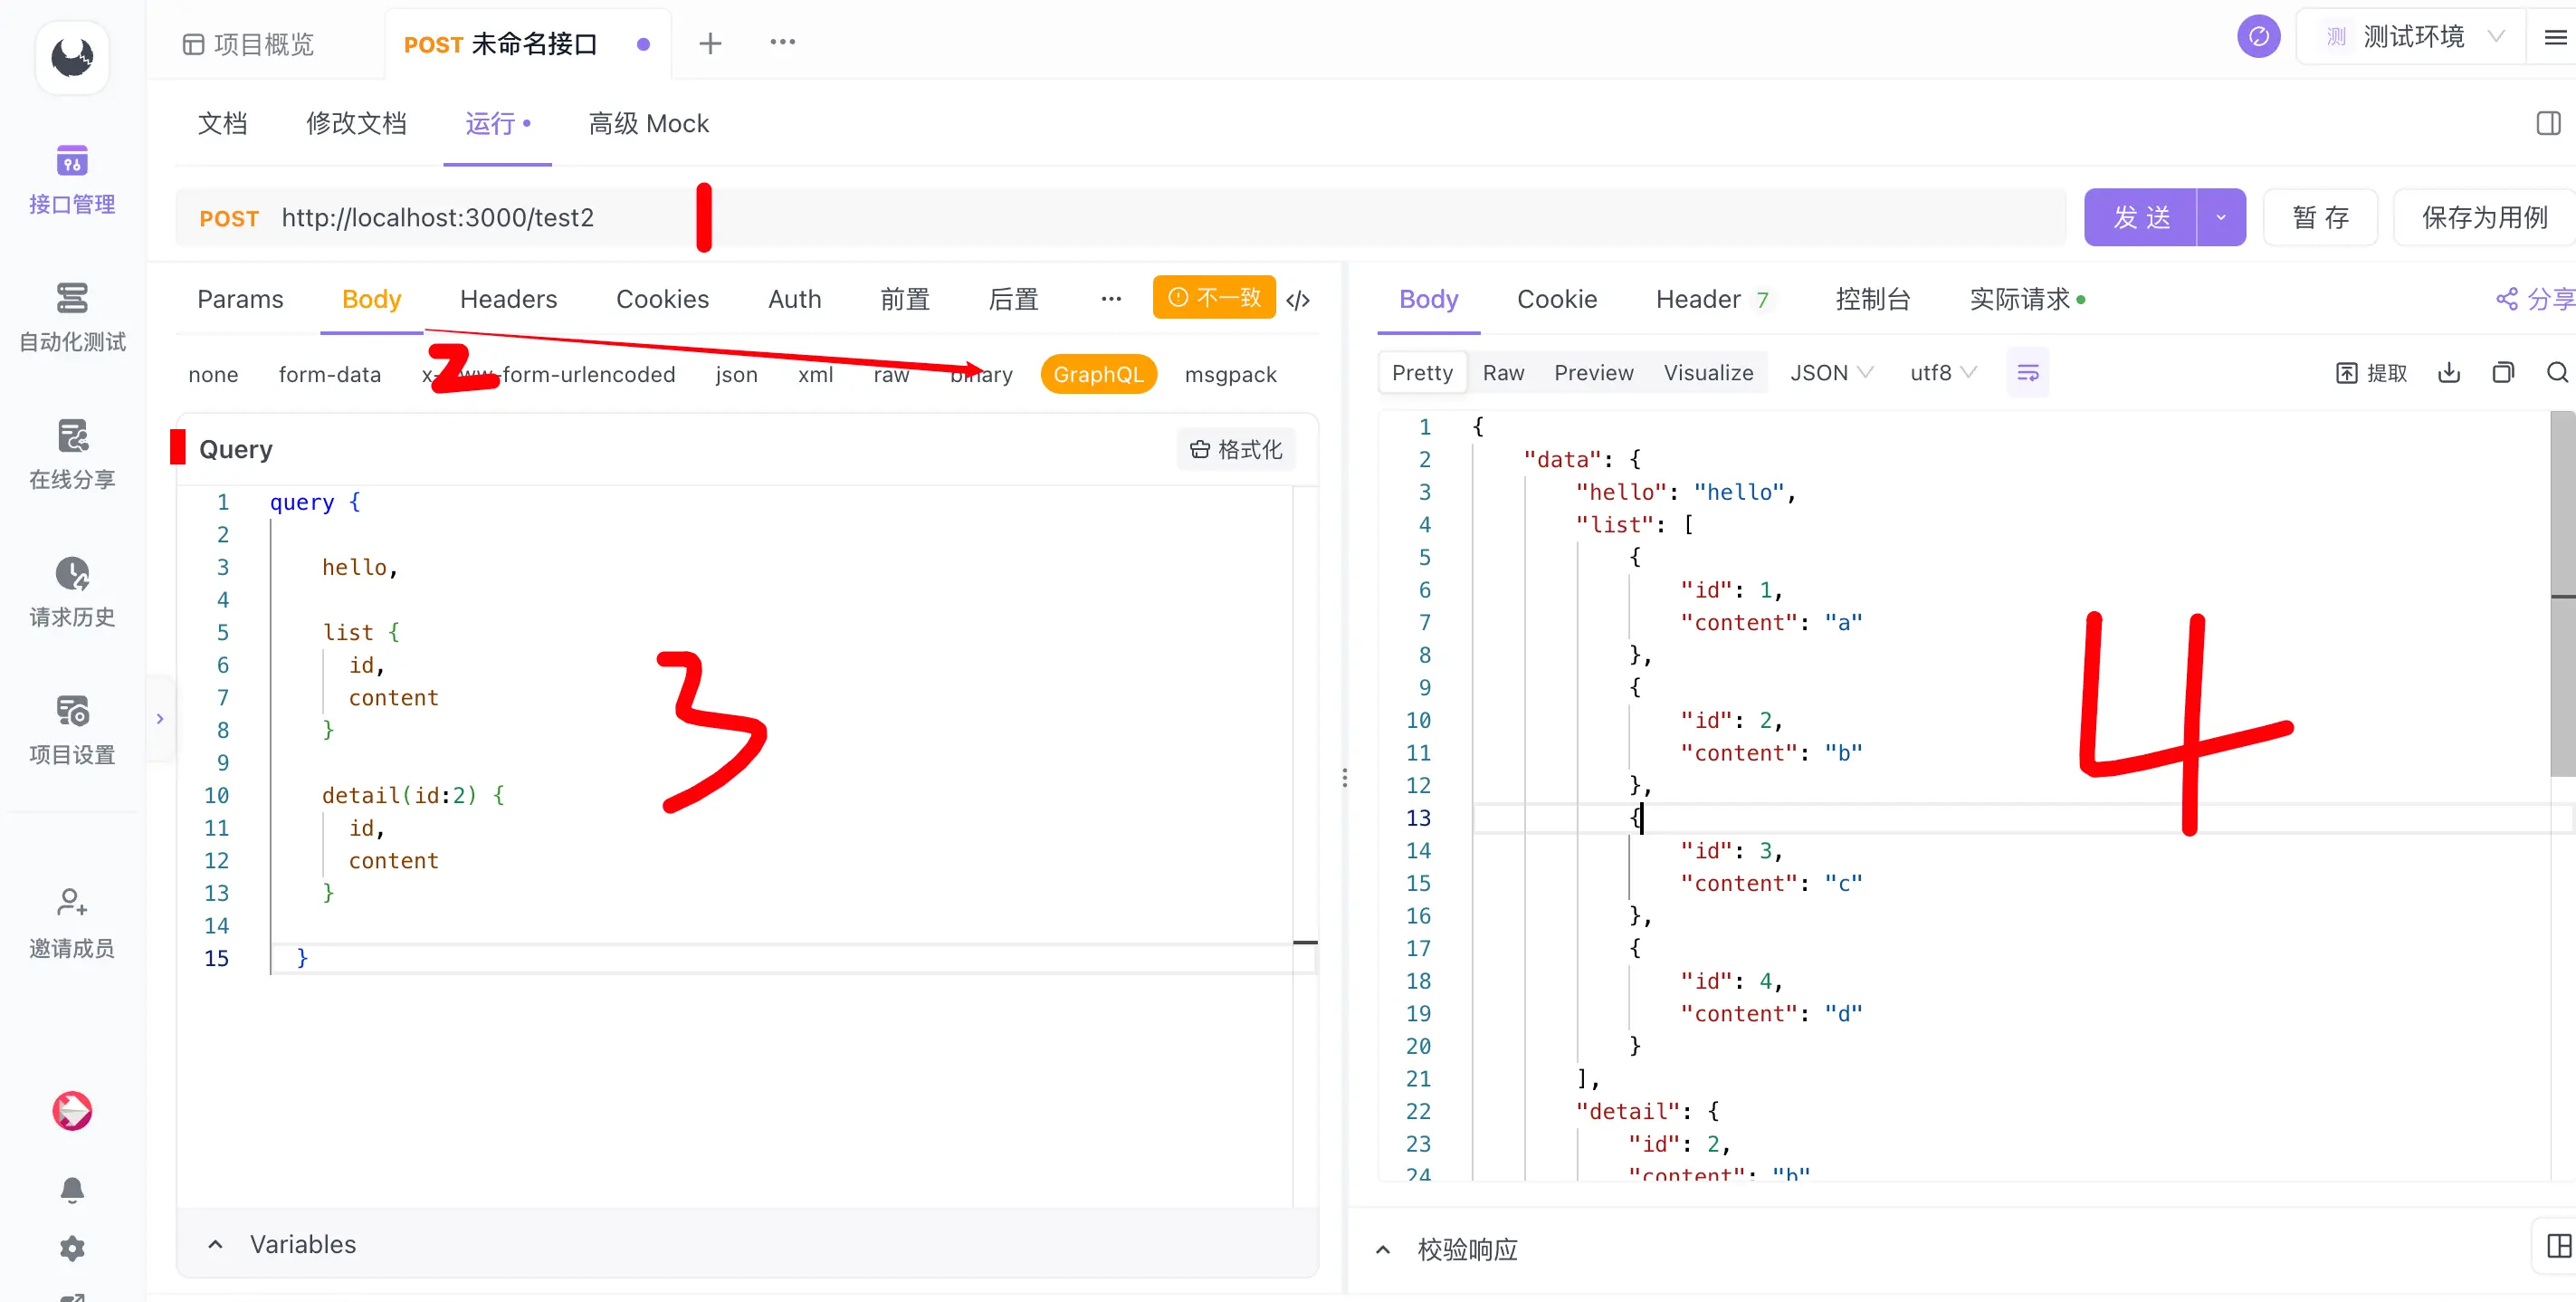
接着node hello.js或者nodemon hello.js启动web服务器,浏览器访问/test2路由,接着页面左侧窗口输入graphql query {}语法就可以查询指定数据啦。

query {

    hello,

    list {
      id,
      content
    }

    detail(id:2) {
      id,
      content
    }

  }
GraphQL Clients
除了用GraphQL默认的可视化界面来编写和查询数据,可以用下述方式来查询数据
ApiPost
Altair GraphQL Client

fetch
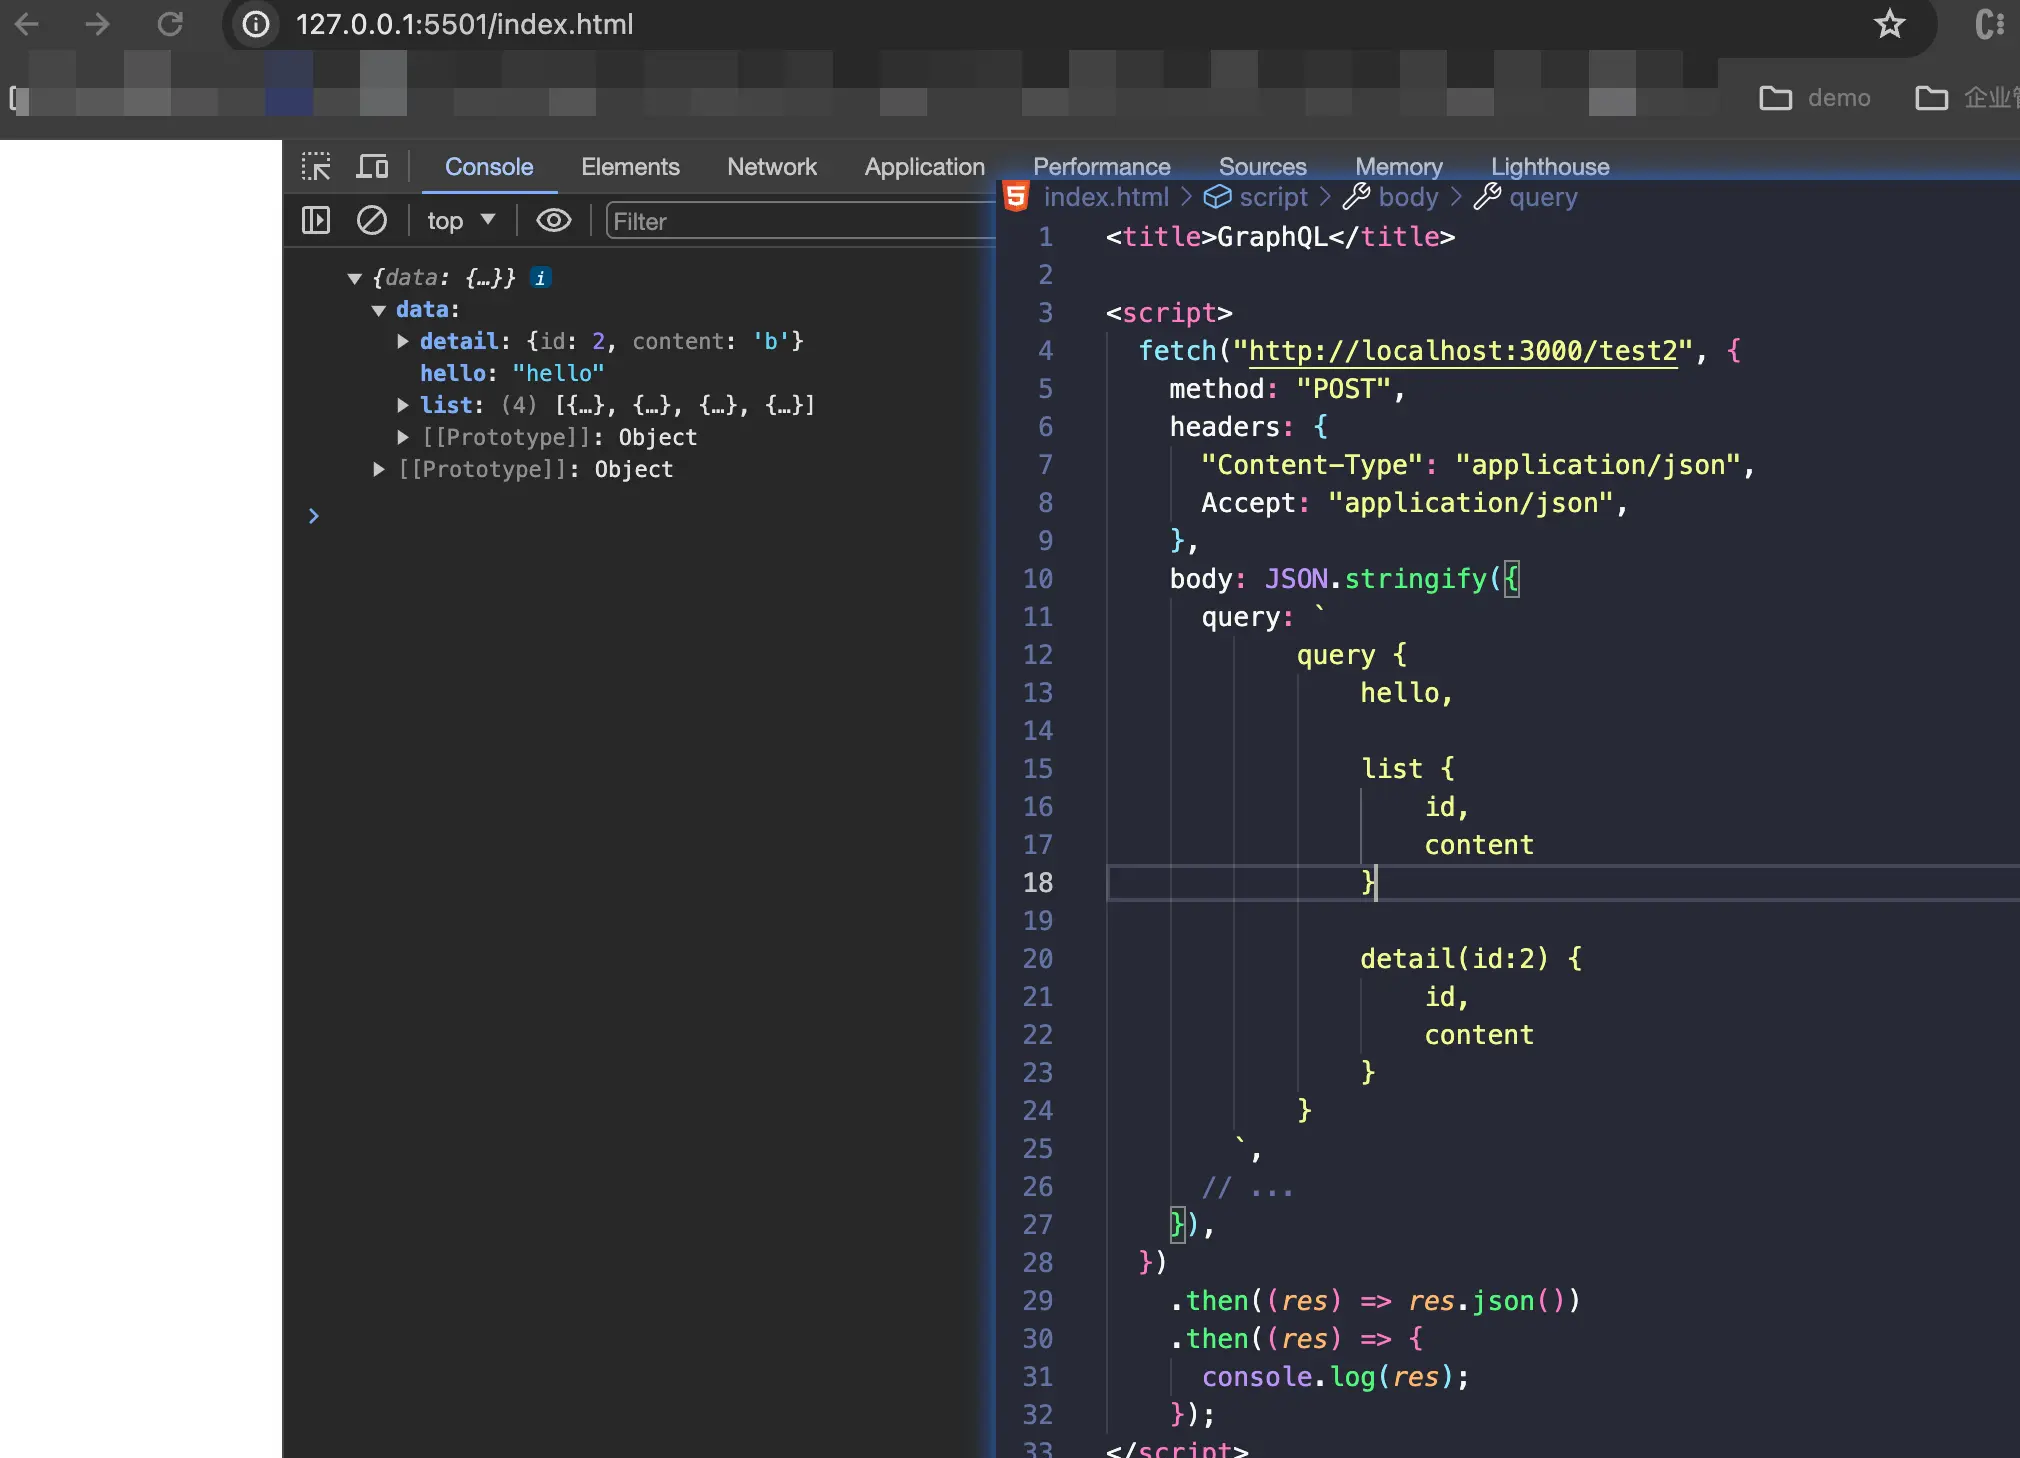
<title>GraphQL</title>

<script>
  fetch("http://localhost:3000/test2", {
    method: "POST",
    headers: {
      "Content-Type": "application/json",
      Accept: "application/json",
    },
    body: JSON.stringify({
      query: `
            query {
                hello,

                list {
                    id,
                    content
                }

                detail(id:2) {
                    id,
                    content
                }
            }
        `,
      // ...
    }),
  })
    .then((res) => res.json())
    .then((res) => {
      console.log(res);
    });
</script>
uni
uni.request({
	url: "https://zion-app.functorz.com/zero/xAXj4omAB9n/api/graphql-v2",
	method: "POST",
	header: {
		"Content-Type": "application/json",
		Accept: "application/json",
	},
	data: JSON.stringify({
	    query: `
		    query {
                  swiper{
                        ud_imgurl_afd0d7
                  }
              }
	    `,
	}),
	success: (res) => {
		console.log(res.data)
		// this.list = res.data.data.swiper
	},
	fail: (err) => {
		console.log(err)
	},
})
Mutations
对mock数据实现增删改查操作
server
创建server.js文件
// 导入模块
const express = require("express");
const { buildSchema } = require("graphql");
const grapqlHTTP = require("express-graphql");

// 定义schema,查询和类型, mutation
const schema = buildSchema(`
    input AccountInput {
        name: String
        age: Int
        sex: String
        department: String
    }
    type Account {
        name: String
        age: Int
        sex: String
        department: String
    }
    type Mutation {
        createAccount(input: AccountInput): Account
        updateAccount(id: ID!, input: AccountInput): Account
    }
    type Query {
        accounts: [Account]
    }
`);

const fakeDb = {};

// 定义查询对应的处理器
const root = {
  accounts() {
    var arr = [];
    for (const key in fakeDb) {
      arr.push(fakeDb[key]);
    }
    return arr;
  },
  createAccount({ input }) {
    // 相当于数据库的保存
    fakeDb[input.name] = input;
    // 返回保存结果
    return fakeDb[input.name];
  },

  updateAccount({ id, input }) {
    // 相当于数据库的更新
    const updatedAccount = Object.assign({}, fakeDb[id], input);
    fakeDb[id] = updatedAccount;
    // 返回保存结果
    return updatedAccount;
  },
};

// 创建web服务器
const app = express();

app.use(
  "/graphql",
  grapqlHTTP({
    schema: schema,
    rootValue: root,
    graphiql: true,
  })
);


// 启动服务器3000端口
app.listen(3000, () => {
    console.log("http://localhost:3000");
});
test
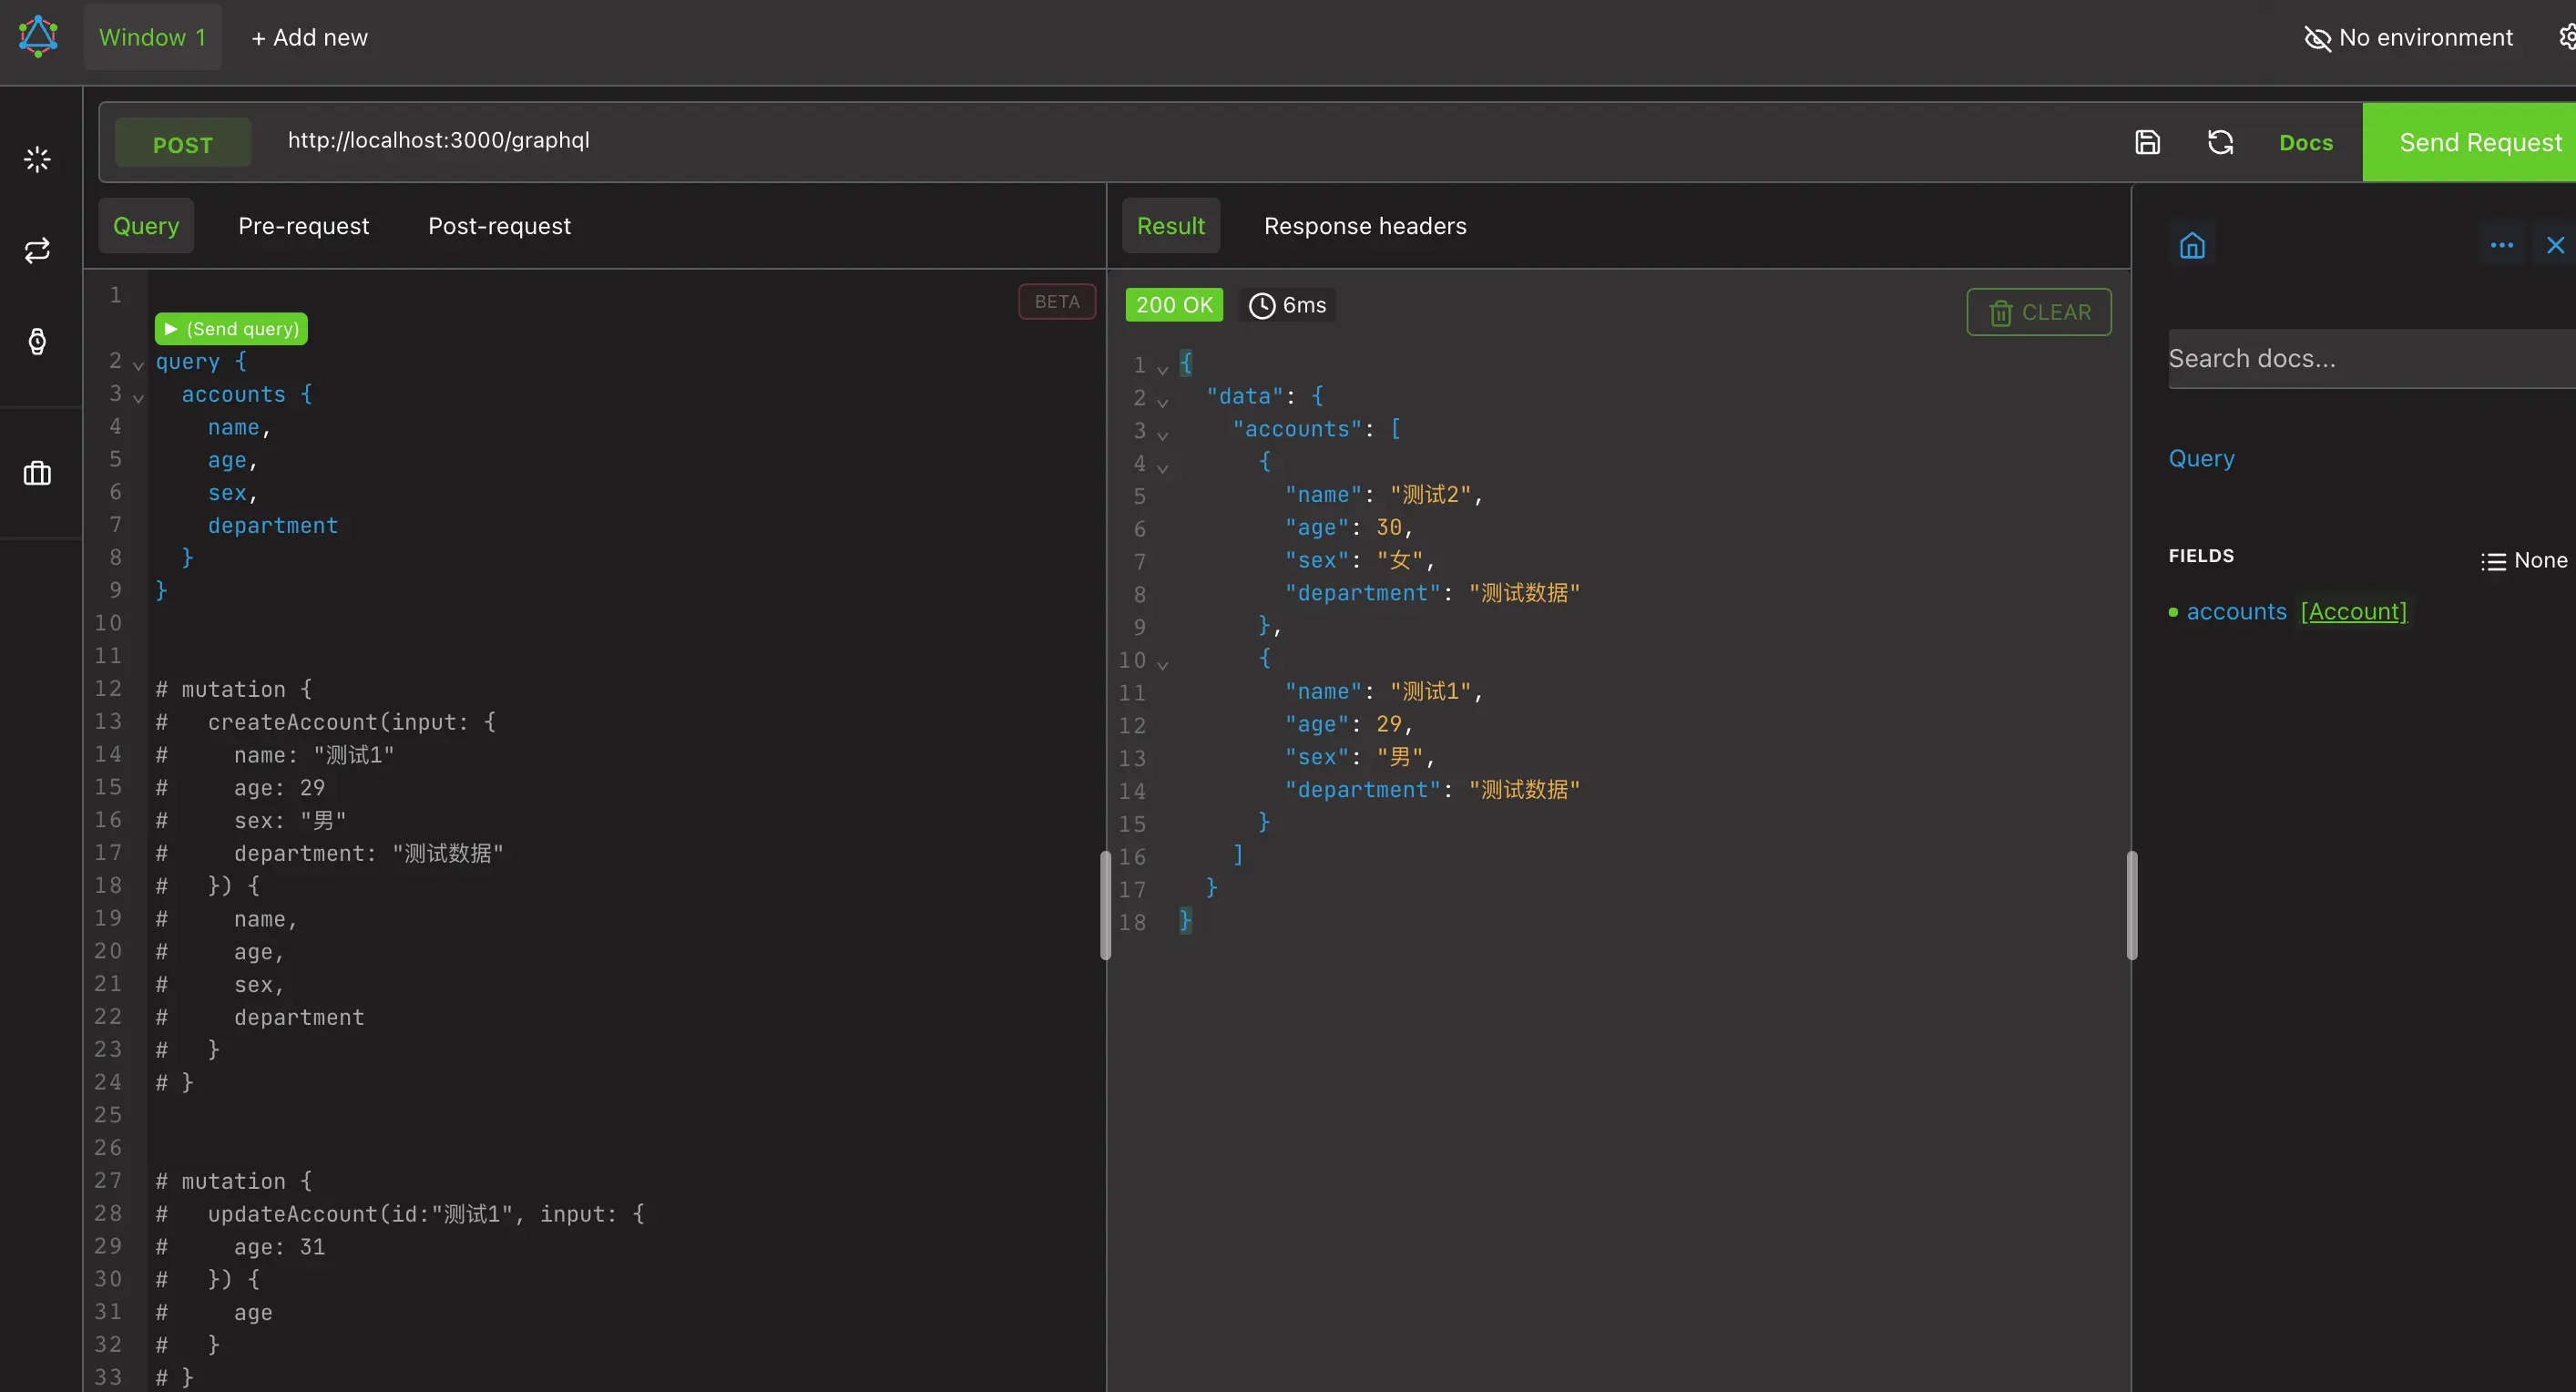
query {
  accounts {
    name,
    age,
    sex,
    department
  }
}


# mutation {
#   createAccount(input: {
#     name: "测试1"
#     age: 29
#     sex: "男"
#     department: "测试数据"
#   }) {
#     name,
#     age,
#     sex,
#     department
#   }
# }


# mutation {
#   updateAccount(id:"测试1", input: {
#     age: 31
#   }) {
#     age
#   }
# }
这里仅仅是对mock数据进行操作,服务重启后数据就会丢失,所以咱们可以结合数据库一起使用
结合数据库
代码仅供参考不可运行,因为没有安装数据库、和创建对应的表结构,看一看知道大致流程就行
// 导入模块
const express = require('express');
const {buildSchema} = require('graphql');
const grapqlHTTP = require('express-graphql');
const mysql = require('mysql');  // pnpm add mysql

const pool = mysql.createPool({
    connectionLimit: 10,
    host: 'localhost',
    user: 'root',
    password: '',
    database: 'dashen'
});


// 定义schema,查询和类型, mutation
const schema = buildSchema(`
    input AccountInput {
        name: String
        age: Int
        sex: String
        department: String
    }
    type Account {
        name: String
        age: Int
        sex: String
        department: String
    }
    type Mutation {
        createAccount(input: AccountInput): Account
        deleteAccount(id: ID!): Boolean
        updateAccount(id: ID!, input: AccountInput): Account
    }
    type Query {
        accounts: [Account]
    }
`);

// 定义查询对应的处理器
const root = {
    accounts() {
        return new Promise((resolve, reject)=>{
            pool.query('select name, age, sex, department from account', (err, results)=> {
                if(err) {
                    console.log('出错了' + err.message);
                    return;
                }
                const arr = [];
                for(let i=0;i<results.length;i++) {
                    arr.push({
                        name: results[i].name,
                        sex: results[i].sex,
                        age: results[i].age,
                        department: results[i].department,
                    })
                }
                resolve(arr);
            })
        })
    },
    createAccount({ input }) {
        const data = {
            name: input.name,
            sex: input.sex,
            age: input.age,
            department: input.department
        }
        return new Promise((resolve, reject)=>{
            pool.query('insert into account set ?', data, (err) => {
                if (err) {
                    console.log('出错了' + err.message);
                    return;
                }
                // 返回保存结果
                resolve(data);
            })
        })
    },

    updateAccount({ id, input }) {
        const data = input
        return new Promise((resolve, reject) => {
            pool.query('update account set ? where name = ?', [data, id], (err) => {
                if (err) {
                    console.log('出错了' + err.message);
                    return;
                }
                // 返回保存结果
                resolve(data);
            })
        })
    },
    deleteAccount({id}) {
        return new Promise((resolve, reject)=>{
            pool.query('delete from account where name = ?', [id], (err)=>{
                if(err) {
                    console.log('出错了' + err.message);
                    reject(false);
                    return;
                }
                resolve(true);
            })
        })
    }
}

const app = express();

app.use('/graphql', grapqlHTTP({
    schema: schema,
    rootValue: root,
    graphiql: true
}))

app.listen(3000);
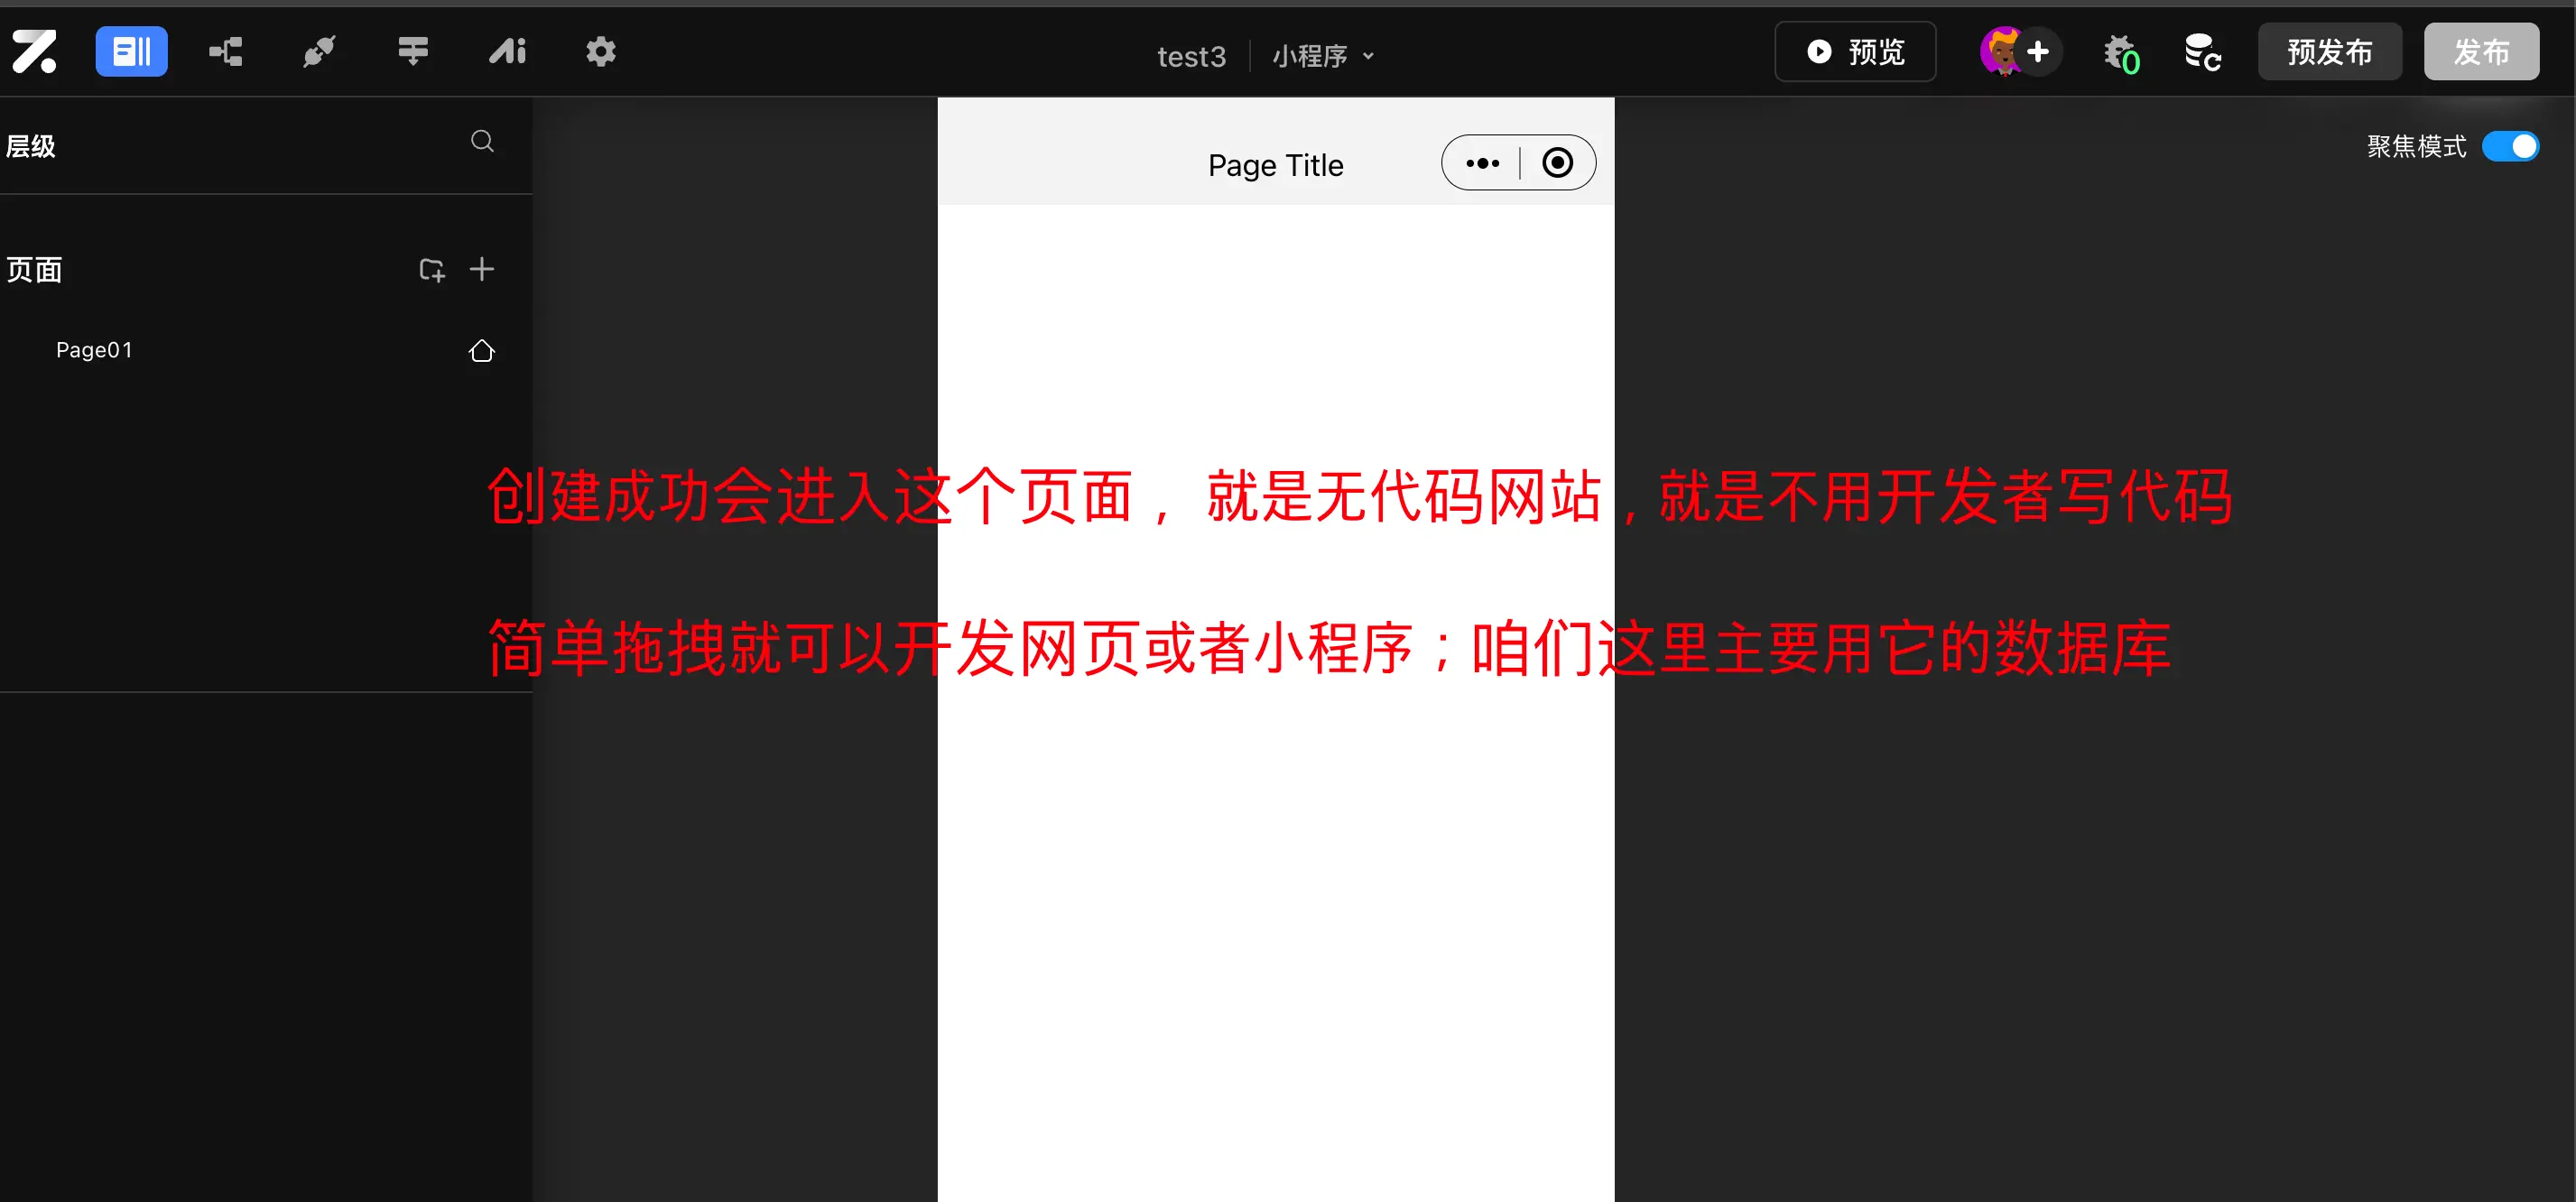
结合第三方Zion无代码平台集成的GraphQL使用
首先 www.functorz.com/ 登录,
1 然后创建项目,

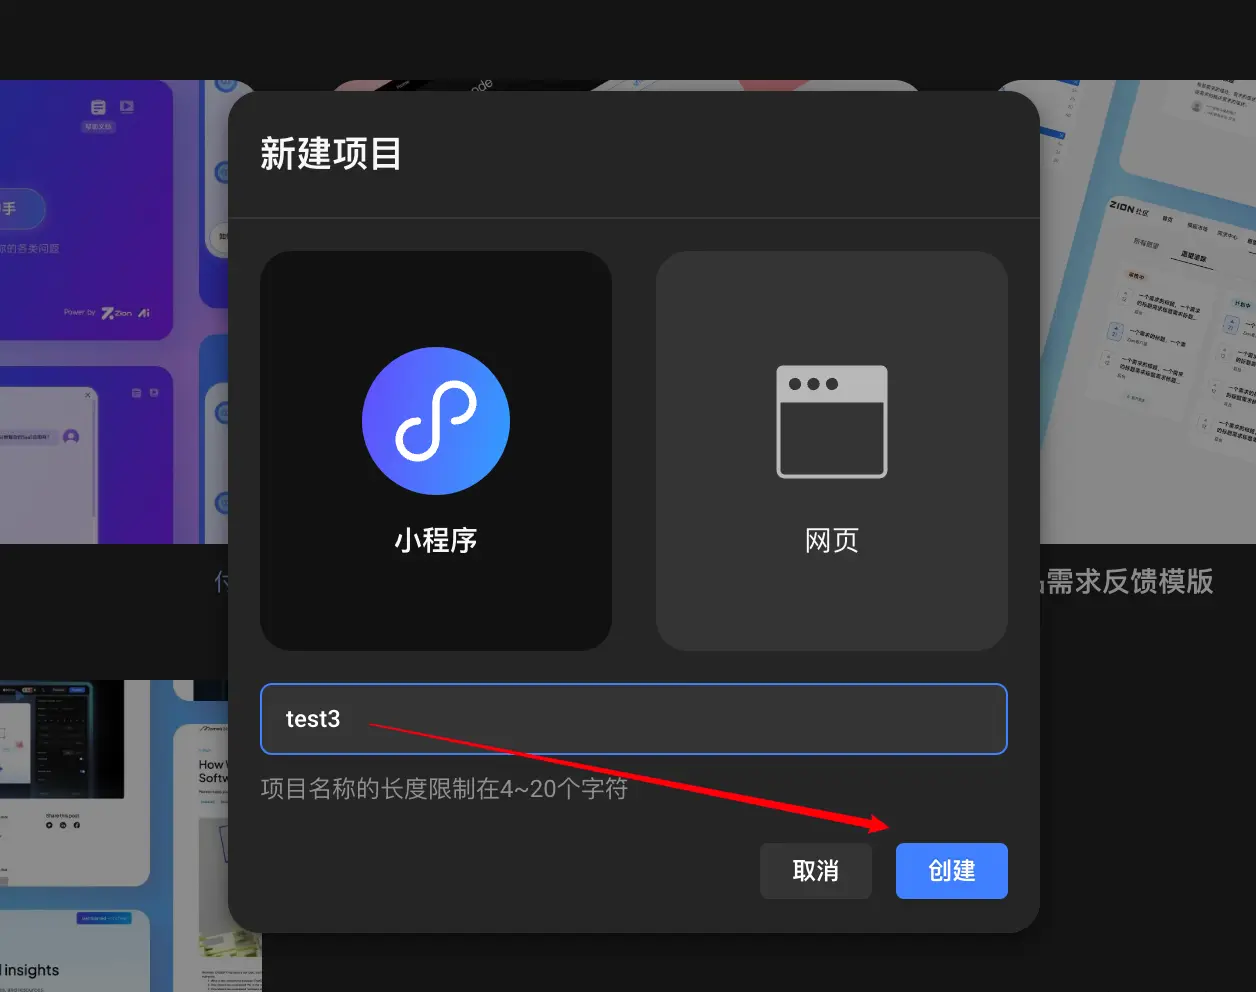
2 新建空白项目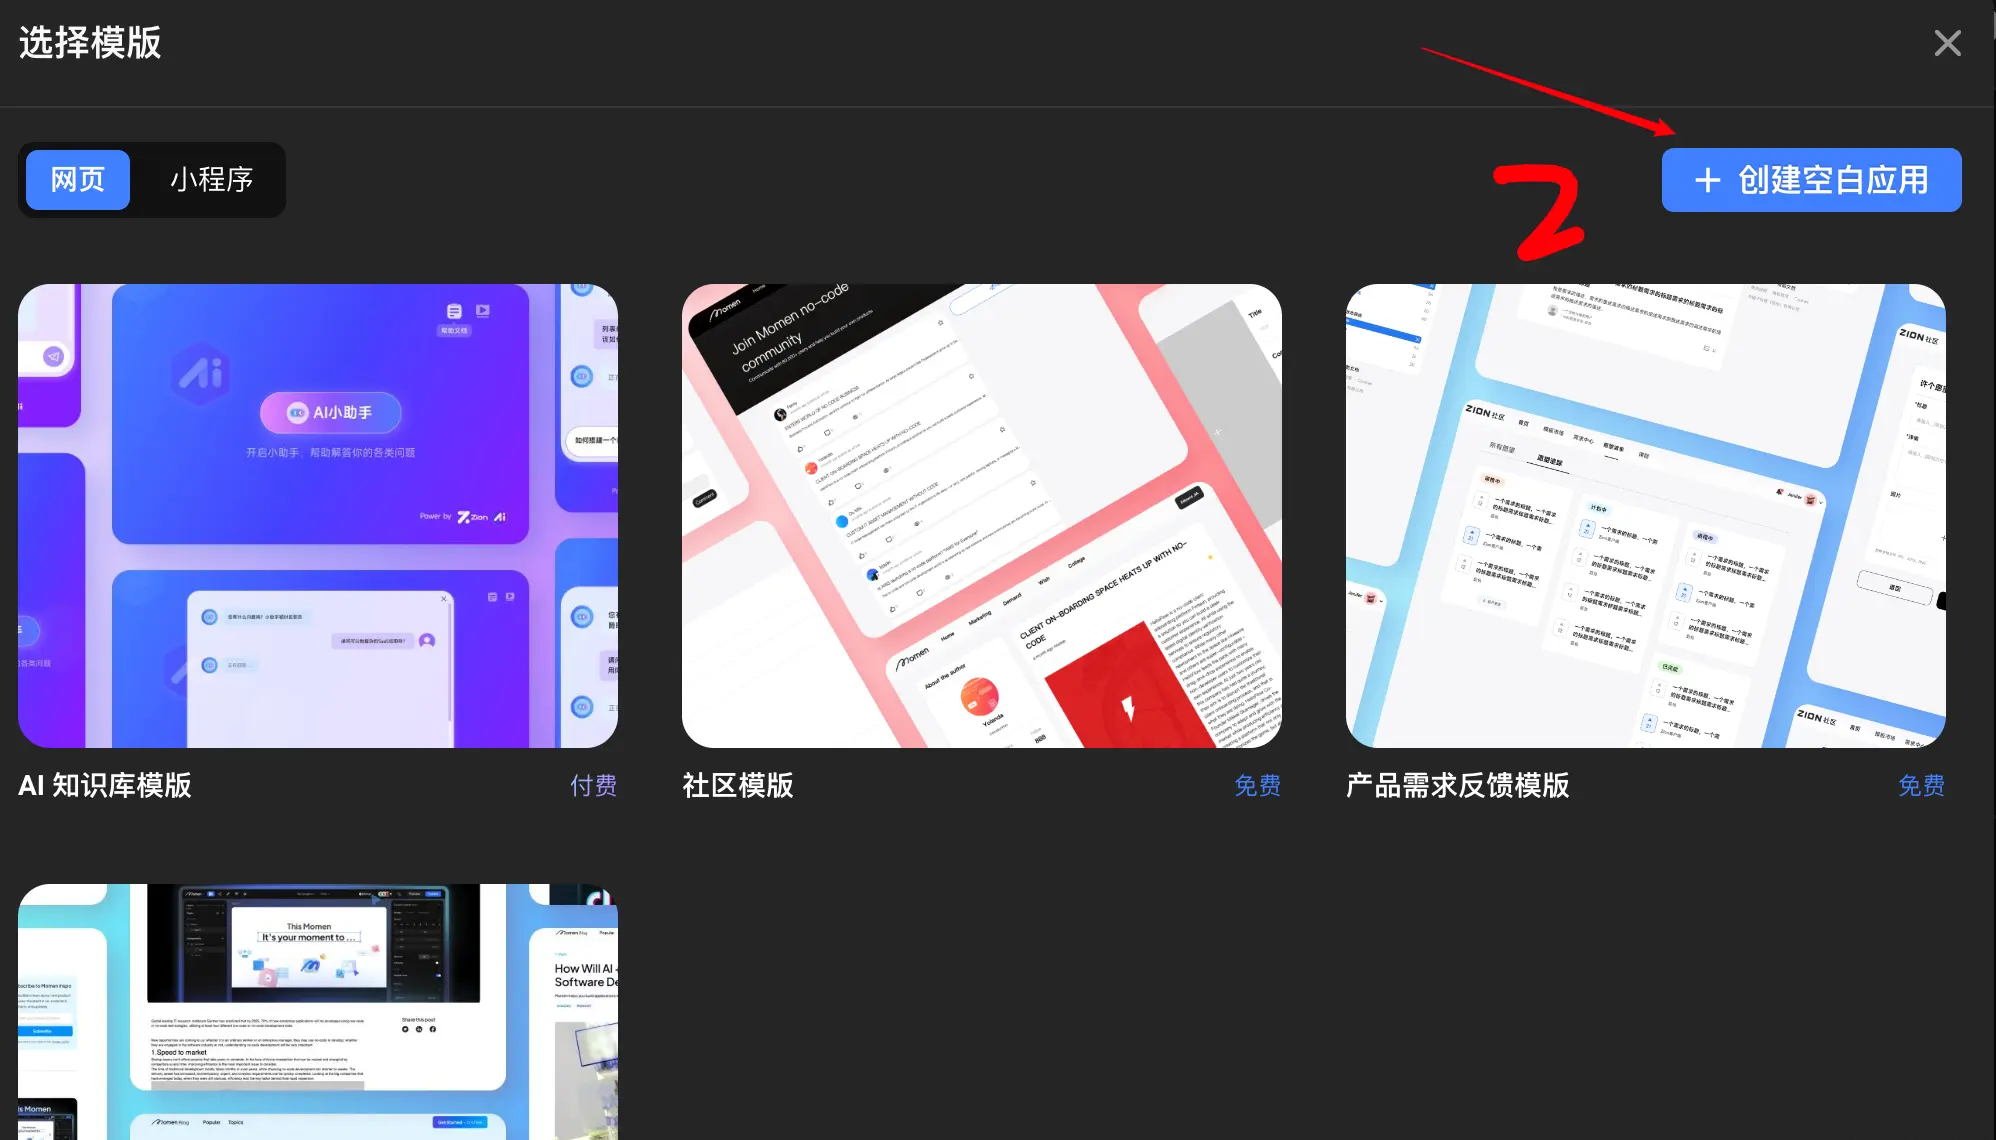
3 填写项目信息
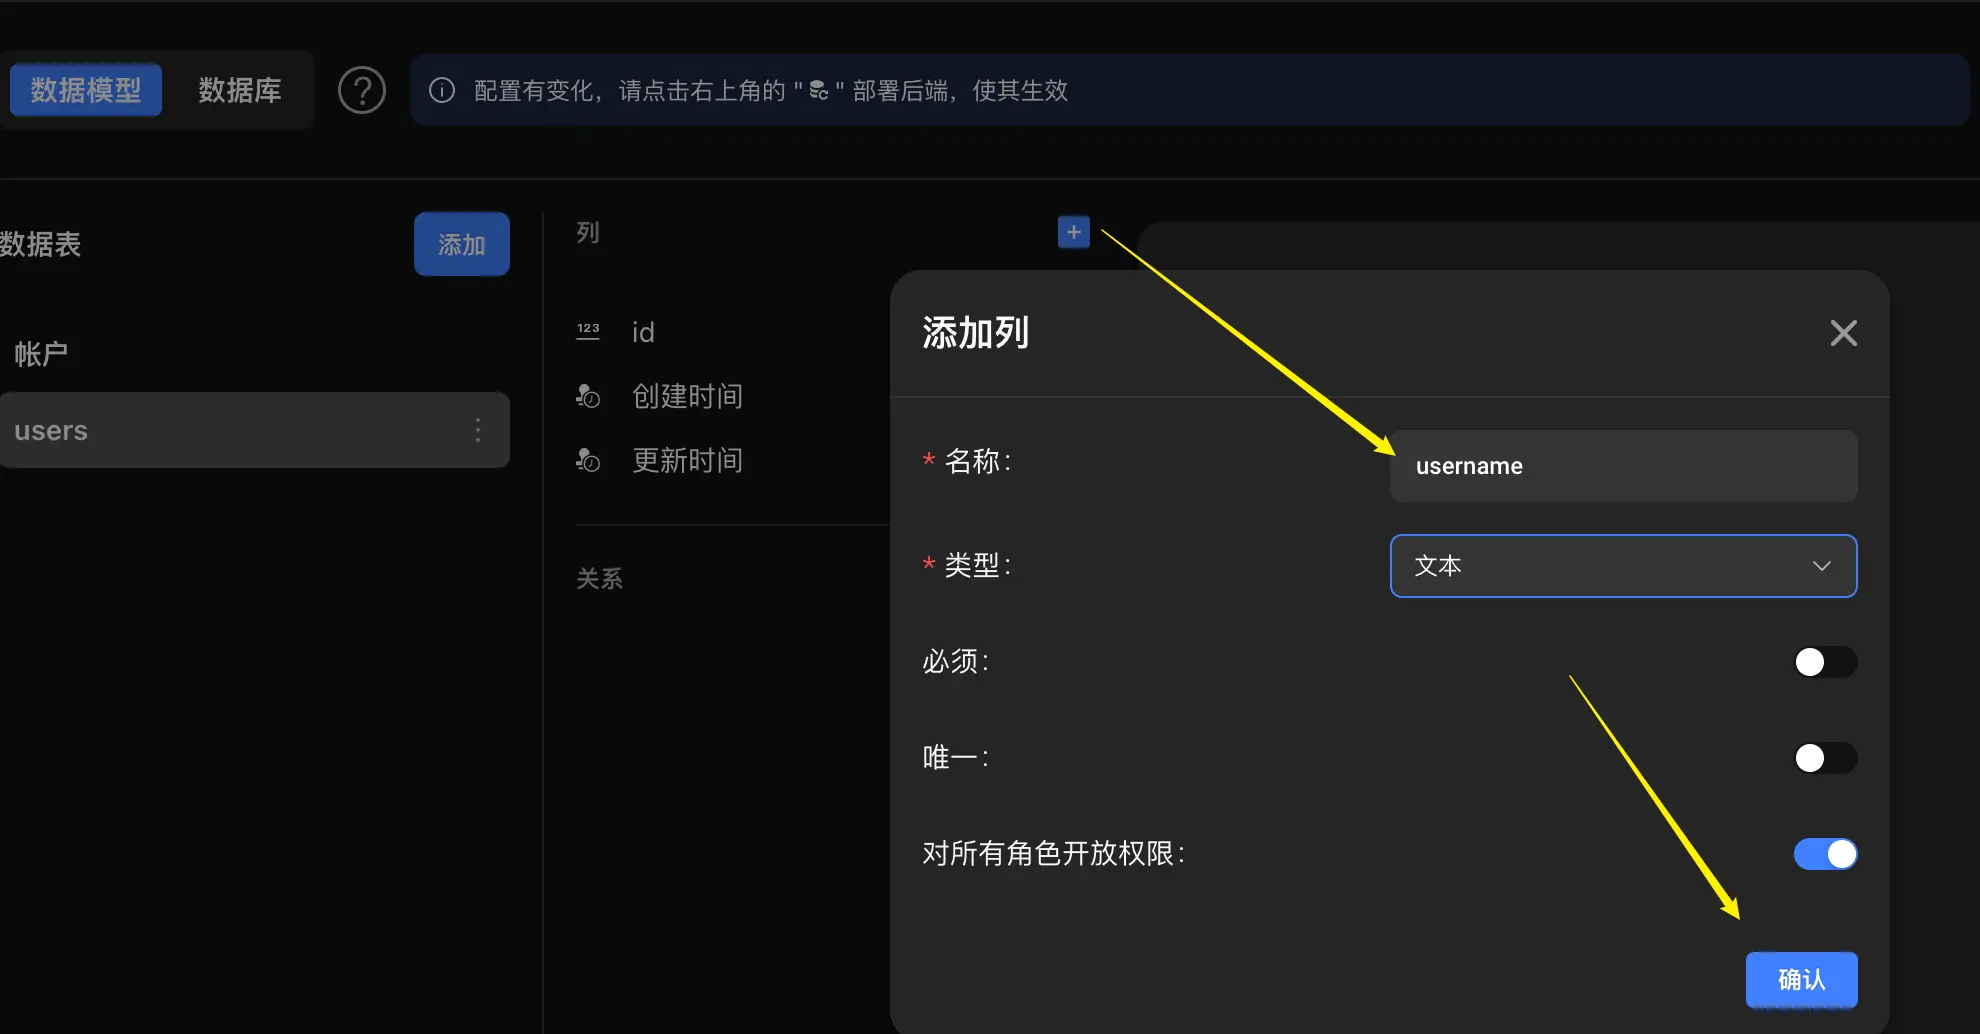
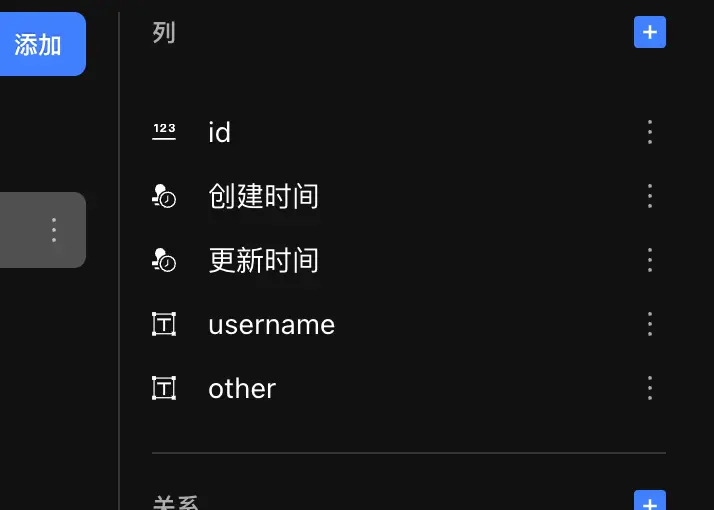
4 创建表(可以理解为excel表格 存放网站数据的)
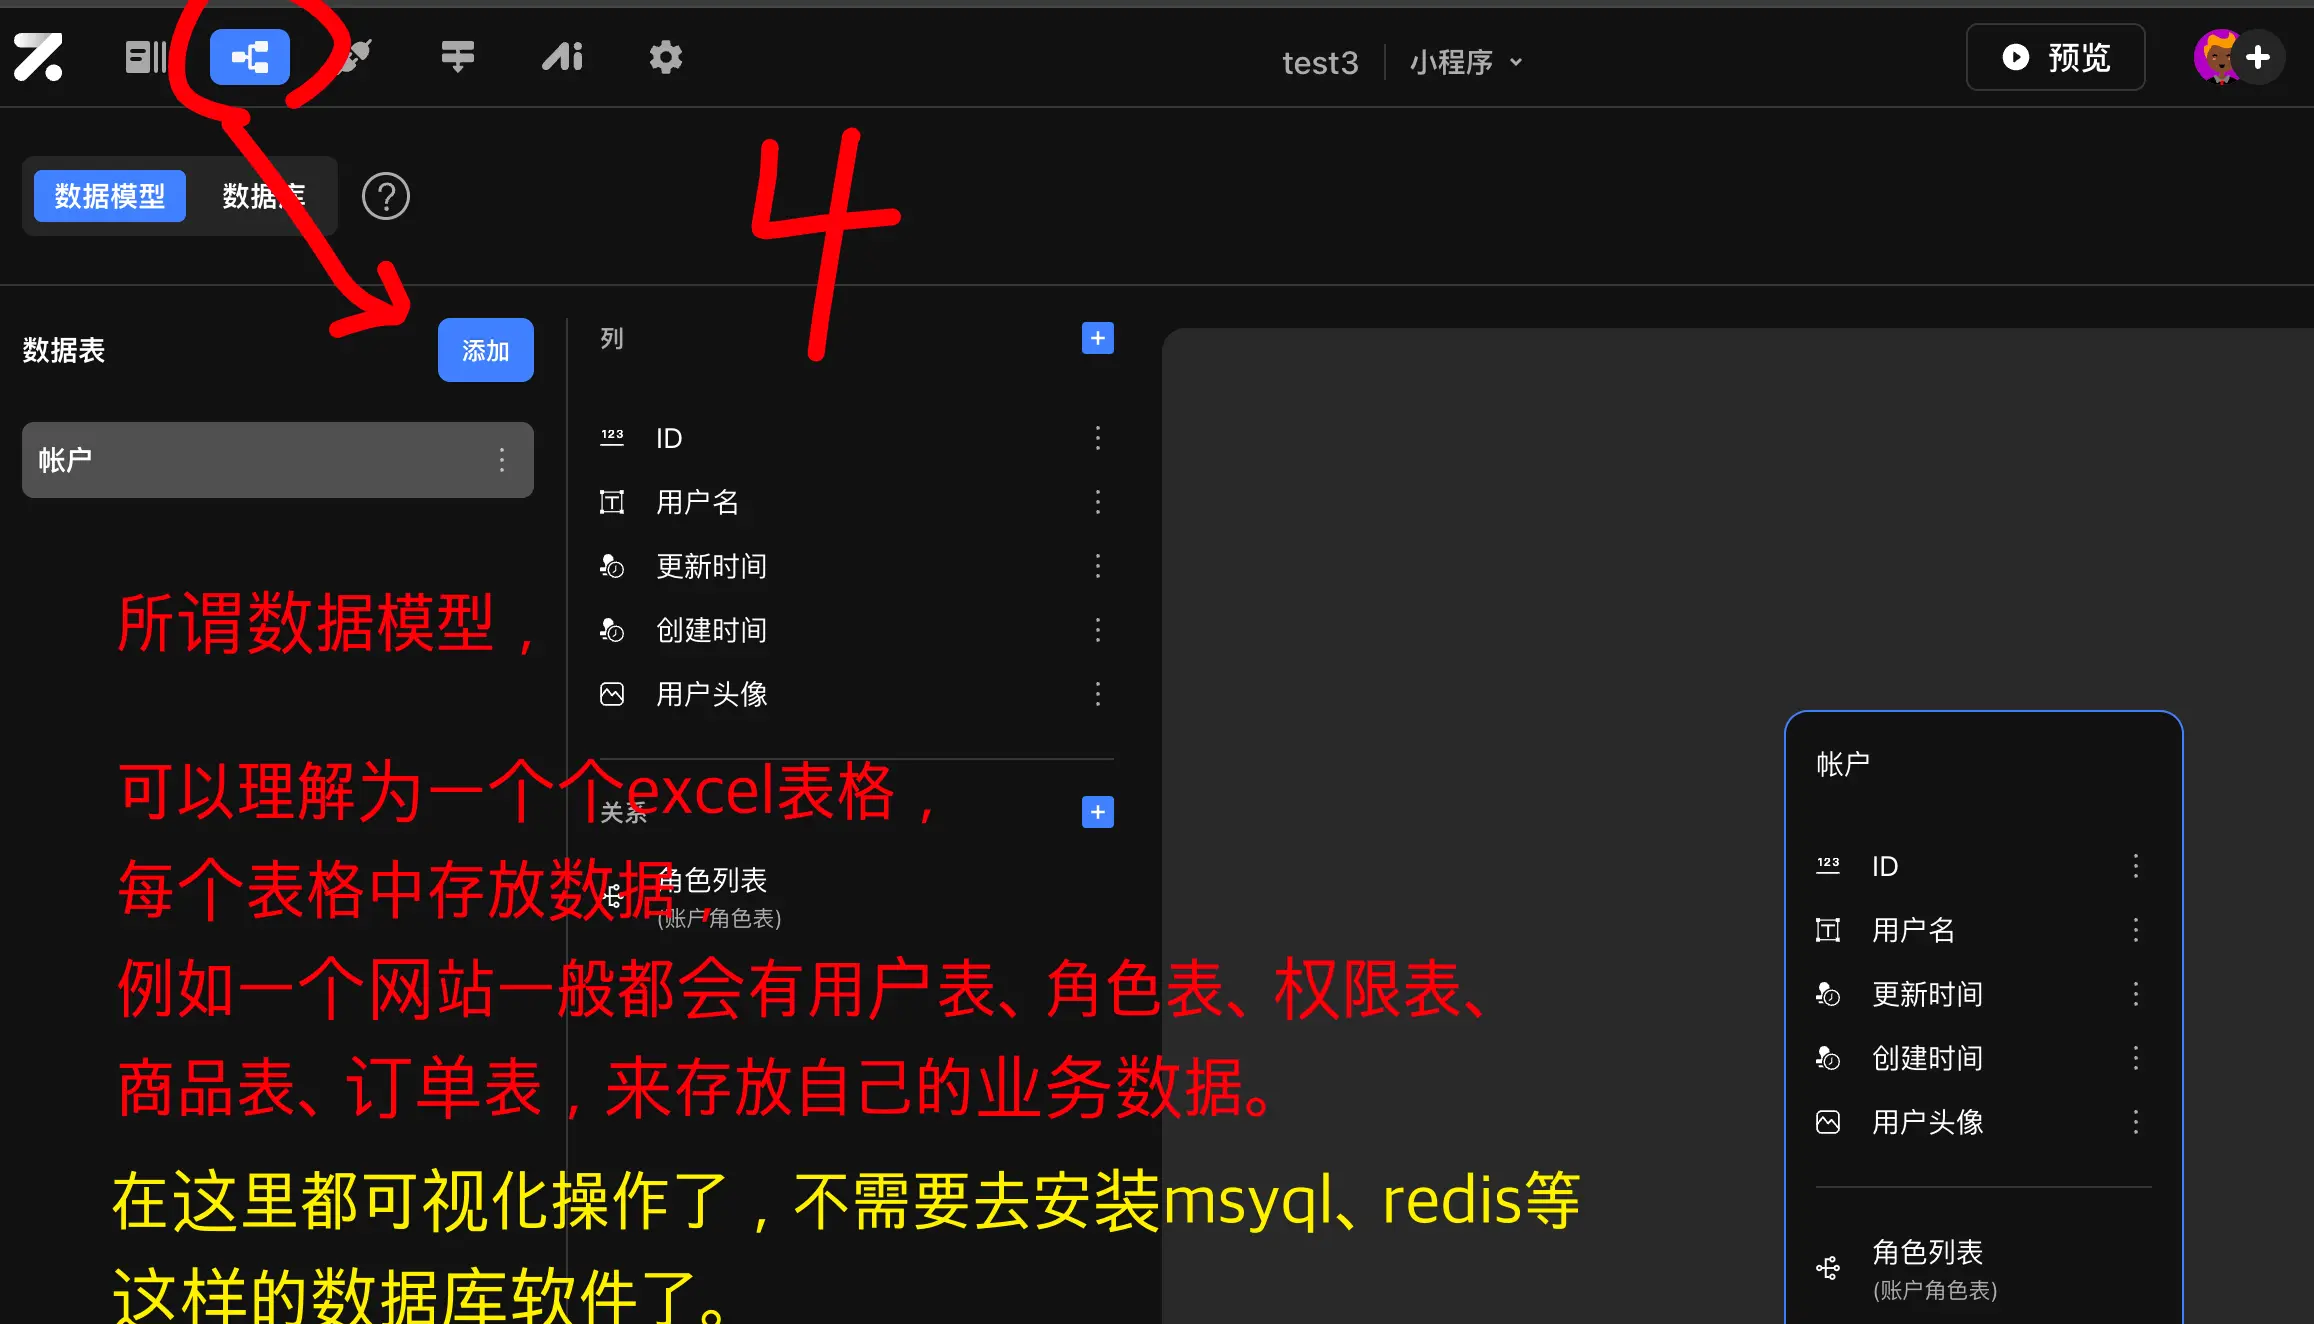
可以使用默认的,也可以自己创建一个


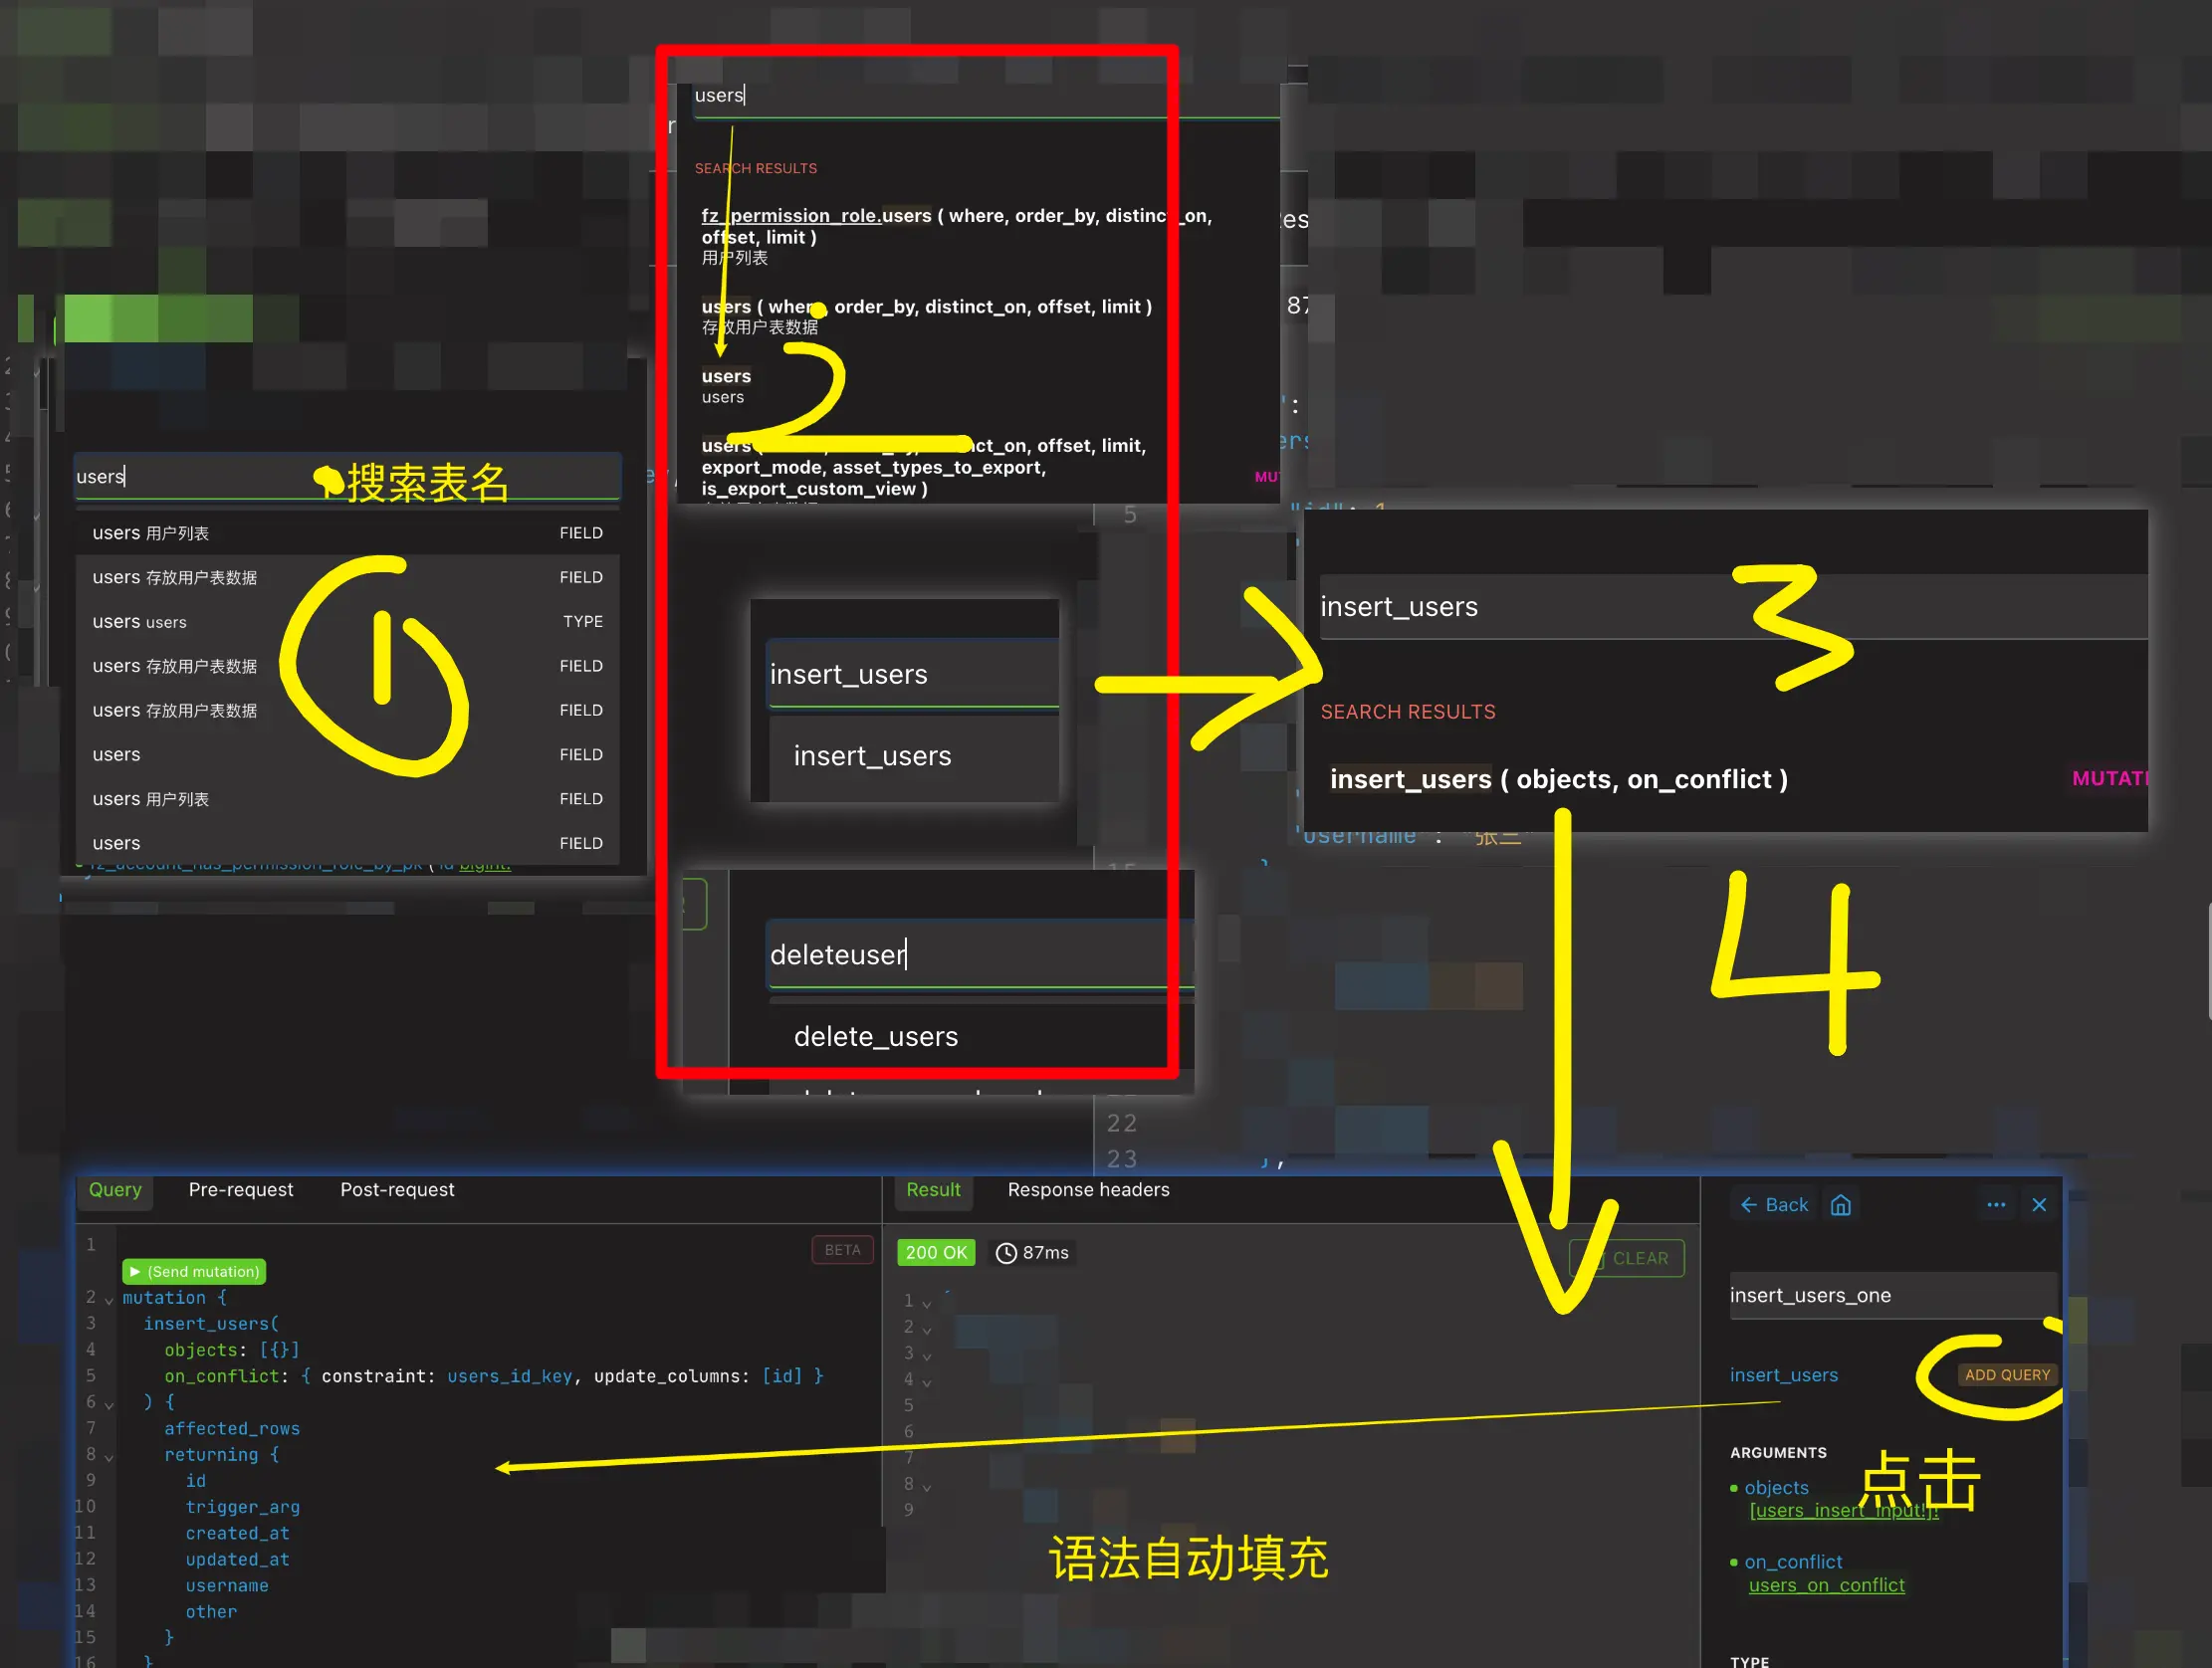
5、f12抓GraphQL接口然后通过 GraphQL Clients工具管理可视化表数据

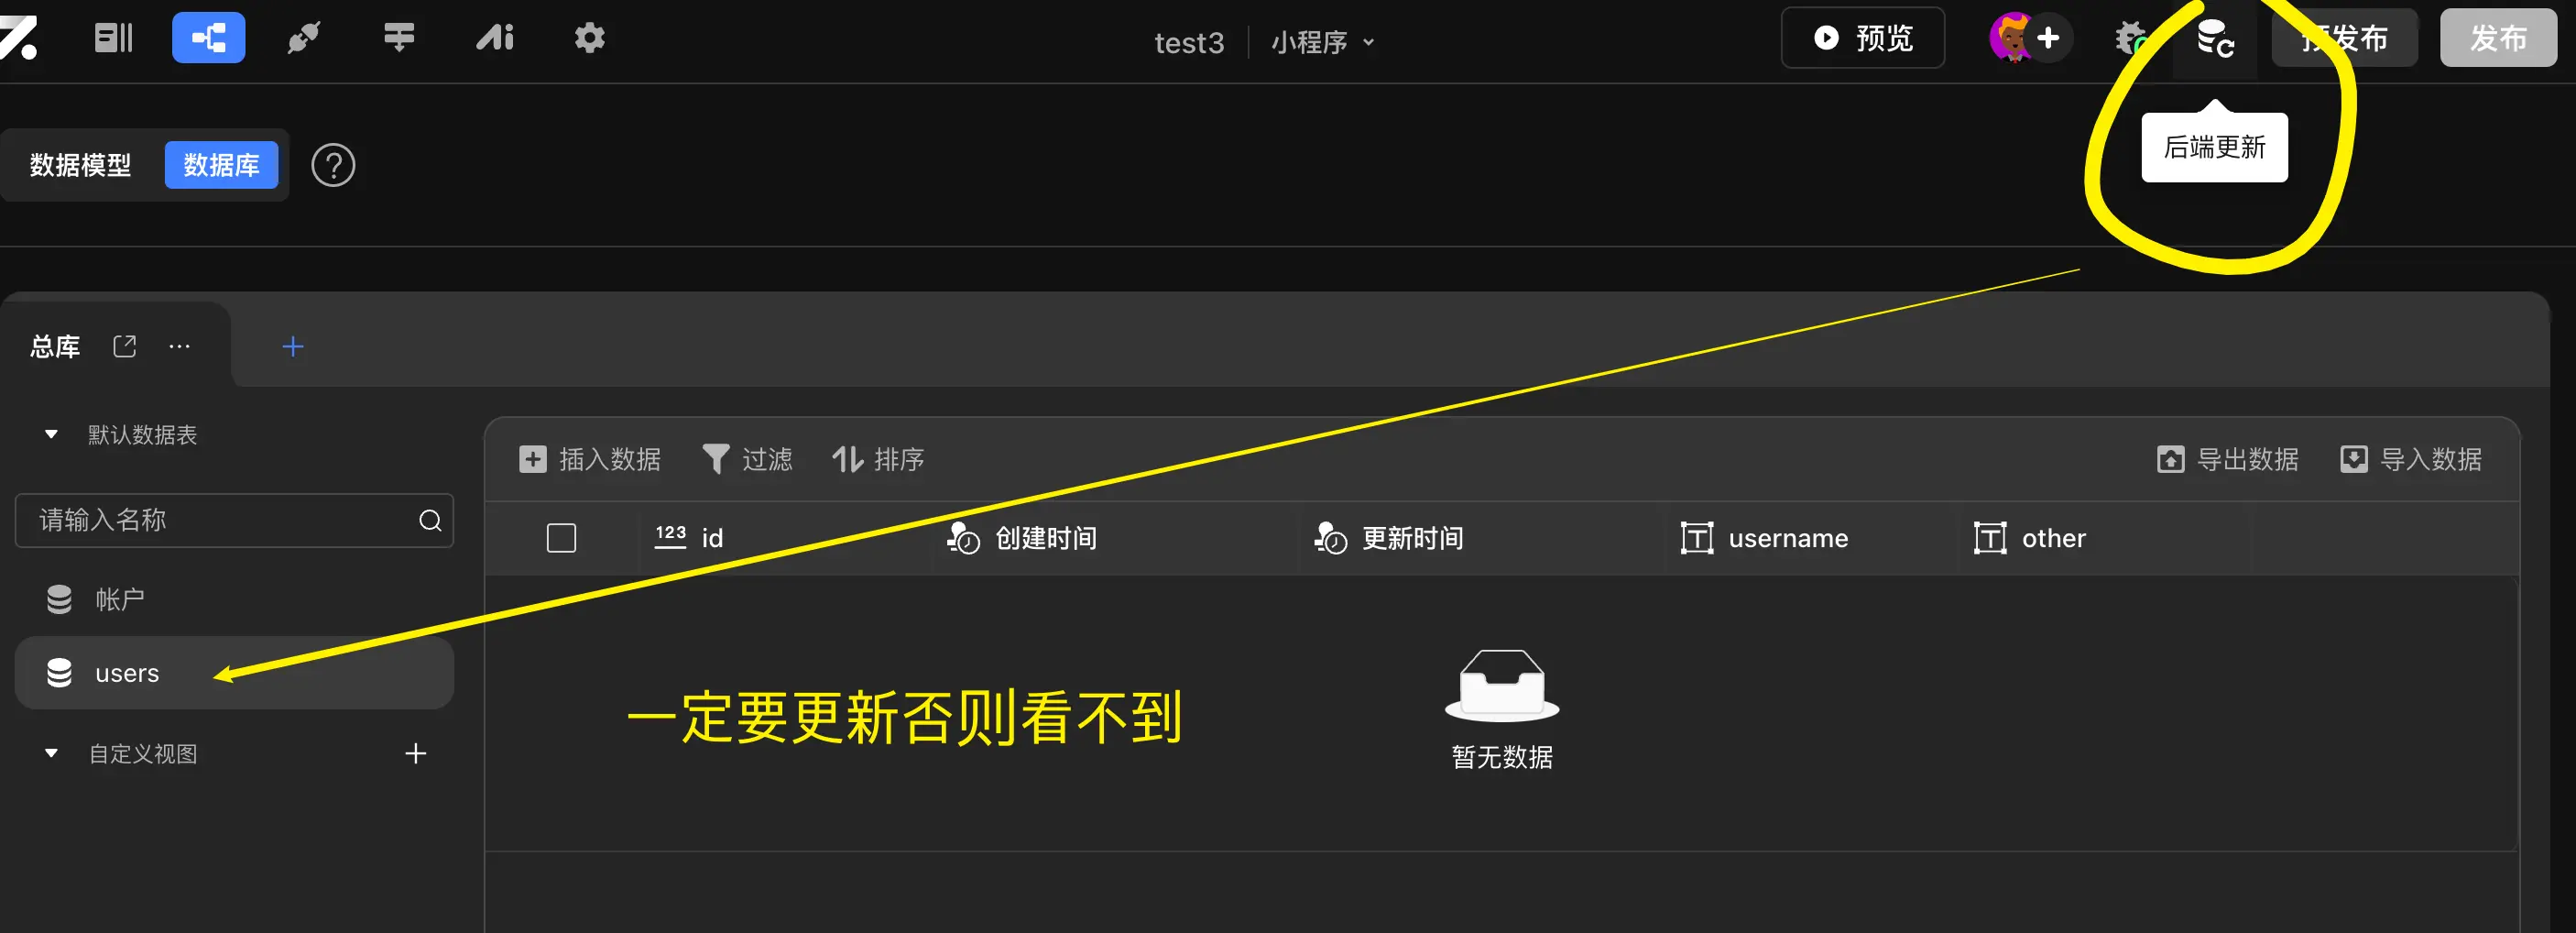

- 细节1:粘贴接口,点击刷新 接口文档才会更新 首次操作下就行
- 细节2:接口文档点击自动填充语法
临时有事,后续我再完善下… 可以收藏更新了再看
原文链接:https://juejin.cn/post/7321896126311579663 作者:IT充电站