
💡 读过一篇文章,像交了一个益友。
摘要
本次分享主要讲解eggjs框架,帮助大家快速上手项目,入门nodejs接口开发
环境准备
- 操作系统:支持 macOS,Linux,Windows
- 运行环境:nodejs, 建议选择 LTS 版本,最低要求 8.x。
- 接口请求验证工具: postman
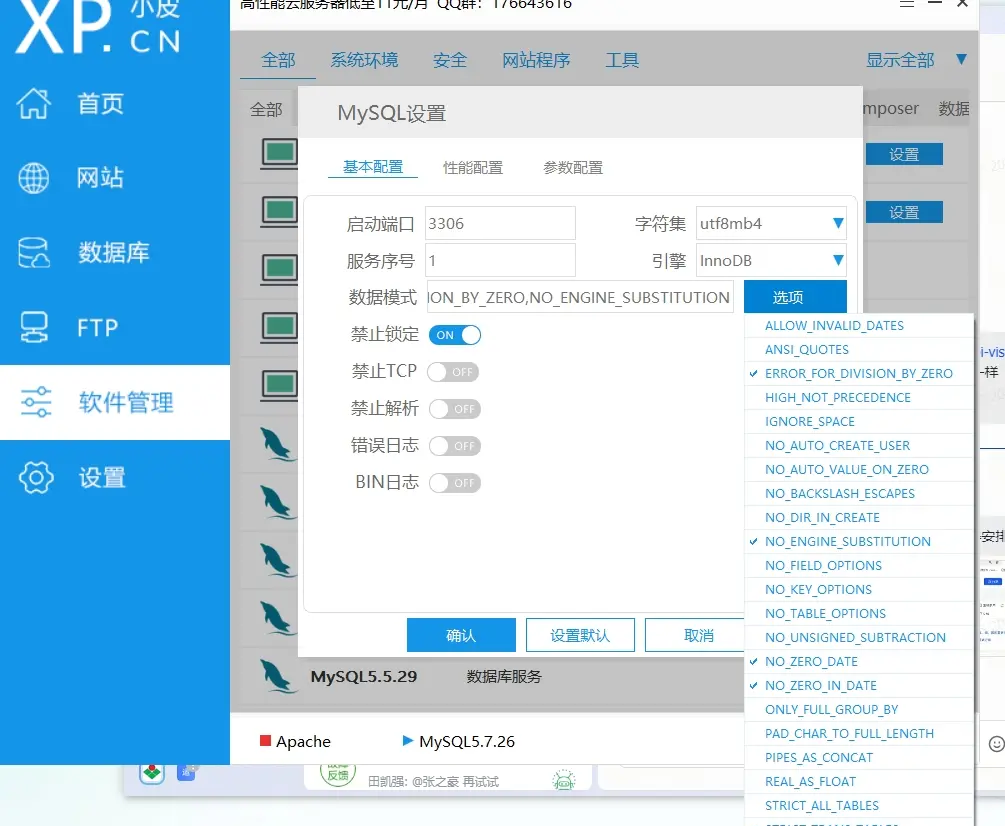
- 数据库环境:Mysql和数据库管理工具,这里推荐下载phpstudy,安装完直接集成了mysql数据库和可视化管理工具

目录结构
nodejs后端项目使用的eggjs框架,可参看官方教程 www.eggjs.org/zh-CN/intro…
project
├── package.json
├── app
|   ├── router.js  // 用于配置 URL 路由规则
│   ├── controller  //  用于解析用户的输入,处理后返回相应的结果
│   |   └── user.js
│   ├── service   // 用于编写业务逻辑层
│   |   └── user.js
│   ├── model // 用于定义数据层
│   |   └── user.js
│   ├── middleware  // 用于编写中间件
│   |   └── tokenHandler.js  // 处理接口的token
│   └── extend // 用于框架的扩展
│       ├── helper.js // 处理响应返回
├── config
|   ├── plugin.js  // 用于配置需要加载的插件 如:egg-cors 跨域,egg-jwt 加密
|   ├── config.default.js // 用于编写配置文件
|   └── config.prod.js
├── database
|   ├── config.json  // 数据库迁移的配置
|   └── migrations // 迁移文件目录
└── test  //  用于单元测试
    ├── middleware
    |   └── response_time.test.js
    └── controller
        └── home.test.js
路由配置
配置Restiful接口
 // router/user.js
module.exports = app => {
const { router, controller } = app;
router.get('/user/:id', controller.user.index);
router.get('/user/findById', controller.user.findById);
router.post('/user/save',
controller.user.saveOrUpdate);
// delete 和 put 比较少用
router.delete('/student/deleteById',
controller.user.deleteById);
router.put('/user/update', controller.user.update);
};
请求参数获取
一般在控制器中
// app/controller/user.js
const Controller = require('egg').Controller;

class UserController extends Controller {
  async index() {
    const { ctx } = this;
    // router.get('/user/:id', controller.user.index);
    // 获取路由get传值参数(路由:id)
    console.log(ctx.params.id)
    // 获取url的问号get传值参数
    // GET /user/findById?id=1&name=node
    console.log(ctx.query)
     // {
    //   id: 1,
    //   name: 'node',
    // }
    // GET /posts?category=egg&id=1&id=2&id=3
     console.log(ctx.queries);
    // {
    //   category: [ 'egg' ],
    //   id: [ '1', '2', '3' ],
    // }

    // 获取post请求中的body
    // POST /api/posts HTTP/1.1
    // Host: localhost:3000
    // Content-Type: application/json; charset=UTF-8
    // {"title": "controller", "content": "what is controller"}
     console.log(ctx.request.body)

  }
}

module.exports = UserController ;
响应结果拦截
如何对接口返回的结构做处理,返回如下形式:
{
    "code": 0,
    "status": "success",
    "msg": "获取成功",
    "data": {
        "count": 0,
        "rows": []
    }
}
使用Helper函数
app\extend\helper.js
module.exports = {
  response(msg, data) {
    if (data.code === 0) {
      this.success(msg, data);
      return;
    }
    this.fail(msg, data);
  },

  success(msg = '操作成功', data) {
    const { ctx } = this;
    ctx.status = 200;
    ctx.body = {
      code: 0,
      status: 'success',
      msg,
      data: data.result,
    };
  },

  // 处理失败,需要传入失败原因
  fail(msg = '操作失败', data) {
    const { ctx } = this;
    ctx.body = {
      code: 1,
      status: 'failed',
      msg,
      data: data.result,
    };
    ctx.status = 200;
  },

};
控制器
使用 ctx.helper.response
class ModelController extends Controller {
  async list() {
    const { ctx } = this;
    const { request } = ctx;
    const result = await ctx.service.model.list(request.body);
    ctx.helper.response(result.msg, result.data);
  }
Token处理
编写中间件
中间件是全局的,会处理每一次请求,定义哪些接口,必须携带token才能访问
app\middleware\tokenHandler.js
const NOT_VERIFY_LIST = [ '/user/login' ];
module.exports = options => {
  return async function(ctx, next) {

    if (!NOT_VERIFY_LIST.includes(ctx.request.url)) {
      const token = ctx.request.header.authorization;
      if (token) {
        try {
          // 'Bearer eyJhbGciOiJIUzI1NiIXVCJ9' 从第7个字符开始提取token字符串
          ctx.app.jwt.verify(token.slice(7), ctx.app.config.jwt.secret);
          await next();
        } catch (error) {
          ctx.body = {
            code: 1,
            status: 'failed',
            msg: 'token无效或过期',
          };
        }
      } else {
        ctx.body = {
          code: 1,
          status: 'failed',
          msg: '无token',
        };
      }
    } else {
      await next();
    }
  };
};
开启中间件
config\config.default.js
config.middleware = [ 'tokenHandler' ];
端口与动态环境配置
方式一
package.json
  {
  "scripts": {
    "dev": "egg-bin dev --port 7003",  // 默认加载 config.default.js配置
    "qa": "egg-bin dev --port 7003 --env=qa"
  }
}
方式二
  {
  "scripts": {
      "start:dev": "egg-scripts start --port=7003 --env=dev --daemon --title=egg-server-material",
      "start:qa": "egg-scripts start --port=7003 --env=qa --daemon --title=egg-server-material",
   }
}
当指定 env 时会同时加载默认配置和对应的配置(具名配置)文件
config
|- config.default.js
|- config.qa.js
|- config.prod.js
`- config.dev.js
如prod 环境会加载 config.prod.js 和 config.default.js 文件,config.prod.js 会覆盖 config.default.js 的同名配置
部署应用时配置
config\config.default.js
exports.cluster = {
    listen: {
      port: 7003,
      hostname: 'localhost',
      // path: '/var/run/egg.sock',
    },
  };
数据库
数据表查看
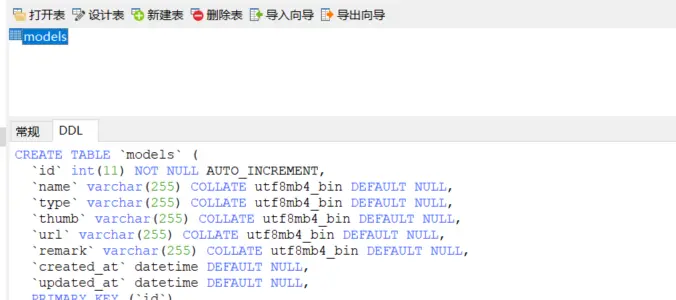
使用数据库管理工具,如navicat,Mysql-font等,进行查看,如设计一张models表
同步数据表结构的变更
在项目中,执行以下命令,初始化生成一张表
npx sequelize migration:generate --name=init-models
对自动生成的表进行完善
'use strict';

/** @type {import('sequelize-cli').Migration} */
module.exports = {
  async up(queryInterface, Sequelize) {
    /**
     * Add altering commands here.
     *
     * Example:
     * await queryInterface.createTable('users', { id: Sequelize.INTEGER });
     */
    const { INTEGER, DATE, STRING } = Sequelize;
    await queryInterface.createTable('models', {
      id: { type: INTEGER, primaryKey: true, autoIncrement: true },
      name: STRING(255),
      type: STRING(255),
      url: STRING(255),
      remark: STRING(255),
      created_at: DATE,
      updated_at: DATE,
    });
  },
};
其他成员通过如下命令进行表结构同步
npx sequelize db:migrate
注意:后续对表进行字段的添加,移除,变更,也需要通过命令执行,可参考
例如给models表添加两个字段 thumb和 app_id
执行命令
npx sequelize migration:generate --name=change-models
对自动生成的表文件进行完善,如添加字段,修改字段,删除字段
'use strict';

module.exports = {
  async up(queryInterface, Sequelize) {
    /**
     * Add altering commands here.
     *
     * Example:
     * await queryInterface.createTable('users', { id: Sequelize.INTEGER });
     */
    const { INTEGER,STRING } = Sequelize;
    // 增加
    await queryInterface.addColumn('models', 'app_id', {
      type: INTEGER,
      allowNull: false,
      defaultValue: 1,
    });
    await queryInterface.addColumn('models', 'thumb', {
      type: STRING(255),
      allowNull: true,
      defaultValue: null,
    });
    // 修改
    queryInterface.changeColumn('Person', 'foo', {
          type: DataTypes.FLOAT,
          defaultValue: 3.14,
          allowNull: false
     });
     // 删除
     queryInterface.removeColumn('Person', 'petName', { /* query options */ });


  },

  async down(queryInterface, Sequelize) {
    /**
     * Add reverting commands here.
     *
     * Example:
     * await queryInterface.dropTable('users');
     */
  },
};
创建模型
app\model\model.js
'use strict';

module.exports = app => {
  const { STRING, INTEGER, DATE } = app.Sequelize;

  const Model = app.model.define('model', {
    id: { type: INTEGER, primaryKey: true, autoIncrement: true },
    name: STRING(255),
    type: STRING(255),
    thumb: STRING(255),
    url: STRING(255),
    remark: STRING(255),
    created_at: DATE,
    updated_at: DATE,
  });

  return Model;
};
这个 Model 就可以在 Controller 和 Service 中通过 ctx.model.Model访问到了,例如我们编写的app/service/model.js
如何实现增删改查
class ModelService extends Service {
  // 列表查询
  async list(data) {
    const { ctx } = this;
    const {
      Op,
    } = this.app.Sequelize;
    const {
      page = 1,
      size = 100,
      name,
      type,
      remark,
    } = data;
    // 清空无效值
    const where = utils.delEmptyQueryNodes({
      name,
      type,
      remark,
    });
    // 支持模糊查询
    Object.keys(where).forEach(key => {
      where[key] = {
        [Op.like]: `%${where[key]}%`,
      };
    });

    const options = {
      offset: (parseInt(page) - 1) * parseInt(size),
      limit: parseInt(size),
      order: [
        [ 'created_at', 'DESC' ],
      ],
      where,
    };
    const result = await ctx.model.Model.findAndCountAll(options);
    return { msg: '获取成功', data: { code: 0, result } };
  }
  // 删除
  async delete(id) {
    const { ctx } = this;
    const result = await ctx.model.Model.findByPk(id);
    // console.log('result', result);
    // ctx.logger.info('debug info from service result: ', result);
    if (!result) {
      return { msg: '未找到模型', data: { code: 1, result: null } };
    }
    result.destroy();
    return { msg: '删除成功', data: { code: 0, result: { id } } };
  }
  // 新增和更新
  async save(data) {
    const { ctx } = this;
    let model = null;
    if (!data.id) { // 新增
      await ctx.model.Model.create(data);
    } else {
      model = await ctx.model.Model.findByPk(data.id);
      model.update(data);
    }
    return { msg: `${data.id ? '更新成功' : '新增成功'}`, data: { code: 0, result: { } } };
  }

}
module.exports = ModelService;
查询进阶
复杂sql查询:多条件
// id降序关键词模糊查询
async list() {
    const ctx = this.ctx;
    let keyword = this.ctx.params.keyword;
    let Op = this.app.Sequelize.Op;
    ctx.body = await ctx.model.User.findAll({
        where:{
            id:{
                [Op.gt]:6
            },
            username: {
                [Op.like]:'%'+keyword+'%'
            }
        },
        attributes:['id','username','sex'],  // 只返回这3个字段
        order:[
            ['id','DESC']
        ],
        limit: toInt(ctx.query.limit),
        offset: toInt(ctx.query.offset)
    });
  }
查询单个
async detail() {
    let id = parseInt(this.ctx.params.id);
      // 通过主键查询单个数据
      // let detail = await this.app.model.User.findByPk(id);
      // 查询单个
      let detail = await this.app.model.User.findOne({
          where: {
              id,
              status: "1"
          }
      });

      this.ctx.body = {
          msg: 'ok',
          data: detail
      };
  }
关联查询
使用 include 关联对应表,字段别名使用 attributes:[[‘name’,’typename’]] 或者 attributes单独配置
 const options = {
      include: [
        { model: ctx.model.ModelClassify, attributes: [ 'name' ] },
      ],
      attributes: {
        include: [
          [ this.app.Sequelize.col('model_classify.name'), 'classifyName' ],
        ],
      },
      offset: (parseInt(page) - 1) * parseInt(size),
      limit: parseInt(size),
      order: [
        [ 'created_at', 'DESC' ],
      ],
      where,
    };
    const result = await ctx.model.Model.findAndCountAll(options);
批量创建
 async create() {
    const ctx = this.ctx;
    const { name, age } = ctx.request.body;
    // 创建单条记录
    const user = await ctx.model.User.create({ name, age });
    // 批量创建
    await ctx.model.User.bulkCreate([{
        name: "第一个",
        age: 18
    },
    {
        name: "第二个",
        age: 19
    },
    {
        name: "第三个",
        age: 20
    }]);
    ctx.status = 200;
    ctx.body = user;
  }
更新局部字段
 async update() {
    const ctx = this.ctx;
    const id = toInt(ctx.params.id);
    const user = await ctx.model.User.findByPk(id);
    if (!user) {
      ctx.status = 404;
      return;
    }

    const { name, age } = ctx.request.body;
    await user.update({ name, age });
    ctx.body = user;
  }
其他
module.exports = app => {

  const { STRING, INTEGER, DATE } = app.Sequelize;

  const Announces = app.model.define('announces', {
    id: { type: INTEGER, primaryKey: true, autoIncrement: true },
    title: { type: STRING, allowNull: false },
    content: { type: STRING, allowNull: false },
    isTop: { type: INTEGER, defaultValue: 1, field: 'is_top' },
    createDate: { type: DATE, field: 'create_date' },
    createBy: { type: STRING, field: 'create_by' },
    updateDate: { type: DATE, field: 'update_date' },  //field 转驼峰
    updateBy: { type: STRING, field: 'update_by' },

  }, {
    timestamps: false,  //去除createAt updateAt
    freezeTableName: true,  使用自定义表名
    // 实例对应的表名
    tableName: 'user',
    // 如果需要sequelize帮你维护createdAt,updatedAt和deletedAt必须先启用timestamps功能
    // 将createdAt对应到数据库的created_at字段
    createdAt: 'created_at',
    // 将updatedAt对应到数据库的updated_at字段
    updatedAt: 'updated_at',
    //And deletedAt to be called destroyTime (remember to enable paranoid for this to work)
    deletedAt: false, //'deleted_at',
    //删除数据时不删除数据,而是更新deleteAt字段 如果需要设置为true,则上面的deleteAt字段不能为false,也就是说必须启用
    paranoid: false
  });

  return Announces;

};
更多请参考
中文版
开发常用
数据库常用文档
www.sequelize.cn/other-topic… www.eggjs.org/zh-CN/tutor… 常用语句 –更新数据表结构 npx sequelize db:migrate npx sequelize db:migrate –env=test –添加/修改表 npx sequelize migration:generate –name=change-models
Eggjs教程
原文链接:https://juejin.cn/post/7357917741909344271 作者:大辉小猿