

创建项目,抛出异常
创建 Nest.js 项目:
nest new exception-filter-test -p pnpm
然后启动项目:
pnpm run start:dev
通过浏览器访问 http://localhost:3000,如果看到“hello world”,说明服务已启动。
在控制器中,我们可以抛出 HttpException 错误: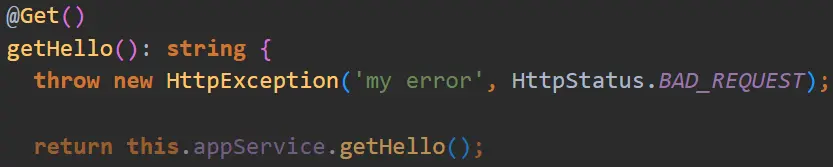

HttpStatus 提供了各种状态码的常量。
访问页面:
这是由 Nest.js 的内置异常过滤器返回的。
创建异常过滤器
nest g filter httpError --flat --no-spec
–flat 参数表示不创建子目录,–no-spec 表示不生成测试文件。
自定义异常过滤器是通过实现 ExceptionFilter 接口来创建的,它必须实现 catch 方法:
使用 @Catch 装饰器来指定要捕获的异常类型。例如,下面的过滤器专门捕获 BadRequestException:
很多错误类型都是 HttpException 的子类,如果我们想捕获其错误,@Catch(HttpException) 就可以:
import {
  ArgumentsHost,
  Catch,
  ExceptionFilter,
  HttpException,
} from '@nestjs/common';
import { Response } from 'express';

@Catch(HttpException)
export class HttpErrorFilter<T> implements ExceptionFilter {
  catch(exception: HttpException, host: ArgumentsHost) {
    const http = host.switchToHttp();
    const request = http.getRequest();
    const response = http.getResponse<Response>();
    const res = exception.getResponse() as { message: string[] };
    const statusCode = exception.getStatus();

    response.status(statusCode).json({
      code: statusCode,
      // 兼容 ValidationPipe 的 res,如果res.message是数组则将其元素用逗号连接,否则直接使用异常的message
      message: res?.message?.join ? res?.message?.join(',') : exception.message,
      path: request.url,
    });
  }
}
访问页面:
以下是一些 HttpException 的常见子类:
- BadRequestException:当客户端发送了一个错误的请求时使用,通常与状态码 400 一起使用。
- UnauthorizedException:当请求需要用户认证时使用,通常与状态码 401 一起使用。
- ForbiddenException:当用户认证成功,但没有足够的权限来访问资源时使用,通常与状态码 403 一起使用。
- NotFoundException:当请求的资源不存在时使用,通常与状态码 404 一起使用。
- NotAcceptableException:当服务器无法满足客户端请求的接受头中的条件时使用,通常与状态码 406 一起使用。
- ConflictException:当请求的资源在当前状态下无法完成时使用,通常与状态码 409 一起使用。
- GoneException:当请求的资源已被永久删除且没有转发地址时使用,通常与状态码 410 一起使用。
- InternalServerErrorException:当服务器遇到意外情况,阻止它完成请求时使用,通常与状态码 500 一起使用。
- NotImplementedException:当服务器不支持请求的功能时使用,通常与状态码 501 一起使用。
- ServiceUnavailableException:当服务器暂时不可用,通常是由于过载或维护时使用,通常与状态码 503 一起使用。
当然,也可以 extends HttpException 自己扩展。
创建自定义异常过滤器
首先,我们定义一个自定义异常 UnLoginException:
// src/unlogin.exception.ts

export class UnLoginException {
  message: string;

  constructor(message?: string) {
    this.message = message;
  }
}
这个异常类可以用来表示未登录或未授权的情况。
接下来,我们创建一个异常过滤器 UnloginFilter 来捕获 UnLoginException:
nest g filter unlogin --flat --no-spec
内容如下:
import {
  ArgumentsHost,
  Catch,
  ExceptionFilter,
  HttpStatus,
} from '@nestjs/common';
import { Response } from 'express';
import { UnLoginException } from './unlogin.exception';

@Catch(UnLoginException)
export class UnloginFilter implements ExceptionFilter {
  catch(exception: UnLoginException, host: ArgumentsHost) {
    const response = host.switchToHttp().getResponse<Response>();

    response
      .status(HttpStatus.UNAUTHORIZED)
      .json({
        code: HttpStatus.UNAUTHORIZED,
        message: 'fail',
        data: exception.message || '用户未登录',
      })
      .end();
  }
}
在这个过滤器中,我们使用 @Catch 装饰器来指定它应该捕获 UnLoginException 异常。
当捕获到这个异常时,过滤器会返回一个包含未授权状态码(401)和自定义消息的 JSON 响应。
在控制器中,我们可以抛出 UnLoginException 测试:
访问页面:
使用异常过滤器
异常过滤器可以通过多种方式来使用:
- 全局范围:可以在应用程序的全局范围内应用异常过滤器。
// 绑定到全局
import { Module } from '@nestjs/common';

@Module({
  // ...
  providers: [
    {
      provide: APP_FILTER,
      useClass: HttpErrorFilter,
    },
  ],
})
export class AppModule {}
- 控制器范围:
@Controller('cats')
@UseFilters(new HttpExceptionFilter())
export class CatsController {
  // ...
}
- 方法范围:
@Controller('cats')
export class CatsController {
  @Post()
  @UseFilters(new HttpExceptionFilter())
  async create(@Body() createCatDto: CreateCatDto) {
    // ...
  }
}
原文链接:https://juejin.cn/post/7342349357385564186 作者:云牧牧